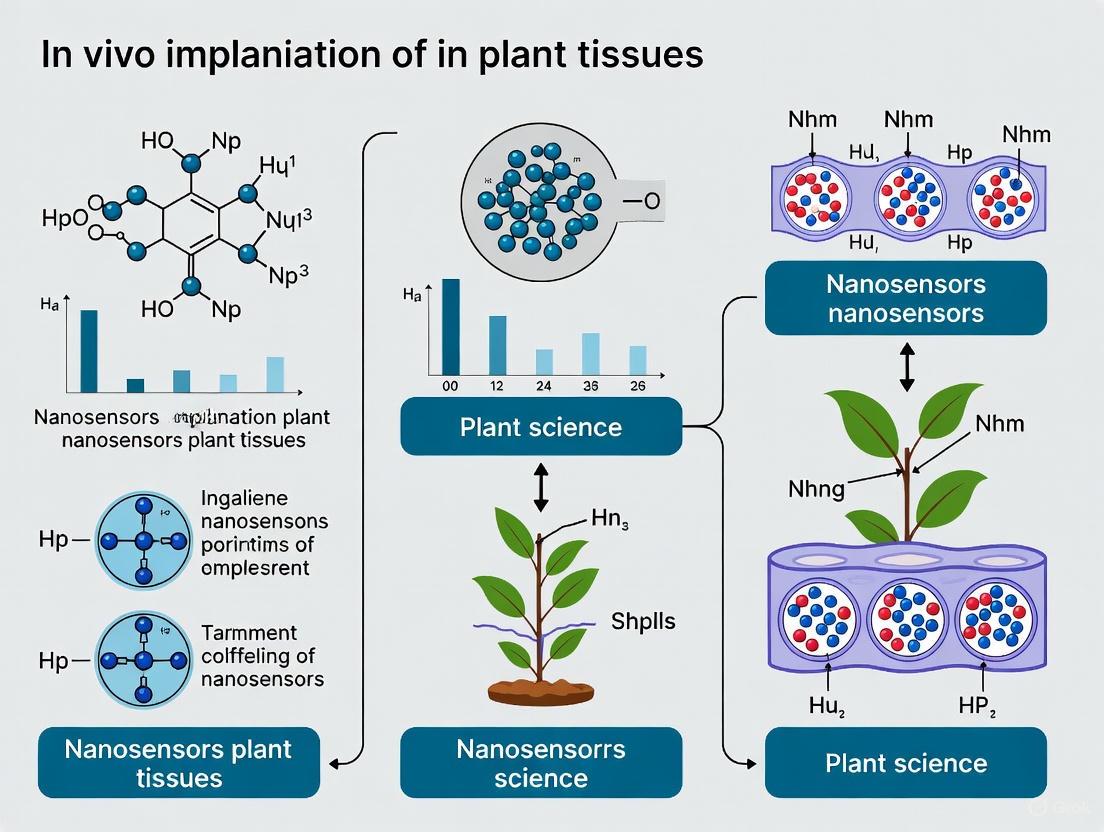
In Vivo Implantation of Nanosensors in Plant Tissues: A New Frontier for Real-Time Monitoring in Biological Research
This article explores the cutting-edge field of implanting nanosensors directly into plant tissues for real-time, in vivo monitoring of physiological processes.
In Vivo Implantation of Nanosensors in Plant Tissues: A New Frontier for Real-Time Monitoring in Biological Research
Abstract
This article explores the cutting-edge field of implanting nanosensors directly into plant tissues for real-time, in vivo monitoring of physiological processes. Aimed at researchers, scientists, and drug development professionals, it provides a comprehensive overview of the foundational principles, design methodologies, and practical applications of these sophisticated tools. We delve into the operational mechanisms of various nanosensors, including optical, electrochemical, and FRET-based systems, and detail their application in tracking signaling molecules, metabolites, and stress responses. The content further addresses critical challenges such as biocompatibility, sensor stability, and data interpretation, while offering validation frameworks and comparative analyses against traditional methods. By synthesizing the latest research, this article serves as a vital resource for leveraging plant-based nanosensing to advance fundamental biological discovery and therapeutic development.
Principles and Designs of Plant Nanosensors for In Vivo Monitoring
In vivo nanosensors are nanoscale devices engineered for insertion into living plant tissues to monitor physiological parameters in real-time, with minimal invasiveness. These sensors function as sophisticated analytical tools that combine a recognition element for specific analyte binding with a transducer that converts this binding event into a quantifiable signal [1]. Within the context of plant research, these sensors provide unprecedented access to spatial and temporal dynamics of key biomarkers, enabling a deeper understanding of plant physiology, stress responses, and growth regulation [2] [3]. The primary advantage over traditional destructive methods lies in their capability for continuous, real-time monitoring without significantly impairing normal plant growth or developmental processes [3].
The operational framework for in vivo plant nanosensors is built upon core requirements including high sensitivity and selectivity to detect analytes at physiologically relevant concentrations, often in the nanomolar range, within a complex cellular matrix [4]. Furthermore, sensor biocompatibility is paramount to avoid phytotoxicity, and near-infrared (NIR) fluorescence is often preferred to minimize background interference from plant pigments like chlorophyll and to allow for deeper tissue penetration [2]. Recent innovations, such as the use of microneedle (MN) sensing platforms, have further advanced the field by providing direct, minimally invasive access to plant sap for ionic content analysis, overcoming limitations of surface-based flexible sensors [3].
Core Components of In Vivo Nanosensors
The architecture of an in vivo nanosensor is modular, comprising distinct components that work in concert to achieve specific detection.
Nanomaterial Scaffold
The foundation of the nanosensor is a nanomaterial that serves as the physical scaffold and often participates in signal transduction. Common scaffolds include:
- Single-Walled Carbon Nanotubes (SWCNTs): These are cylindrical nanostructures known for their intrinsic fluorescence in the near-infrared (NIR) range, which is ideal for minimizing interference from plant autofluorescence. Their surface is functionalized with a polymer wrapper or other molecules to enable specific sensing [2] [1].
- Quantum Dots (QDs): These are semiconductor nanoparticles with size-tunable fluorescence properties and exceptional photostability. They are often used as donors in Förster Resonance Energy Transfer (FRET)-based sensors [1] [5].
- Metal Nanoparticles: Gold and silver nanoparticles are frequently utilized due to their unique plasmonic properties, which are the basis for techniques like Surface-Enhanced Raman Scattering (SERS). They can enhance the signal of molecules attached to their surface [4] [6].
Biorecognition Element
This component confers specificity to the sensor by interacting selectively with the target analyte. The nature of this interaction defines the sensor's mechanism.
- Molecular Receptors (Ionophores/Chromoinophores): Used in optode-based nanosensors (OBNs), an ionophore selectively chelates a target ion, while a chromoionophore transduces the binding event into a fluorescent change [1].
- DNA/RNA Aptamers: Short, single-stranded oligonucleotides that fold into specific three-dimensional structures to bind targets with high affinity and specificity. They can be easily conjugated to nanomaterials like SWCNTs or QDs [4].
- Polymers (Corona Phase): A polymer wrapper (e.g., phospholipid-PEG) around a nanomaterial scaffold like SWCNT can form a corona with a specific three-dimensional structure that recognizes a target analyte through the Corona Phase Molecular Recognition (CoPhMoRe) technique, creating a synthetic recognition site [2].
- Peptides: Short amino acid sequences, such as the Arg-Gly-Asp (RGD) peptide, can be used to functionalize sensor surfaces for specific molecular recognition [4].
Signal Transducer
This component converts the biorecognition event into a measurable output signal.
- Fluorescent Emitter: The most common transducer for in vivo imaging. It can be an intrinsic property of the nanomaterial (e.g., SWCNT) or a separate dye molecule. Changes in fluorescence intensity, lifetime, or wavelength (e.g., in FRET pairs) are measured [1] [2].
- Electrochemical Transducer: Used in microneedle-based sensors, where the interaction with the analyte induces a change in electrical properties (current, potential, or impedance) that is measured electrochemically [3].
Table 1: Core Components of In Vivo Plant Nanosensors
| Component | Function | Common Examples |
|---|---|---|
| Nanomaterial Scaffold | Provides structural backbone & transducing properties | Single-walled carbon nanotubes (SWCNTs), Quantum Dots (QDs), Gold Nanoparticles (AuNPs) |
| Biorecognition Element | Binds target analyte with high specificity | DNA Aptamers, Corona Phase Polymers, Ionophores, Peptides |
| Signal Transducer | Converts binding event into measurable signal | NIR Fluorescence, Electrochemical current/potential, FRET signal |
| Delivery Vehicle | Facilitates sensor insertion into plant tissue | Polymeric Microneedles, Cell-penetrating peptides, Microinjection |
Operational Mechanisms and Signaling Pathways
The operational mechanism of a nanosensor is defined by the interplay between its components. The signaling pathway begins when the target analyte (e.g., a hormone, ion, or metabolite) diffuses and interacts with the biorecognition element on the nanosensor. This molecular interaction induces a physicochemical change in the nanosensor, which is subsequently converted by the transducer into a detectable and quantifiable signal output [1] [2].
Diagram 1: Nanosensor signaling pathway.
Corona Phase Molecular Recognition (CoPhMoRe)
This mechanism is exemplified by a universal nanosensor for the plant hormone indole-3-acetic acid (IAA). A specific polymer (e.g., phospholipid-PEG) is wrapped around a SWCNT, forming a corona with a unique 3D structure. The binding of an IAA molecule within this corona pocket causes a measurable change in the intrinsic NIR fluorescence intensity of the SWCNT, enabling direct and real-time hormone tracking [2].
Fluorescence Quenching/Recovery
Some nanosensors operate based on the modulation of fluorescence. For instance, DNA-wrapped SWCNTs can be quenched by certain analytes. When the analyte binds, it may displace the quencher or alter the electronic structure of the nanotube, leading to a recovery or further quenching of the fluorescence signal. This principle has been used to detect molecules like nitric oxide (NO) [1].
Förster Resonance Energy Transfer (FRET)
In a FRET-based nanosensor, a quantum dot donor and a dye acceptor are linked by a molecular recognition element. The presence of the target analyte, such as Ca²⁺, induces a conformational change that alters the distance between the donor and acceptor, thereby changing the FRET efficiency. This is observed as a shift in the emission ratio between the donor and acceptor, providing a ratiometric and thus more reliable readout [1].
Optode-Based Ion Exchange
An optode-based nanosensor contains an ionophore (for selective ion binding), a chromoionophore (a pH-sensitive dye), and a charge-balancing additive embedded in a polymer matrix. When the target ion (e.g., K⁺ or Na⁺) is extracted by the ionophore from the environment, it forces the chromoionophore to release a proton to maintain electroneutrality. This deprotonation event causes a shift in the chromoionophore's fluorescence, which can be measured ratiometrically [1] [3].
Table 2: Quantitative Performance of Selected In Vivo Nanosensors
| Target Analyte | Nanosensor Platform | Operational Mechanism | Reported Detection Range/Sensitivity |
|---|---|---|---|
| Auxin (IAA) | Polymer-wrapped SWCNT [2] | Corona Phase Molecular Recognition (CoPhMoRe) | Real-time tracking in multiple plant species (e.g., Arabidopsis, spinach) |
| Nitric Oxide (NO) | DNA-wrapped SWCNT [1] | Fluorescence Quenching | Monitoring in mouse liver for >400 days |
| Calcium (Ca²⁺) | QD-Dye FRET pair [1] | FRET Change | Resolved Ca²⁺ transients with 250 ms temporal resolution |
| Potassium (K⁺) | Optode-based Nanosensor [1] | Ion Exchange / Chromoionophore Fluorescence | Dynamic range matching physiological K⁺ levels (e.g., 10-200 mM) [3] |
| Sodium (Na⁺) | Optode-based Nanosensor [1] | Ion Exchange / Chromoionophore Fluorescence | Tracked neuronal Na⁺ flux during electrical stimulation |
| Adenosine Triphosphate (ATP) | DNA Aptamer-UCNP [4] | Aptamer Binding / Fluorescence Change | Selective over GTP, CTP, and UTP |
Experimental Protocols for Key Applications
Protocol 1: Monitoring Phytohormone Dynamics with CoPhMoRe Nanosensors
This protocol details the procedure for real-time, non-destructive monitoring of auxin (IAA) in living plants using a polymer-SWCNT-based nanosensor [2].
Research Reagent Solutions:
- Sensor Solution: (1 mg/L) of single-walled carbon nanotubes (SWCNTs) wrapped with a specific phospholipid-PEG polymer in deionized water. The polymer wrapper is synthesized and selected via the CoPhMoRe process for high affinity to IAA.
- Plant Material: Healthy, intact plants (e.g., Arabidopsis thaliana, Nicotiana benthamiana, choy sum, or spinach) at the desired growth stage.
- Control Solutions: IAA standard solutions for calibration, pure polymer solution (without SWCNTs) for control experiments.
Procedure:
- Sensor Infiltration: Using a syringe without a needle, gently infiltrate the Sensor Solution into the abaxial side of the plant leaf. Apply a small droplet and gently pressure-infiltrate into the mesophyll. Alternatively, for localized application, use a microneedle to deliver a nanoliter volume directly into a specific tissue type (e.g., root, cotyledon) [2] [3].
- Acclimation Period: Allow the plant to rest for 1-2 hours post-infiltration to recover from the minor stress and for the sensors to distribute within the apoplastic space.
- NIR Imaging Setup: Place the plant under a confocal microscope or a specialized NIR imaging system equipped with a 785 nm laser for excitation and an InGaAs detector for collecting fluorescence emission between 1000-1300 nm.
- Baseline Recording: Acquire NIR fluorescence images of the sensor-infiltrated area for at least 15 minutes to establish a stable baseline signal.
- Stimulus Application: Apply the chosen environmental stimulus (e.g., shift to shade/low light, apply heat stress, or alter gravity vector) to the plant.
- Real-Time Data Acquisition: Continuously record NIR fluorescence videos or time-lapse images throughout the stimulus application and for a subsequent recovery period. The fluorescence intensity of the sensors will correlate with IAA concentration.
- Data Analysis: Use image analysis software (e.g., ImageJ, MATLAB) to quantify the fluorescence intensity over time in specific Regions of Interest (ROIs). Convert fluorescence changes to relative IAA concentrations using a pre-established calibration curve.
Protocol 2: Measuring Ionic Flux with Implantable Microneedle Sensors
This protocol describes the use of microneedle (MN) sensors for minimally invasive, in-planta monitoring of ion concentrations (e.g., K⁺, Ca²⁺) in the sap [3].
Research Reagent Solutions:
- Ion-Selective Microneedle Sensor: A solid microneedle (e.g., stainless steel) coated with an ion-selective membrane (ISM). The ISM contains an ionophore specific to the target ion, a lipophilic salt, a plasticizer, and a poly(vinyl chloride) matrix. An internal reference electrode is integrated into the design.
- Calibration Standards: A series of standard solutions with known concentrations of the target ion, covering the expected physiological range (e.g., 1-150 mM for K⁺).
- Reference Electrode: A standard Ag/AgCl reference electrode for completing the electrochemical cell.
Procedure:
- Sensor Calibration: Prior to implantation, calibrate the Ion-Selective Microneedle Sensor by measuring its potential (in mV) against the Reference Electrode in the series of Calibration Standards. Plot the potential vs. log(ion concentration) to obtain the calibration slope and intercept.
- Plant Preparation: Secure the plant pot to minimize movement. Select a healthy, mature stem or leaf petiole for sensor insertion.
- Sensor Implantation: Manually or using a micro-manipulator, insert the microneedle sensor perpendicularly through the plant epidermis and into the vascular tissue (e.g., xylem/phloem). Ensure the reference electrode is placed in the soil or in contact with the plant surface via a suitable electrolyte bridge.
- Potentiometric Measurement: Connect the microneedle sensor and the reference electrode to a high-impedance potentiometer. Allow the potential reading to stabilize for 5-15 minutes. This stable reading represents the real-time ion activity in the sap.
- Stimulus Application & Continuous Monitoring: Once a stable baseline is recorded, apply a stress stimulus (e.g., drought, salinity, mechanical wounding) and continuously log the potential data.
- Data Conversion: Convert the recorded potential values (mV) to ion concentrations using the Nernst equation and the calibration parameters obtained in Step 1.
- Post-Experiment: Gently remove the sensor. Monitor the insertion site for any signs of prolonged damage, though studies indicate normal plant growth is not hindered [3].
Diagram 2: General workflow for in vivo sensing.
The Scientist's Toolkit: Essential Research Reagents and Materials
Table 3: Research Reagent Solutions for In Vivo Plant Nanosensing
| Reagent/Material | Function/Description | Example Application |
|---|---|---|
| Single-Walled Carbon Nanotubes (SWCNTs) | Near-infrared fluorescent scaffold; provides signal transduction and a surface for bioreceptor attachment. | Core component in CoPhMoRe sensors for hormones like IAA [2]. |
| Phospholipid-PEG Polymer | A biorecognition element; forms a specific corona around SWCNT for target analyte binding. | Used as the recognition wrapper in the universal IAA nanosensor [2]. |
| Ion-Selective Microneedle (MN) | Minimally invasive probe for electrochemical sensing of ions in plant sap. | Direct measurement of K⁺, Ca²⁺, NO₃⁻ fluxes in stems or leaves [3]. |
| Ionophore | A selective molecular receptor embedded in a polymer membrane to bind a specific ion. | Key component in optode-based nanosensors and MN ion-selective electrodes for K⁺, Na⁺, etc. [1] [3]. |
| Chromoionophore | A pH-sensitive dye that transduces an ion-binding event into a fluorescent signal change. | Signal transducer in optode-based nanosensors for ions [1]. |
| DNA Aptamer | A single-stranded DNA molecule that folds into a 3D shape to bind a specific target with high affinity. | Can be conjugated to nanomaterials like QDs or UCNPs for sensing ATP, toxins, or other metabolites [4]. |
| Quantum Dots (QDs) | Semiconductor nanoparticles as bright, photostable fluorescent donors in FRET assays. | FRET-based donor in nanosensors for intracellular Ca²⁺ [1]. |
| NIR Imaging System | Microscope with laser excitation (~785 nm) and InGaAs detector for measuring SWCNT fluorescence. | Essential for non-destructive, real-time imaging of NIR fluorescent nanosensors in plants [2]. |
| High-Impedance Potentiometer | Instrument for measuring small voltage changes with minimal current draw. | Used for signal acquisition from electrochemical microneedle sensors [3]. |
Nanosensors are transducers with at least one dimension on the nanoscale, engineered to detect physical, chemical, or biological events with exceptional sensitivity and specificity [7] [8]. For plant science research, particularly in vivo implantation studies, these devices enable non-destructive, real-time monitoring of signaling molecules, metabolites, and pathogens within living plant tissues [9] [8]. This capability provides crucial insights into plant physiology, stress responses, and metabolic pathways, overcoming the limitations of traditional destructive methods. Optical, electrochemical, and FRET-based nanosensors represent the most prominent categories, each with distinct operating principles and application domains suited to the unique challenges of the plant environment [6] [8].
Optical Nanosensors
Principle and Applications
Optical nanosensors function by detecting changes in light properties—such as intensity, wavelength, or polarization—upon interaction with a target analyte [7]. A significant advancement in this category is the activatable NIR-II fluorescent nanosensor, which operates in the second near-infrared window (1000–1700 nm) [10]. This design specifically addresses the challenge of plant autofluorescence from chlorophyll and cell walls, which often interferes with measurements in the visible light spectrum [10] [8]. The NIR-II nanosensor utilizes an aggregation-induced emission (AIE) fluorophore as a signal reporter, co-assembled with polymetallic oxomolybdates (POMs) that act as a fluorescence quencher. In the presence of the stress signaling molecule hydrogen peroxide (H₂O₂), the POMs' quenching effect is diminished, leading to a "turn-on" NIR-II fluorescence signal [10]. This mechanism allows for real-time, non-destructive monitoring of early plant stress responses.
Table 1: Key Characteristics of an Activatable NIR-II Optical Nanosensor
| Parameter | Specification |
|---|---|
| Target Analyte | Hydrogen Peroxide (H₂O₂) |
| Detection Mechanism | Fluorescence "Turn-On" |
| Sensitivity (Limit of Detection) | 0.43 μM |
| Response Time | < 1 minute |
| Key Advantage | Avoids interference from plant autofluorescence |
Experimental Protocol for NIR-II Imaging of H₂O₂
Application Note: This protocol is designed for the non-destructive, real-time monitoring of H₂O₂, a key signaling molecule in plant stress responses, using an activatable NIR-II nanosensor [10].
Materials:
- NIR-II nanosensor suspension (AIE1035NPs@Mo/Cu-POM)
- Target plant specimens (e.g., Arabidopsis, lettuce, spinach)
- NIR-II fluorescence microscope or macroscopic whole-plant imaging system
- Microsyringe or fine-tipped applicator
- Phosphate buffer saline (PBS, pH 7.4)
Procedure:
- Nanosensor Preparation: Dilute the concentrated nanosensor suspension in PBS to a working concentration suitable for infiltration.
- Plant Preparation: Grow plants under controlled conditions. For leaf infiltration, select fully expanded, healthy leaves.
- Sensor Administration: Use a microsyringe to pressure-infiltrate the nanosensor suspension into the abaxial (lower) side of the leaf. A control leaf should be infiltrated with PBS only.
- Acclimation: Allow the plant to rest for 15-30 minutes post-infiltration to stabilize and permit any non-specific background signal to clear.
- Stress Induction & Imaging: Apply the desired stressor (e.g., pathogen, drought, cold shock). Immediately place the plant under the NIR-II imaging system.
- Data Acquisition: Acquire time-lapse NIR-II fluorescence images. Use an excitation wavelength suitable for the AIE fluorophore (e.g., 808 nm laser) and collect emission in the NIR-II range (e.g., 1000-1300 nm).
- Data Analysis: Quantify the fluorescence intensity over time in regions of interest. An increase in signal indicates H₂O₂ production in response to stress.
Electrochemical Nanosensors
Principle and Applications
Electrochemical nanosensors transduce a chemical interaction into an electrical signal, such as a change in current, potential, or impedance [7] [11]. These sensors often incorporate nanomaterials like carbon nanotubes, graphene, gold nanoparticles, or metal oxides to create a large active surface area, which enhances sensitivity, specificity, and electron transfer rates [6] [11]. A prominent application in plant research is the "on-plant" wearable electrochemical sensor for monitoring environmental pollutants like atmospheric lead [12]. These wearable devices can be attached directly to plant surfaces, enabling continuous, in-situ monitoring of a plant's immediate environment or the uptake of specific analytes.
Table 2: Key Characteristics of a Wearable Electrochemical Sensor
| Parameter | Specification |
|---|---|
| Target Analyte | Lead (Pb) |
| Detection Mechanism | Stripping Voltammetry |
| Transducer Material | Bismuth-based Electrode |
| Sensor Substrate | Polyvinyl Alcohol (PVA) |
| Key Advantage | Continuous, on-plant monitoring (wearable) |
Experimental Protocol for Fabricating a Wearable On-Plant Sensor
Application Note: This protocol outlines the creation of a flexible, wearable electrochemical sensor for detecting heavy metals like lead on plant surfaces [12].
Materials:
- Polyvinyl alcohol (PVA)
- Bismuth precursor (e.g., Bismuth nitrate)
- Carbon ink
- Screen-printing apparatus or stencil printer
- Flexible polymer substrate (e.g., polyester)
- Electrochemical workstation with potentiostat
Procedure:
- Substrate Preparation: Clean the flexible polymer substrate with ethanol and deionized water, then dry it in an inert atmosphere.
- Electrode Printing: Screen-print the carbon ink onto the substrate to form the working, counter, and reference electrodes. Cure the electrodes according to the ink manufacturer's specifications.
- Bismuth Film Deposition: Deposit the bismuth precursor onto the carbon working electrode. This can be achieved by drop-casting a bismuth salt solution and allowing it to dry, or through electrochemical deposition.
- Sensor Integration & Plant Mounting: Cut the sensor into an appropriate size and shape for the target plant organ (e.g., leaf). Attach the sensor gently to the plant surface using a biocompatible adhesive or a non-invasive clip design, ensuring good contact without damaging the tissue.
- Electrochemical Measurement: Connect the sensor to a portable potentiostat. In the case of lead detection, perform anodic stripping voltammetry:
- Pre-concentration: Apply a negative potential to reduce and deposit Pb²⁺ onto the bismuth electrode for a fixed time.
- Stripping: Scan the potential in a positive direction. The deposited lead is oxidized back into solution, generating a characteristic current peak.
- Data Analysis: The magnitude of the stripping current peak is proportional to the concentration of lead present.
FRET-Based Nanosensors
Principle and Applications
Förster Resonance Energy Transfer (FRET)-based nanosensors rely on the distance-dependent, non-radiative transfer of energy from an excited donor fluorophore to a nearby acceptor fluorophore [13]. The efficiency of this energy transfer is exquisitely sensitive to changes in the nanoscale distance (typically 1-10 nm) between the donor and acceptor, making FRET an ideal mechanism for reporting conformational changes in proteins, molecular interactions, or ligand binding [14] [8]. A landmark example is the genetically encoded FRET JH Indicator Agent (FREJIA), the first ratiometric biosensor for Juvenile Hormone (JH) in insects [14]. FREJIA was engineered by inserting a JH-binding protein (JHBP) between the donor (mTFP1) and acceptor (mVenus) fluorescent proteins. JH binding induces a conformational change in JHBP, altering the FRET efficiency between the fluorescent protein pair.
Table 3: Key Characteristics of the FREJIA FRET Nanosensor
| Parameter | Specification |
|---|---|
| Target Analyte | Juvenile Hormone (JH I, II, III), Methoprene |
| Detection Mechanism | Ligand-induced FRET change |
| FRET Pair | mTFP1 (donor) / mVenus (acceptor) |
| Dynamic Range | Nanomolar (nM) concentrations |
| Key Advantage | Ratiometric, genetically encoded for real-time, non-destructive imaging |
Experimental Protocol for a Genetically Encoded FRET Sensor
Application Note: This protocol describes the process of using a genetically encoded FRET-based nanosensor, like FREJIA, for monitoring analyte dynamics in plant cells [14] [8]. A significant challenge in plants is overcoming gene silencing, which can be addressed by using mutant plant lines deficient in gene silencing mechanisms [8].
Materials:
- Mammalian or plant expression vector (e.g., pcDNA3.1) containing the FREJIA construct
- Agrobacterium tumefaciens strain (for plant transformation)
- Target plant specimens (e.g., Nicotiana benthamiana leaves, Arabidopsis plants)
- Confocal microscope or fluorescence microscope with FRET capability (e.g., CFP/YFP filter sets)
- Image analysis software (e.g., ImageJ with FRET plug-ins)
Procedure:
- Plant Transformation: For stable expression, transform the FRET sensor construct into the plant of interest using Agrobacterium-mediated transformation. For transient expression, infiltrate Agrobacterium harboring the sensor into leaves of N. benthamiana.
- Sample Preparation: Grow transformed plants or use infiltrated leaves after 48-72 hours for expression. Prepare plant samples such as leaf epidermal peels or root hairs for microscopy.
- Microscopy Setup: Configure the microscope for FRET imaging. For a CFP/YFP pair, use:
- Donor (CFP/mTFP1) channel: Ex 405-455 nm, Em 460-500 nm.
- FRET channel: Ex 405-455 nm, Em 520-560 nm.
- Acceptor (YFP/mVenus) channel: Ex 490-510 nm, Em 520-560 nm.
- Image Acquisition: Capture images of expressing cells in all three channels. Acquire a baseline time-series.
- Stimulus Application: Introduce the hormone or analyte of interest (e.g., by adding JH III dissolved in ethanol to the imaging chamber) and continue time-lapse imaging.
- Ratiometric Analysis: Calculate the FRET ratio for each time point, typically defined as the fluorescence intensity in the FRET channel divided by the intensity in the donor channel (F{FRET}/F{Donor}). Plot the ratio over time to visualize analyte dynamics.
The Scientist's Toolkit: Key Research Reagent Solutions
Table 4: Essential Materials for Nanosensor Development and Implementation
| Reagent/Material | Function/Application |
|---|---|
| AIE1035 NIR-II Fluorophore | Serves as a stable, bright fluorescence reporter in NIR-II optical sensors, minimizing photobleaching [10]. |
| Polymetallic Oxomolybdates (POMs) | Acts as a highly selective H₂O₂-responsive quencher in activatable "turn-on" nanosensors [10]. |
| Bismuth-based Electrode | An environmentally friendly and sensitive transducer material for electrochemical detection of heavy metals [12]. |
| mTFP1 & mVenus | A optimized FRET pair of fluorescent proteins used in genetically encoded biosensors like FREJIA for ratiometric imaging [14]. |
| Juvenile Hormone-Binding Protein (JHBP) | The sensing domain derived from Bombyx mori that confers specificity to juvenile hormone in the FREJIA sensor [14]. |
| Polyvinyl Alcohol (PVA) | A polymer used as a substrate for fabricating flexible, wearable electrochemical sensors [12]. |
Visualizing Nanosensor Workflows
Workflow for Activatable NIR-II Nanosensor
Workflow for Genetically Encoded FRET Sensor
The in vivo implantation of nanosensors in plant tissues represents a frontier in plant science, enabling real-time monitoring of physiological processes. Among the most promising nanomaterials for these applications are Quantum Dots (QDs), Carbon Nanotubes (CNTs), and Metal-Organic Frameworks (MOFs). These materials offer unique properties—such as tunable fluorescence, high surface area, and programmable porosity—that make them ideal for developing advanced biosensing platforms. This document provides detailed application notes and experimental protocols for employing these critical nanomaterials in plant research, supporting the broader objective of understanding and optimizing plant physiology at the molecular level.
Application Notes and Quantitative Data
The following tables summarize key performance metrics and applications of each nanomaterial class, based on recent research findings.
Table 1: Performance Metrics of Critical Nanomaterials in Plant Applications
| Nanomaterial | Primary Function | Key Performance Metrics | Plant Species Tested | Reference |
|---|---|---|---|---|
| Carbon Nanotubes (CNTs) | Plasmid DNA delivery for gene editing | 30x higher mitochondrial delivery efficiency; Transient GFP/YFP/GUS expression in embryos/leaves [15] [16] | Rice (Oryza sativa), Arabidopsis thaliana [15] [16] | |
| Quantum Dots (QDs) | Light conversion, biosensing | 15-40% increased crop yield; 56% enhanced photosynthesis; 30% boosted N uptake; 23% higher light use efficiency [17] | Onion, Tomato, Zea mays [18] [17] | |
| Metal-Organic Frameworks (MOFs) | Controlled release of agrochemicals, pathogen detection | High loading capacity for essential oils; Pathogen inhibition via ROS generation; Triggered release by pH changes [19] [20] [21] | Various model crops [19] [20] |
Table 2: Sensor Performance Characteristics for In Vivo Plant Monitoring
| Sensor Type / Nanomaterial | Target Analyte | Sensitivity / Key Performance | Stability / Duration | Reference |
|---|---|---|---|---|
| Ion-Selective OECT | K+ ions in xylem sap | 215 µA dec⁻¹; >1000x selectivity over Na+, Ca²⁺, Mg²⁺ [22] | >5 weeks in vivo [22] | |
| FRET-based Nanosensors | ATP, Ca²⁺, Glucose, Gibberellin | Ratiometric detection of cellular metabolites and signalling molecules [23] | Transient expression (days) [23] | |
| Self-Powered H₂O₂ Sensor | Hydrogen Peroxide (H₂O₂) | Real-time monitoring of stress signalling molecules [24] | N/S [24] | |
| CNT-polymer hybrid | DNA to Mitochondria | ~30x higher efficiency than peptide-only delivery [16] | Enabled homologous recombination [16] |
Experimental Protocols
Protocol: CNT-Mediated Plasmid DNA Delivery to Rice Embryos
This protocol describes a method for transient transformation of rice tissues using PEI-functionalized CNTs, adapted from [15].
1. Research Reagent Solutions
- Polyethylenimine (PEI)-functionalized CNTs: Serve as the primary nanocarrier for plasmid DNA.
- Plasmid DNA (e.g., pDNA with GFP/YFP/GUS reporter): Genetic cargo for transient expression.
- MES Delivery Buffer: Infiltration medium for plant tissues.
- Rice seeds or excised embryos: Target plant material.
2. Procedure 1. CNT-pDNA Complex Preparation: Complex PEI-functionalized CNTs with plasmid DNA at an optimal mass ratio of 2:1 (pDNA:CNT) in MES delivery buffer. Incubate for 30-60 minutes at room temperature to allow for electrostatic binding [15]. 2. Plant Material Preparation: Sterilize rice seeds and excise mature embryos. 3. Infiltration: Submerge the excised embryos in the CNT-pDNA complex solution. Apply a mild vacuum for 5-10 minutes, then release slowly to facilitate infiltration into the intercellular spaces. 4. Incubation: Incubate the imbibed embryos in the solution for 48 hours in the dark at room temperature. 5. Analysis: Assess transient expression of reporter genes (e.g., GFP, YFP) using confocal microscopy or GUS expression via histochemical staining. Validate delivery using RT-PCR with gene-specific primers [15].
3. Troubleshooting Notes
- Low Transformation Efficiency: Optimize the pDNA:CNT ratio and vacuum infiltration parameters.
- Cytotoxicity: Ensure CNT concentrations and functionalization levels are within biocompatible limits.
Protocol: Implantation of K+-Selective OECTs in Pine Xylem
This protocol details the procedure for implanting a miniaturized Ion-Selective Organic Electrochemical Transistor (IS-OECT) into tree xylem for long-term potassium monitoring, as described in [22].
1. Research Reagent Solutions
- K+-Selective OECT on Kapton Film: The core sensor, fabricated on a flexible 50 µm thick Kapton substrate.
- Ion-Selective Membrane (ISM): A plasticized PVC membrane containing valinomycin as the potassium ionophore.
- Poly(sodium-4-styrene sulfonate) (PSSNa) Internal Electrolyte: Solid polyelectrolyte between the channel and the ISM.
- Artificial Xylem Sap: Solution for sensor calibration and performance validation.
2. Procedure 1. Sensor Pre-conditioning and Calibration: Prior to implantation, calibrate the IS-OECT by measuring the drain current (ID) in standard K+ solutions (e.g., 10⁻⁵ to 10⁻¹ M) to establish a calibration curve. Verify selectivity against interfering ions (Na+, Ca²⁺, Mg²⁺) [22]. 2. Plant Preparation: Select a healthy pine plantlet. Identify a suitable implantation site on the main stem. 3. Implantation: Using a micro-drill, create a pilot hole (diameter slightly smaller than the sensor probe) into the xylem tissue. Gently insert the miniaturized IS-OECT sensor, ensuring the sensing region is in contact with the xylem sap. Seal the insertion site with a biocompatible sealant (e.g., plant-safe wax) to prevent sap leakage and pathogen entry. 4. Data Acquisition: Connect the sensor to a portable potentiostat/data acquisition system. Apply constant gate and drain voltages (e.g., VG = 0 V, VD = -0.4 V) and continuously monitor the drain current (ID), which correlates with K+ concentration [22]. 5. Data Analysis: Convert the recorded I_D signals to K+ concentration using the pre-established calibration curve. Monitor dynamic changes over time.
3. Troubleshooting Notes
- Signal Drift: Ensure a stable internal PSSNa electrolyte layer and a well-sealed ISM during fabrication.
- Biofouling: The use of a biocompatible Kapton substrate and a clean implantation technique minimizes immune responses.
Protocol: Applying QD-Polymer Films for Enhanced Plant Growth
This protocol outlines the use of quantum dot-based photoconversion films to optimize the light spectrum for plant photosynthesis, based on findings in [17].
1. Research Reagent Solutions
- QD-polymer composite film: A fluoropolymer film embedded with QDs (e.g., CdSe/ZnS core-shell).
- Target plants (e.g., Solanum lycopersicum): Plants grown under the film.
2. Procedure 1. Film Fabrication/Selection: Obtain or fabricate a polymer film containing dispersed QDs. The QDs should be selected for their ability to absorb UV/blue light and re-emit it in the blue/red spectrum (e.g., 2-3 nm dots for blue, 5-6 nm for red) [17]. 2. Experimental Setup: Install the QD-film as a covering for plants in a growth chamber or greenhouse. Use a control group under a standard polymer film. 3. Plant Growth and Monitoring: Grow plants under the films for a full growth cycle. Monitor standard growth parameters (plant height, leaf area, biomass) and physiological metrics such as CO₂ assimilation rate and chlorophyll content [17]. 4. Data Analysis: Compare the growth rates, biomass, and photosynthetic efficiency of plants under QD-films versus control films.
3. Troubleshooting Notes
- QD Photodegradation: Use robust core-shell QD structures (e.g., CdSe/ZnS) to enhance photostability.
- Optimal Spectrum: The composition and size of QDs must be tuned to match the absorption peaks of plant chlorophylls.
Signaling Pathways and Experimental Workflows
The following diagrams, generated using Graphviz DOT language, illustrate key experimental setups and functional principles.
Diagram 1: Experimental workflows for CNT-mediated delivery and OECT sensor implantation.
Diagram 2: MOF-mediated crop disease management pathway involving direct pathogen inhibition and induced plant defense mechanisms.
The Scientist's Toolkit: Research Reagent Solutions
Table 3: Essential Reagents for Nanomaterial-Based Plant Research
| Reagent / Material | Function / Description | Example Application / Note |
|---|---|---|
| PEI-functionalized CNTs | Polycationic polymer coating enables electrostatic binding and delivery of nucleic acids (pDNA, siRNA) [15]. | Optimal pDNA:CNT ratio of 2:1 for rice embryo transformation [15]. |
| SWNT-Polymer Hybrid (SWNT-PM-CytKH9) | CNT hybrid with mitochondria-targeting (Cytcox) and DNA-binding (KH9) peptides for organelle-specific delivery [16]. | Achieves ~30x higher mitochondrial delivery efficiency than peptide-only methods [16]. |
| K+-Selective OECT | Implantable organic electrochemical transistor for real-time ion monitoring in xylem sap [22]. | Provides high sensitivity (215 µA dec⁻¹) and long-term stability (>5 weeks) in pine trees [22]. |
| CdSe/ZnS Core-Shell QDs | Semiconductor nanocrystals for photoconversion; ZnS shell enhances photostability and reduces toxicity [18] [17]. | Embedded in polymer films to convert UV light to photosynthetically active blue/red wavelengths [17]. |
| Carbon Quantum Dots (CQDs) | Fluorescent carbon-based nanoparticles with low toxicity and high biocompatibility [17]. | Act as nanocarriers for nutrient delivery and enhance stress tolerance by scavenging ROS [17]. |
| Zr-based MOFs (e.g., UiO-66) | Highly chemically stable metal-organic frameworks for encapsulation and controlled release [19] [21]. | Used for controlled release of pesticides and essential oils, triggered by pathogen-induced pH changes [20] [21]. |
| Ion-Selective Membrane (ISM) | Membrane containing ionophores (e.g., Valinomycin) that confers high ion selectivity to sensors [22]. | Enables >1000x selectivity for K+ over interfering ions like Na+ and Ca²⁺ in OECTs [22]. |
The Biorecognition-Signal Transduction Pathway in a Plant Cellular Environment
Plants possess a sophisticated innate capacity to perceive a wide array of environmental and biological stimuli through complex biorecognition-signal transduction pathways. These pathways commence with the specific recognition of ligands by cellular receptors, initiating a cascade of intracellular signals that culminate in tailored physiological responses [25] [26]. The foundational principle of these systems involves signal perception at the membrane level, transduction through secondary messengers, and activation of defense mechanisms that enable adaptation and survival [27]. Recent advances in nanosensor technology now permit the real-time monitoring of these signaling events within living plant tissues (in vivo), offering unprecedented insights into plant stress responses, immune activation, and intercellular communication [23] [28]. This protocol details methodologies for leveraging nanosensors to decode early signaling dynamics, with particular emphasis on reactive oxygen species (ROS) and hormone pathways that constitute the plant's primary defense signaling network.
Table 1: Core Signaling Molecules in Plant Biorecognition Pathways
| Signaling Molecule | Role in Pathway | Response Trigger | Detection Method |
|---|---|---|---|
| Hydrogen Peroxide (H₂O₂) | Early ROS wave signal; activates defense genes | Biotic/abiotic stress | SWNT-DNA (GT)₁₅ nanosensor [28] |
| Salicylic Acid (SA) | Defense hormone; mediates systemic resistance | Pathogen attack | Polymer-wrapped SWNT (S3) nanosensor [28] |
| Calcium Ions (Ca²⁺) | Secondary messenger; transduces extracellular signals | Multiple stimuli | FRET-based 'Cameleon' sensors [23] |
| Flagellin (flg22) | Microbe-associated molecular pattern (MAMP) | Bacterial pathogens | LRR receptor kinase FLS2 [26] |
| Small Signaling Peptides | Regulators of growth & regeneration | Wounding, development | Membrane-localized receptors (e.g., CLE, RALF) [29] |
Experimental Protocols for Nanosensor Implementation
Synthesis and Characterization of SA Nanosensors
The development of a salicylic acid (SA)-selective nanosensor employs the Corona Phase Molecular Recognition (CoPhMoRe) strategy to create a near-infrared fluorescent probe [28].
Materials:
- Single-walled carbon nanotubes (SWNTs) (AP-SWNT, Sigma-Aldrich)
- Cationic fluorene-based co-polymers (S1-S4 series)
- Salicylic acid (Sigma-Aldrich, 247588)
- Phosphate buffered saline (PBS), pH 7.4
- Ultrasonic cell disruptor (Branson SFX550)
- Photoluminescence excitation (PLE) spectrometer
Procedure:
- Polymer Synthesis: Synthesize cationic fluorene-based co-polymers S1-S4 via Suzuki-Miyaura cross-coupling, incorporating pyrazine (S1, S3) and pyrimidine (Pm: S2, S4) diazine co-monomers to enable hydrogen bonding with plant hormone analytes [28].
- SWNT Suspension: Suspend SWNTs in aqueous solutions of polymers S1-S4 (1 mg/mL) at a concentration of 50-75 mg/L. Sonicate using a probe ultrasonicator for 30 minutes (10s on/10s off pulses, 40% amplitude) to achieve stable suspensions [28].
- Selectivity Screening: Incubate 100 µL of each polymer-SWNT suspension with 12 key plant hormones and signaling molecules (100 µM final concentration) including SA, JA, ABA, GA, and synthetic auxins. Use dimethyl sulfoxide (DMSO) as a blank solvent control.
- PLE Measurement: Record SWNT fluorescence intensities using PLE spectrometry before and after analyte addition. Calculate fluorescence change percentage as (I₁-I₀)/I₀ × 100%, where I₀ is initial intensity and I₁ is final intensity.
- Validation: Confirm S3-wrapped SWNTs as the optimal SA sensor, demonstrating 35% quenching response to 100 µM SA with minimal interference from other plant hormones [28].
In Planta Multiplexed Sensing of H₂O₂ and SA
This protocol enables simultaneous monitoring of H₂O₂ and SA dynamics in living plants subjected to controlled stress treatments, providing temporal resolution of signaling waves [28].
Materials:
- Brassica rapa subsp. Chinensis (Pak choi) plants, 4-week old
- SWNT-(GT)₁₅ H₂O₂ nanosensor
- S3-wrapped SWNT SA nanosensor
- Pseudomonas syringae pv. tomato DC3000 (for pathogen stress)
- High-intensity light source (1000 µmol m⁻² s⁻¹)
- Precision heating chamber (for heat stress at 38°C)
- Hypodermic needle (for mechanical wounding)
- Near-infrared (nIR) fluorescence imaging system
Procedure:
- Plant Preparation: Grow Pak choi plants under controlled conditions (22°C, 60% humidity, 12h/12h light/dark cycle) for 4 weeks.
- Nanosensor Infiltration: Infiltrate nanosensors into abaxial leaf surfaces using 1 mL needleless syringes:
- Experimental Group: Co-infiltrate H₂O₂ nanosensor (1 µM) and SA nanosensor (1 µM)
- Control Group: Infiltrate with reference sensor (non-responsive SWNT construct)
- Stress Application: After 24-hour recovery, apply stresses:
- Light Stress: Expose to high light (1000 µmol m⁻² s⁻¹) for 2 hours
- Heat Stress: Transfer to 38°C chamber for 2 hours
- Pathogen Stress: Infiltrate with P. syringae (OD₆₀₀ = 0.2) in 10 mM MgCl₂
- Mechanical Wounding: Create uniform puncture wounds with hypodermic needle
- Real-time Imaging: Capture nIR fluorescence images (λex = 785 nm, λem = 900-1400 nm) at 5-minute intervals for 4 hours post-stress initiation.
- Data Analysis: Calculate fluorescence intensity ratios (F/F₀) for each nanosensor. Generate temporal waveform profiles for H₂O₂ and SA. Apply kinetic modeling to determine stress-specific signature patterns.
Detection of Flagellin-Mediated Immune Signaling
This protocol details the monitoring of early immune recognition events through the flagellin-FLS2 biorecognition pathway [26].
Materials:
- Arabidopsis thaliana Col-0 wild-type and fls2 mutant plants
- Synthetic flg22 peptide (QRLSTGSRINSAKDDAAGLQIA)
- Non-polarizable Ag/AgCl electrodes
- Faraday cage with vibration-stabilized table
- Data acquisition system (National Instruments NI 6052E DAQ)
Procedure:
- Electrode Implantation: Insert reversible Ag/AgCl electrodes into plant stem tissues at 5 cm intervals. Maintain temperature at 22±0.5°C to minimize electrode drift [25].
- Signal Acquisition: Configure data acquisition system with 50,000 samples/s sampling rate to avoid aliasing, exceeding Nyquist Criterion for plant action potentials (typically 0.25 cm/s to 15 m/s propagation) [25].
- flg22 Treatment: Apply 100 µL of 1 µM flg22 solution to leaf surfaces. Use water treatment as negative control.
- Membrane Potential Recording: Record extracellular potential changes for 60 minutes post-treatment. Filter signals (0.1-100 Hz bandpass) to remove noise.
- Data Analysis: Quantify action potential characteristics: amplitude, duration, propagation velocity. Compare wild-type and fls2 mutant responses to confirm FLS2-dependent signaling.
Table 2: Key Reagents for Plant Signaling Research
| Reagent/Category | Specific Examples | Function/Application | Key Characteristics |
|---|---|---|---|
| FRET-Based Nanosensors | Yellow Cameleons (Ca²⁺), FLIP (Glucose), Nano-lantern (ATP) [23] | Ratiometric detection of ions & metabolites in live cells | Genetically encodable; enables non-destructive monitoring |
| Electrochemical Nanosensors | Carbon nanotube electrodes, metal nanoparticle sensors [23] [30] | Detection of hormones, enzymes, ROS, ions (H⁺, K⁺, Na⁺) | High sensitivity; suitable for in-field deployment |
| Optical Nanosensors | SWNT-based sensors, SERS nanoparticles [28] [23] | Real-time monitoring of signaling molecules & hormones | nIR fluorescence avoids chlorophyll autofluorescence |
| Pattern Recognition Receptors | FLS2 (flagellin), EFR (EF-Tu), CERK1 (chitin) [26] | Recognition of microbe-associated molecular patterns | Initiate pattern-triggered immunity (PTI) |
| Small Signaling Peptides | CLE peptides, RALF33, REF1, PSK [29] | Regulation of development & stress responses | Recognized by membrane-localized receptor kinases |
Signaling Pathway Architecture and Experimental Workflows
Plant Stress Signaling Pathway
The following diagram illustrates the integrated signaling network plants employ to perceive environmental stresses and transduce these signals into defensive responses, highlighting key points of nanosensor intervention.
Nanosensor Implantation Workflow
This workflow details the complete experimental procedure for implementing multiplexed nanosensors in plant tissues for real-time signaling monitoring.
The protocols outlined herein provide a framework for real-time monitoring of biorecognition-signal transduction pathways in living plants using implantable nanosensors. The multiplexed detection of H₂O₂ and SA represents a particularly powerful approach for decoding early stress signaling dynamics, as these molecules form integral components of the plant's defense network [28]. Successful implementation requires careful attention to sensor specificity validation, appropriate sampling rates to prevent signal aliasing [25], and controlled implantation techniques to minimize tissue damage. Future developments in this field will likely focus on expanding the repertoire of detectable signaling molecules, improving sensor longevity in plant tissues, and integrating nanosensor outputs with automated phenotyping platforms. These advancements will further establish plant nanobionics as a transformative approach for fundamental plant biology research and the development of climate-resilient crops.
The plant cell wall presents a formidable challenge for the in vivo implantation of nanosensors. This dynamic and complex structure regulates the passage of molecules based on size, charge, and other physicochemical properties, primarily through specialized channels called plasmodesmata (PD). For researchers aiming to monitor plant physiology in real-time, understanding and overcoming this selective barrier is paramount. The effective symplasmic permeability of a molecule is not determined by a single factor but by the integrated properties of the PD, including its geometry, the presence of constrictions, and the dynamics of callose deposition [31]. This Application Note provides a structured framework of protocols and data to guide the rational design of nanomaterials capable of bypassing these natural defenses for successful in vivo sensor implantation.
Understanding the Gateway: Plasmodesmata Architecture and Size Exclusion
Structural Foundations of Symplasmic Transport
Plasmodesmata are membrane-lined nanoscopic channels that traverse the plant cell wall, creating cytoplasmic continuums between adjacent cells. Their core architecture consists of several key features, which are visualized in the following diagram:
Diagram 1: Plasmodesmata Ultra-structure
The cytoplasmic sleeve, the space between the desmotubule and the plasma membrane, constitutes the primary conduit for molecular transport. The size exclusion limit (SEL) of this pathway is dynamically regulated, particularly by the accumulation of the polysaccharide callose at the neck regions, which mechanically reduces the aperture [32]. The presence of a dilated central region can significantly impact overall permeability, especially in thick cell walls [31].
Quantitative Size Exclusion Limits
Experimental data on SEL varies based on measurement techniques, plant species, and cell type. The table below summarizes key quantitative data from empirical observations.
Table 1: Experimentally Determined Size Exclusion Limits
| Plant System / Context | Permeable Molecule / Probe | Approximate Hydrodynamic Radius / Molecular Weight | Key Experimental Method | Reference / Context |
|---|---|---|---|---|
| General Non-Targeted Transport | Fluorescein derivatives | 0.4 - 0.6 nm | Fluorescence redistribution | [31] |
| General Non-Targeted Transport | GFP (e.g., DRONPA-s, Dendra2) | 26-28 kDa, 2.45-2.82 nm radius | Photobleaching/Photoactivation | [31] |
| Active/Targeted Transport | Specific transcription factors (e.g., SHR), viral movement proteins | > 50 kDa | Genetic mobility assays | [31] [32] |
| Bioristor Implantation | PEDOT:PSS conductive polymer (textile OECT) | N/A - forms continuous thread | In vivo electrochemical sensing | [33] |
Application Note: The data indicates that the passive SEL for symmetric movement is typically below 30 kDa (or ~3 nm). Strategies for implanting larger nanomaterials must therefore employ active transport mechanisms or direct physical integration, as demonstrated by the textile-based bioristor.
Core Experimental Protocols
Protocol 1: Characterizing Plasmodesmal Permeability via Fluorescent Tracer Assay
This protocol is foundational for establishing the baseline SEL in your plant system of interest before nanosensor implantation.
1. Reagent Preparation:
- Prepare a stock solution (1-10 mM) of the selected fluorescent tracer (e.g., Carboxyfluorescein, HPTS, or purified GFP) in an appropriate buffer.
- Prepare a washing buffer (e.g., 5 mM MES, pH 6.0, with 0.5 mM CaCl₂).
2. Microinjection and Sampling:
- Step 1: Immobilize the target plant tissue (e.g., leaf epidermis, root) on a microscope slide.
- Step 2: Using a pressure microinjection system and a fine-tipped glass capillary, inject the tracer solution into a single cell. Limit injection pressure and time to avoid cell damage.
- Step 3: Immediately after injection, initiate time-lapse imaging using a confocal laser scanning microscope. Capture images at 30-second to 2-minute intervals for 20-60 minutes.
- Step 4: At the end of the experiment, use a fresh capillary to sample the cytoplasm of the initially injected cell and a neighboring cell for fluorescence intensity quantification via fluorometry to confirm movement.
3. Data Analysis:
- Step 1: Use image analysis software (e.g., Fiji/ImageJ) to quantify the fluorescence intensity in the injected cell and adjacent cells over time.
- Step 2: Calculate the rate of fluorescence decrease in the source cell and the rate of increase in recipient cells.
- Step 3: Model the data to estimate the effective symplasmic permeability coefficient. A failure of the tracer to move indicates it exceeds the native SEL [31].
Troubleshooting Tip: High background fluorescence can obscure results. Include negative controls with buffer injection. Cell damage during injection is a common artifact; monitor for rapid, non-specific flooding of the tracer into the apoplast.
Protocol 2: In Vivo Implantation of a Textile-Based Electrochemical Nanosensor (Bioristor)
This protocol details the method for implanting a robust, continuous sensor for real-time sap monitoring, as validated in tomato plants [33].
1. Sensor Fabrication:
- Step 1: Select a natural textile fiber thread (e.g., cotton).
- Step 2: Functionalize the thread by soaking it in a conductive polymer solution, such as poly(3,4-ethylenedioxythiophene) polystyrene sulfonate (PEDOT:PSS).
- Step 3: Dry the functionalized thread and connect it to a customized potentiostat for data acquisition.
2. Implantation Procedure:
- Step 1: Identify a healthy, mature stem on the target plant (e.g., a tomato plant).
- Step 2: Using a sterile, hollow microneedle or guide, carefully insert the functionalized textile thread horizontally through the stem's pith, avoiding major vascular bundles.
- Step 3: Position a thin silver (Ag) wire gate electrode in the soil or in the stem's apoplast to complete the organic electrochemical transistor (OECT) circuit.
- Step 4: Secure the external components without constricting stem growth.
3. Calibration and Data Acquisition:
- Step 1: Apply a fixed drain-source voltage (Vds) while stepping the gate voltage (Vg) from 0 to 1 V.
- Step 2: Monitor the drain-source current (Ids). The sensor response (R) is calculated from Ids.
- Step 3: Correlate changes in R and the system's time constant (τ) with the ionic content of the plant sap. The circadian rhythm of solute concentration will manifest as a periodic signal with a ~24-hour cycle, serving as an internal validation of sensor function [33].
The workflow and data relationship for this protocol are illustrated below:
Diagram 2: Bioristor Implantation Workflow
Strategic Nanomaterial Design for Enhanced Delivery
Exploiting Active and Targeted Transport Pathways
To circumvent the passive SEL, nanomaterials can be engineered to mimic the behavior of endogenous mobile macromolecules.
- Surface Functionalization: Covalently link nanomaterial surfaces with peptides or protein domains derived from mobile transcription factors (e.g., SHORT-ROOT) or viral movement proteins (MPs). These act as "molecular passports" for active transport through PD [31] [32].
- Size and Shape Optimization: Model the transport efficiency based on PD geometry. While spherical nanoparticles are standard, designing smaller, elongated particles may improve diffusion through the restricted cytoplasmic sleeve [31].
Modulating Plasmodesmal Dynamics
A more invasive strategy involves temporarily opening the PD to facilitate sensor delivery.
- Chemical Modulation: Co-apply nanomaterials with agents that regulate callose turnover. This includes:
- Callose Synthesis Inhibitors: Such as 2-deoxy-D-glucose.
- β-1,3-Glucanase (BG): The enzyme that degrades callose [32].
- Inducible Systems: Use transgenic lines (e.g.,
icals3m) where callose deposition can be chemically suppressed on demand, creating a transient window of increased SEL for sensor loading [32].
The strategic choice between passive, active, and modulatory approaches is summarized in the following decision pathway:
Diagram 3: Nanomaterial Delivery Strategy Decision Tree
The Scientist's Toolkit: Research Reagent Solutions
Table 2: Essential Reagents for Plasmodesmal and Nanomaterial Research
| Reagent / Material | Function / Application | Example & Notes |
|---|---|---|
| Fluorescent Tracers | Probing SEL and permeability in vivo. | Carboxyfluorescein (0.6 nm), 10-kDa GFP (~3.5 nm). Use a size series to characterize SEL. |
| Callose Synthesis Inhibitor | Chemically reduce callose deposition to widen PD aperture. | 2-deoxy-D-glucose. Use in controlled doses to avoid pleiotropic effects. |
| Conductive Polymer | Fabrication of implantable electrochemical sensors. | PEDOT:PSS. Provides biocompatibility and stable electrochemical properties in planta [33]. |
| Metal Nanoparticles | Antimicrobial agent for explant sterilization; potential sensor component. | Silver Nanoparticles (AgNPs). Effective for surface sterilization in tissue culture protocols [34]. |
| Chitosan-based NPs | Biocompatible nanocarrier for molecule delivery. | Chitosan Nanoparticles. Can be functionalized for targeted delivery and induce plant defense responses [35]. |
| Genetically Encoded FRET Sensors | Monitor in vivo analytes (e.g., Ca²⁺, ATP, hormones) without implantation. | "Cameleon" sensors (CFP-YFP FRET pair). Enable ratiometric, non-destructive monitoring of cellular processes [23]. |
Implementation and Real-World Sensing Applications in Living Plants
The in vivo implantation of nanosensors into plant tissues represents a transformative approach for real-time monitoring of physiological processes. This protocol details standardized methods for introducing optical nanosensors, specifically those based on single-walled carbon nanotubes (SWNTs), into living plants for the direct, real-time measurement of signaling molecules and hormones such as hydrogen peroxide (H₂O₂) and salicylic acid (SA) [28]. These techniques enable researchers to decode early stress signaling waves in plants, providing insights for developing climate-resilient crops and pre-symptomatic stress diagnoses [28]. The methodologies outlined herein are designed to be non-destructive, species-agnostic, and require no genetic modification of the host plant, making them widely applicable for both fundamental plant physiology research and precision agriculture applications [36].
The Scientist's Toolkit: Essential Research Reagents and Materials
The following table catalogs the essential materials and reagents required for the successful preparation and implantation of nanosensors in plant tissues.
Table 1: Key Research Reagent Solutions for Nanosensor Implantation
| Item Name | Function/Application | Specifications & Notes |
|---|---|---|
| Single-Walled Carbon Nanotubes (SWNTs) | Core nanomaterial; serves as the optical sensing platform. | High-purity SWNTs are essential. They fluoresce in the near-infrared (nIR) region, avoiding chlorophyll autofluorescence [28]. |
| (GT)₁₅ DNA Oligomer | Corona phase for H₂O₂ sensing; wraps SWNTs via π-π interactions. | Confers specific binding ability to H₂O₂ through the CoPhMoRe technique [28]. |
| Cationic Fluorene-based Co-polymers (e.g., S3) | Corona phase for SA sensing; wraps SWNTs. | Designed for electrostatic interactions with anionic plant hormones like SA. S3 polymer shows high selectivity for SA [28]. |
| Infiltration Buffer (e.g., MES or KCl) | Medium for sensor delivery. | Provides a stable ionic environment for the nanosensors during the introduction process [28]. |
| Syringe (without needle) or Vacuum Infiltration Apparatus | Equipment for sensor introduction. | Used for the direct, pressure-based infusion of nanosensor solution into the leaf apoplast. |
| Near-Infrared (nIR) Spectrometer | Detection equipment. | For measuring the fluorescence intensity changes of the SWNT-based nanosensors in real-time. |
Detailed Experimental Protocols
Protocol 1: Synthesis and Functionalization of Optical Nanosensors
This protocol describes the creation of selective nanosensors using the Corona Phase Molecular Recognition (CoPhMoRe) method.
3.1.1 Materials
- Single-walled carbon nanotubes (SWNTs)
- Selected wrapping agent: (GT)₁₅ DNA for H₂O₂ sensors or S3 cationic polymer for SA sensors
- Filtration buffer (e.g., 10 mM MES, pH 6.5)
3.1.2 Step-by-Step Procedure
- Dispersion: Disperse 1 mg of purified SWNTs in 1 mL of filtration buffer.
- Polymer Addition: Add a 1 mg/mL solution of the chosen wrapping polymer (e.g., (GT)₁₅ DNA or S3 polymer) to the SWNT dispersion at a 1:1 mass ratio.
- Probe Sonication: Sonicate the mixture using a tip sonicator on ice for 10-30 minutes at a power level sufficient to exfoliate the SWNT bundles without damaging the polymer.
- Ultracentrifugation: Centrifuge the sonicated dispersion at 100,000 - 150,000 x g for 30-60 minutes to pellet any undispersed SWNTs and aggregates.
- Collection: Carefully collect the top 70-80% of the supernatant, which contains the individually polymer-wrapped SWNTs. This is the stock nanosensor solution.
- Characterization: Characterize the nanosensor using Photoluminescence Excitation (PLE) spectroscopy to confirm fluorescence in the nIR region and establish a baseline intensity [28].
This protocol outlines the method for implanting nanosensors into the leaf apoplast of a model plant like Brassica rapa (Pak choi) or Arabidopsis.
3.2.1 Materials
- Prepared nanosensor solution (from Protocol 3.1)
- Target plant(s)
- Syringe (1 mL, without a needle)
- Optional: Vacuum infiltration setup
3.2.2 Step-by-Step Procedure
- Plant Preparation: Use healthy, well-hydrated plants. Abaxial (lower) sides of leaves are typically more permeable.
- Solution Application: For syringe infiltration, pipette a small droplet (~10-20 µL) of the nanosensor solution onto the abaxial leaf surface.
- Infiltration: Gently press the open end of the syringe barrel against the leaf surface where the droplet is placed. Apply slow, steady pressure to the plunger, using the finger of your other hand to support the leaf. The solution will infiltrate the leaf apoplast, creating a water-soaked spot.
- Curing: Allow the infiltrated plant to rest under normal growth conditions for 15-30 minutes. The infiltrated spot will regain its original appearance as the aqueous medium evaporates, leaving the nanosensors embedded in the leaf mesophyll and apoplastic space [28].
- Validation: Confirm successful sensor implantation and functionality by placing the leaf under an nIR spectrometer and applying a known stimulus (e.g., a light stress) to observe a characteristic H₂O₂ or SA fluorescence response.
Protocol 3: Multiplexed Sensing and Real-Time Data Acquisition
This protocol describes the procedure for simultaneously monitoring multiple analytes and acquiring real-time data from the implanted sensors.
3.3.1 Materials
- Plant with implanted nanosensors
- nIR fluorescence imaging system or spectrometer
- Equipment for applying stress stimuli (e.g., controlled light source, heat source, pathogen solution)
3.3.2 Step-by-Step Procedure
- Sensor Multiplexing: Co-infiltrate multiple types of nanosensors (e.g., H₂O₂ sensor and SA sensor) into the same leaf area using the method in Protocol 3.2 [28].
- Baseline Recording: Place the plant under the nIR imaging system and record the fluorescence intensity of all sensor channels for at least 15-30 minutes to establish a stable baseline.
- Stress Application: Apply a defined stress treatment to the plant. Examples include:
- Real-Time Monitoring: Continuously monitor and record the fluorescence signals from all implanted nanosensors throughout the stress application and subsequent recovery period. Data collection should continue for several hours to capture the full dynamic waveform of the signaling molecules.
- Data Analysis: Analyze the temporal dynamics of the signals. The fluorescence data (e.g., quenching for SA) is plotted as (I₀-I)/I₀, where I₀ is the initial baseline fluorescence and I is the real-time fluorescence intensity [28]. This reveals the distinct "wave characteristics" of each analyte for different stress types.
Data Presentation and Analysis
The following table summarizes the expected quantitative responses of different nanosensors to specific stimuli, based on published findings.
Table 2: Characteristic Nanosensor Responses to Various Stress Stimuli
| Nanosensor Type | Stress Stimulus | Sensor Response | Temporal Characteristics | Key Findings |
|---|---|---|---|---|
| H₂O₂ Sensor(DNA-wrapped SWNT) | Pathogen Stress | >80% fluorescence increase (turn-on) [28] | Rapid, monophasic spike | Early wave encodes stress-specific information [28] |
| SA Sensor(S3 Polymer-wrapped SWNT) | Pathogen Stress | ~35% fluorescence quenching [28] | Slow, sustained increase | Signals follow H₂O₂ wave; interplay indicates stress type [28] |
| H₂O₂ Sensor(DNA-wrapped SWNT) | Heat Stress | >60% fluorescence increase (turn-on) [28] | Rapid, biphasic spike | Distinct temporal pattern from pathogen stress [28] |
| IAA Sensor(Polymer-wrapped SWNT) | Shade / Low Light | Change in nIR fluorescence [36] | Real-time, dynamic | Enables direct tracking of auxin fluctuations [36] |
Workflow and Signaling Pathway Visualization
The following diagram illustrates the complete experimental workflow from nanosensor preparation to data analysis.
Experimental Workflow for Nanosensor Implantation and Use
The diagram below conceptualizes the plant stress signaling pathway that is revealed using multiplexed nanosensors.
Plant Stress Signaling Pathway Revealed by Nanosensors
In plant physiology, hydrogen peroxide (H₂O₂) functions as a crucial signaling molecule that mediates various physiological and biochemical processes, playing a significant role in plant development and responses to abiotic and biotic stresses [37] [38]. While traditionally viewed as merely a damaging reactive oxygen species, it is now clear that H₂O₂ takes a central role in regulating plant development and environmental responses through its compartmentalized synthesis, temporal control exerted by the antioxidant machinery, and ability to oxidize specific residues of target proteins [37]. The fluctuating environmental conditions that plants experience throughout growing seasons immediately trigger signaling pathways that ultimately remodel epigenetic landscapes, gene expression, proteomes, and metabolomes [37].
Creating further complexity, plants often experience combinations of stress factors either simultaneously or separated in time, making the monitoring of H₂O₂ signaling dynamics particularly challenging [37]. Existing methods for sensing stress-induced signals primarily rely on histochemical reagents following isolation and purification of plant extracts, which are typically destructive and do not permit real-time tracking of endogenous dynamic signals [10]. This case study examines the application of Second Near-Infrared Region (NIR-II, 1000-1700 nm) fluorescent nanosensors for non-destructive, real-time monitoring of H₂O₂ stress signaling in living plants, framed within broader research on in vivo implantation of nanosensors in plant tissues.
H₂O₂ Signaling in Plant Stress Responses
The Dual Role of H₂O₂ in Plant Physiology
Hydrogen peroxide operates as a key modulator in many oxidative stress-related statuses in plants, with normal cellular metabolism continuously producing H₂O₂ through various enzymatic and non-enzymatic pathways [39] [38]. Even when stress conditions subside, many molecular processes are not immediately reset to their prestress levels, creating a new baseline that underlies conceptually new responses to future environmental fluctuations [37]. This conceptual framework is often referred to as priming, acclimation, or hardening, where plants experiencing mild stress will react differently to subsequent harsher stress than naïve plants [37].
The diverse roles of H₂O₂ are achieved through several mechanisms:
- Compartmentalized synthesis across different cellular compartments
- Temporal control exerted by the antioxidant machinery
- Oxidation capability of specific residues on target proteins
- Crosstalk with other signaling molecules like nitric oxide (NO) and calcium (Ca²⁺) [37] [38]
H₂O₂ Production and Scavenging Pathways
Table 1: Cellular Sources and Scavengers of Hydrogen Peroxide in Plant Cells
| Category | Components | Localization | Function |
|---|---|---|---|
| Production Sources | NADPH oxidases | Plasma membrane | Generate superoxide which is converted to H₂O₂ by SOD |
| Photorespiration | Peroxisomes | Associated with glycolate oxidation | |
| Electron transport chains | Chloroplasts/Mitochondria | Reduction of O₂ by photosynthetic electron transport | |
| Cell wall peroxidases | Apoplast | Direct production of H₂O₂ | |
| Oxalate oxidases, amine oxidases | Various compartments | Oxidize substrates to generate H₂O₂ | |
| Scavenging Systems | Catalase (CAT) | Peroxisomes | Decomposes H₂O₂ |
| Ascorbate peroxidase (APX) | Cytosol, Chloroplasts, Mitochondria | Scavenges H₂O₂ using ascorbate | |
| Peroxidase (POX) | Various compartments | Scavenges H₂O₂ | |
| Glutathione reductase (GR) | Various compartments | Maintains glutathione redox state | |
| Non-enzymatic antioxidants (AsA, GSH) | Throughout cell | Directly react with and eliminate H₂O₂ |
H₂O₂ Signaling Pathways in Stress Acclimation
The signaling pathways involving H₂O₂ are complex and interconnected with other signaling systems. The diagram below illustrates the key pathways in plant stress responses.
Figure 1: H₂O₂ Signaling Pathways in Plant Stress Responses. Hydrogen peroxide mediates stress responses through crosstalk with calcium and nitric oxide signaling, leading to defense gene expression and eventual stress acclimation.
NIR-II Fluorescent Nanosensors: Design and Mechanism
Principles of NIR-II Fluorescence Imaging
Fluorescence imaging in the second near-infrared region (NIR-II, 1000-1700 nm) has emerged as a powerful technology for deep-tissue in vivo bioimaging, overcoming significant limitations of traditional visible (400-700 nm) and NIR-I (700-900 nm) imaging [40] [41]. The NIR-II window offers several distinct advantages for plant imaging:
- Diminished absorption by plant pigments including chlorophyll
- Reduced tissue autofluorescence leading to higher signal-to-background ratios
- Suppressed photon scattering enabling deeper tissue penetration (5-20 mm)
- Enhanced spatial resolution for precise localization of signals [40] [10] [41]
This technology is particularly valuable for plant systems where chlorophyll autofluorescence in the visible spectrum traditionally interferes with conventional fluorescence imaging techniques [10].
Nanosensor Architecture and Activation Mechanism
Recent advances have led to the development of activatable "turn-on" NIR-II nanosensors specifically designed for H₂O₂ detection in plants [10]. These nanosensors employ an ingenious design consisting of two key components:
- NIR-II fluorophores with aggregation-induced emission (AIE) properties
- Polymetallic oxomolybdates (POMs) as H₂O₂-responsive fluorescence quenchers
The mechanism of action involves initial quenching of the NIR-II fluorescence signal through co-assembly of AIE nanoparticles with POMs, achieving a "turn-off" state. When the nanosensor encounters H₂O₂, the inherent oxygen vacancies in POMs confer unique H₂O₂-responsive properties, leading to oxidation that diminishes their quenching effect and subsequently activates a bright NIR-II fluorescence signal [10].
Table 2: Components of H₂O₂-Responsive NIR-II Nanosensors
| Component | Type/Composition | Function | Key Characteristics |
|---|---|---|---|
| Fluorophore | AIE1035 (D-A-D structured dye) | Signal reporter | Enhanced fluorescence in aggregates, photostability, emission in NIR-II window |
| Quencher | Mo/Cu-POM (Polymetallic oxomolybdates) | H₂O₂ recognition and activation | Oxygen vacancies for H₂O₂ response, strong NIR absorption, selective for H₂O₂ |
| Assembly | PS nanospheres (Polystyrene) | Fluorophore encapsulation | Uniform particle size, good dispersion, protection of fluorophore |
| Final Sensor | AIE1035NPs@Mo/Cu-POM | H₂O₂ detection | ~230 nm diameter, PDI 0.078, "turn-on" response to H₂O₂ |
The selectivity of these nanosensors for H₂O2 over other reactive oxygen species and endogenous molecules is remarkable, with the Mo/Cu-POM component showing minimal response to potentially interfering compounds while maintaining high sensitivity to H₂O₂ across a range of physiological pH conditions [10].
Nanosensor Activation Mechanism
The following diagram illustrates the activation mechanism of H₂O₂-responsive NIR-II nanosensors.
Figure 2: NIR-II Nanosensor Activation Mechanism. The nanosensor transitions from a fluorescence-off to fluorescence-on state upon H₂O₂-induced oxidation of the POM quencher.
Performance Characteristics and Quantitative Assessment
Sensitivity and Detection Capabilities
The developed NIR-II nanosensors demonstrate exceptional performance characteristics for monitoring H₂O₂ in plant systems:
- High sensitivity with detection limit of 0.43 μM H₂O₂
- Rapid response time of approximately 1 minute
- Excellent selectivity for H₂O₂ over other ROS and endogenous molecules
- pH stability across physiological ranges in plant tissues
- Photostability suitable for long-term monitoring [10]
These performance metrics represent significant advancements over existing detection methods, enabling researchers to monitor trace levels of H₂O₂ in real-time without destructive sampling procedures.
Comparison with Alternative H₂O₂ Detection Methods
Table 3: Performance Comparison of H₂O₂ Detection Methods
| Method | Detection Principle | Sensitivity | Temporal Resolution | Spatial Resolution | In Vivo Capability |
|---|---|---|---|---|---|
| Histochemical Staining | Chemical precipitation | ~10 μM | Hours to days | Tissue level | No (destructive) |
| Electrochemical Sensors | Electron transfer | ~1 μM | Minutes | Macroscopic | Limited (invasive) |
| Genetically Encoded Sensors | Fusion proteins | ~0.1 μM | Minutes | Cellular | Yes (specific species) |
| Conventional Fluorescence Probes | Boronate oxidation | ~1 μM | Minutes | Cellular | Limited (autofluorescence) |
| NIR-II Nanosensors | POM oxidation & NIR-II fluorescence | 0.43 μM | ~1 minute | Subcellular | Yes (species-independent) |
The NIR-II nanosensors provide an optimal balance of sensitivity, temporal resolution, and non-destructive monitoring capability, making them particularly suitable for long-term studies of H₂O₂ signaling dynamics in living plants [39] [10].
Experimental Protocols
Nanosensor Synthesis and Characterization
Synthesis of AIE1035 Nanoparticles
Materials:
- AIE1035 dye (D-A-D structured fluorophore)
- Polystyrene (PS) nanospheres
- Organic solvents (THF, DMF)
Procedure:
- Dissolve AIE1035 dye in THF at concentration of 1 mg/mL
- Prepare PS nanospheres (100 nm diameter) in aqueous suspension at 2.5% w/v
- Mix AIE1035 solution with PS suspension at 1:10 volume ratio
- Incubate mixture for 24 hours at room temperature with gentle stirring
- Purify resulting AIE1035NPs by centrifugation at 14,000 rpm for 15 minutes
- Resuspend in phosphate buffer saline (PBS) and characterize using DLS and TEM [10]
Synthesis of Mo/Cu-POM Quencher
Materials:
- Sodium molybdate dihydrate (Na₂MoO₄·2H₂O)
- Copper chloride dihydrate (CuCl₂·2H₂O)
- Hydrochloric acid (HCl)
Procedure:
- Dissolve Na₂MoO₄·2H₂O (10 mmol) in 20 mL deionized water
- Add CuCl₂·2H₂O (1 mmol) to solution under vigorous stirring
- Adjust pH to 2.0 using 1M HCl
- Heat solution at 80°C for 4 hours under reflux
- Cool to room temperature and collect precipitate by centrifugation
- Wash precipitate three times with ethanol and dry under vacuum [10]
Assembly of AIE1035NPs@Mo/Cu-POM Nanosensor
Materials:
- AIE1035NPs suspension (2 mg/mL in PBS)
- Mo/Cu-POM suspension (1 mg/mL in deionized water)
Procedure:
- Mix AIE1035NPs and Mo/Cu-POM at mass ratio of 1:5
- Incubate mixture for 2 hours at room temperature with gentle shaking
- Purify assembled nanosensors by centrifugation at 12,000 rpm for 10 minutes
- Resuspend in PBS and characterize using TEM, XPS, and zeta potential measurements
- Confirm successful assembly by monitoring fluorescence quenching efficiency [10]
Plant Preparation and Nanosensor Implantation
Plant Material Selection and Growth Conditions
Materials:
- Arabidopsis thaliana (or other species: lettuce, spinach, pepper, tobacco)
- Growth chambers with controlled environment
- Standard growth media (soil or hydroponic)
Procedure:
- Germinate seeds under sterile conditions
- Grow plants for 4-6 weeks under controlled conditions (22°C, 60% humidity, 16/8h light/dark cycle)
- Maintain consistent watering and nutrient supply
- Acclimate plants to experimental conditions for 1 week prior to nanosensor implantation [10]
Nanosensor Implantation Protocol
Materials:
- AIE1035NPs@Mo/Cu-POM nanosensor suspension (1 mg/mL in PBS)
- Microsyringe with 33-gauge needle or high-pressure gene gun
- Sterile surgical tools
Procedure:
- For microinjection approach:
- Position target leaf and stabilize using soft foam padding
- Inject 5-10 μL nanosensor suspension into mesophyll tissue using microsyringe
- Apply gentle pressure at injection site to prevent backflow
- For gene gun bombardment:
- Precipitate nanosensors onto gold microparticles (1 μm diameter)
- Use helium pressure of 150-200 psi for bombardment
- Maintain target distance of 10 cm from particle launch to plant tissue
- Allow implanted nanosensors to distribute for 24 hours before imaging
- Monitor plant health indicators post-implantation [10]
NIR-II Fluorescence Imaging Setup
Microscopy Imaging for Cellular Resolution
Equipment:
- NIR-II microscope with 980 nm laser excitation
- InGaAs camera for NIR-II detection (1000-1700 nm range)
- Motorized XYZ stage for time-lapse imaging
- Environmental chamber for maintaining plant conditions during imaging
Imaging Parameters:
- Laser power: 100 mW/cm²
- Exposure time: 100-500 ms
- Frame rate: 1-10 frames per second for dynamic studies
- Spatial resolution: ~10 μm
- Acquisition intervals: 30 seconds to 5 minutes depending on experimental needs [10]
Whole-Plant Macroscopic Imaging
Equipment:
- NIR-II macroscopic imaging system with 808 nm or 980 nm excitation
- SWIR camera with spectral filters for NIR-II window
- Light-tight enclosure to eliminate background light
- Plant mounting platform with adjustable positioning
Imaging Parameters:
- Field of view: 10 × 10 cm to 20 × 20 cm
- Spatial resolution: 50-100 μm
- Acquisition time: 1-5 seconds per image
- Temporal series: Continuous monitoring or interval acquisition [10]
Stress Application and H₂O₂ Monitoring
Stress Treatment Protocols
Abiotic Stress Application:
- Drought Stress: Withhold watering and monitor soil moisture content
- Salt Stress: Apply 150 mM NaCl solution to root zone
- Cold Stress: Transfer plants to 4°C growth chamber
- Heat Stress: Expose plants to 38°C for designated periods
Biotic Stress Application:
- Pathogen Infection: Inoculate with Pseudomonas syringae (10⁸ CFU/mL)
- Herbivore Wounding: Mechanical wounding using pattern tool [10]
Data Acquisition and Analysis
Time-Lapse Imaging:
- Acquire baseline images before stress application
- Initiate continuous imaging 5 minutes before stress treatment
- Maintain imaging for predetermined period (typically 2-24 hours)
- Ensure consistent imaging parameters throughout experiment
Data Processing:
- Subtract background fluorescence using control regions
- Normalize fluorescence intensity to baseline values
- Calculate rate of H₂O₂ production from fluorescence increase
- Generate spatial maps of H₂O₂ distribution
- Apply machine learning classification for stress type identification [10]
The Scientist's Toolkit: Essential Research Reagents
Table 4: Key Research Reagent Solutions for H₂O₂ Monitoring with NIR-II Nanosensors
| Category | Specific Reagent/Product | Function/Application | Key Characteristics |
|---|---|---|---|
| NIR-II Fluorophores | AIE1035 dye | Fluorescence reporter | D-A-D structure, AIE properties, 1000-1350 nm emission |
| β-NaErF₄:2%Ce@NaYbF₄@NaYF₄ nanoparticles | Alternative NIR-II emitter | High quantum yield (50.1% in organic solvents) | |
| Ag₂S quantum dots | NIR-II contrast agent | Low toxicity, tunable emission (687-1294 nm) | |
| Sensor Components | Mo/Cu-POM | H₂O₂-responsive quencher | Oxygen vacancies, selective H₂O₂ response |
| PEG-b-PABE block copolymer | H₂O₂-responsive polymer | Boronate ester oxidation by H₂O₂ | |
| Assembly Materials | Polystyrene nanospheres | Fluorophore encapsulation | Uniform size, good biocompatibility |
| Phospholipid-PEG | Surface functionalization | Improved biocompatibility, reduced toxicity | |
| Imaging Equipment | InGaAs NIR-II camera | Signal detection | Spectral range 900-1700 nm, high sensitivity |
| 980 nm laser diode | Excitation source | Penetrates plant tissue, minimal autofluorescence | |
| Analysis Tools | Machine learning algorithms | Stress classification | >96.67% accuracy for stress type identification |
Applications and Validation Studies
Species-Independent Stress Monitoring
The NIR-II nanosensor platform has been validated across multiple plant species, demonstrating its broad applicability beyond model organisms. Successful monitoring of H₂O₂ signaling has been achieved in:
- Arabidopsis thaliana (model dicot)
- Lactuca sativa (lettuce, crop species)
- Spinacia oleracea (spinach, leafy green vegetable)
- Capsicum annuum (pepper, fruit-bearing crop)
- Nicotiana benthamiana (tobacco, model solanaceous species) [10]
This species independence represents a significant advantage over genetically encoded sensors, which require transformation and are typically limited to specific model organisms.
Machine Learning-Enhanced Stress Classification
Integration of machine learning algorithms with NIR-II imaging data enables highly accurate discrimination between different stress types based on H₂O₂ signaling patterns:
- Data Collection: Acquire time-lapse NIR-II fluorescence images during stress application
- Feature Extraction: Extract temporal and spatial features from H₂O₂ fluorescence signals
- Model Training: Train convolutional neural networks (CNNs) on labeled stress response data
- Classification: Implement real-time stress type identification with >96.67% accuracy [10]
This approach allows researchers not only to detect the presence of stress but also to identify the specific stress type based on characteristic H₂O₂ signaling signatures.
Troubleshooting and Technical Considerations
Common Experimental Challenges
Limited Nanosensor Penetration:
- Issue: Nanosensors restricted to injection site
- Solution: Optimize injection pressure/volume or use smaller nanosensor formulations
Variable Signal Intensity:
- Issue: Inconsistent fluorescence signals between plants
- Solution: Normalize signals to internal standards and standardize implantation protocols
Background Autofluorescence:
- Issue: Residual background in NIR-II window
- Solution: Implement spectral unmixing algorithms and optimize filter sets
Plant Tissue Damage:
- Issue: Physical damage from implantation procedure
- Solution: Refine microinjection techniques and allow recovery time post-implantation
Validation and Control Experiments
Essential control experiments for reliable data interpretation:
- Null Sensor Control: Use non-responsive nanosensors to account for non-specific distribution
- Stress Controls: Include unstressed plants to establish baseline H₂O₂ levels
- Sensor Specificity Controls: Validate H₂O₂ specificity using antioxidant treatments
- Viability Controls: Monitor plant health indicators throughout experiments
The protocols and applications described herein provide a comprehensive framework for implementing NIR-II fluorescent nanosensors to monitor H₂O₂ stress signaling in living plants, contributing valuable tools to the growing field of plant nanosensor research.
The detection of signaling molecules in vivo is a cornerstone of modern plant biology research. Nitric oxide (NO) is a crucial, lipid-soluble signaling molecule involved in regulating key plant processes, including photosynthetic activity, seed germination, stomatal movement, and stress responses [42]. However, its low concentration, short half-life (approximately 5 seconds), and the potential for diffusion loss or false positives during mechanical extraction present significant challenges for accurate detection [42] [43]. While fluorescence imaging offers a powerful solution, conventional fluorescent probes are often hampered by poor tissue penetration, limited biocompatibility, and an inability to cross the robust plant cell wall [42] [8].
Supramolecular chemistry provides a sophisticated approach to overcome these limitations. By designing systems based on non-covalent interactions—such as host-guest complexes—researchers can create sensors with optimized optical properties, enhanced stability, and improved biocompatibility [42] [44] [45]. This case study focuses on a supramolecular sensor, the β-CD/AIENAP complex, detailing its application for the fluorescence imaging of NO in plant tissues. The content is framed within a broader research context aiming to advance the in vivo implantation of nanosensors for real-time monitoring of plant physiology.
Sensor Design and Working Principle
Sensor Components and Synthesis
The β-CD/AIENAP sensor is constructed from two primary components:
AIENAP: An organic small molecule fluorophore designed with several key features:
- A naphthalimide core grafted with a triphenylamine group to achieve red emission ( > 600 nm), which provides stronger tissue penetration compared to probes with shorter emission wavelengths [42].
- An o-phenylenediamine group that serves as the specific recognition site for NO.
- Aggregation-induced emission (AIE) characteristics, meaning its fluorescence is enhanced in the aggregated state, avoiding the fluorescence quenching common to traditional dyes [42]. The molecule is synthesized via a Suzuki-Miyaura coupling reaction between NAP precursor, triphenylboronic acid, and a palladium catalyst, followed by purification and characterization using NMR and HRMS [42].
β-Cyclodextrin (β-CD): A macrocyclic host molecule composed of glucose units, forming a conical hydrophobic cavity with a hydrophilic outer surface. Its size is smaller than the pore size of the plant cell wall (typically 20 nm), allowing it to traverse this barrier [42].
The supramolecular sensor is fabricated by simply encapsulating the AIENAP molecule within the hydrophobic cavity of β-CD in an aqueous solution, forming the β-CD/AIENAP host-guest complex [42].
Signaling Mechanism
The sensor operates via a specific turn-on fluorescence mechanism triggered by the reaction with NO, as shown in the diagram below.
The mechanism involves two key stages:
- Supramolecular Assembly: The encapsulation of AIENAP by β-CD rigidifies the molecular conformation, which enhances its optical properties and boosts the fluorescence quantum yield [42].
- Sensing Reaction: In the absence of NO, the fluorescence of the AIENAP core is quenched by the o-phenylenediamine group via a photoinduced electron transfer (PET) effect. Upon encountering NO, the o-phenylenediamine group undergoes a series of reactions, culminating in the formation of a fluorescent benzotriazole derivative. This reaction switches off the PET effect, resulting in a significant turn-on fluorescence signal that can be quantitatively correlated with NO concentration [42].
Performance Characteristics and Experimental Setup
Key Performance Metrics
The β-CD/AIENAP sensor exhibits performance parameters suitable for sensitive plant science applications, as summarized in the table below.
Table 1: Key Performance Metrics of the β-CD/AIENAP Sensor
| Parameter | Performance Value | Experimental Significance |
|---|---|---|
| Detection Mechanism | Turn-on fluorescence | Enables detection against a dark background, reducing false positives. |
| Emission Wavelength | > 600 nm (Red emission) | Minimizes interference from plant autofluorescence and allows deeper tissue penetration [42]. |
| Limit of Detection (LOD) | 77 nM | High sensitivity suitable for detecting physiological levels of NO in plants [42]. |
| Response Time | ~2 minutes | Allows for rapid, real-time monitoring of dynamic NO fluctuations [42]. |
| Biocompatibility | High (Improved by β-CD) | Minimizes phytotoxicity, enabling long-term in vivo studies without disrupting normal plant physiology [42]. |
| Cell Wall Penetration | Effective (Size < 20 nm) | Crucial for intracellular NO sensing, which more directly reflects the true physiological state of plants [42]. |
Research Reagent Solutions
The following table lists the essential materials and reagents required to replicate the experiments using the β-CD/AIENAP sensor.
Table 2: Essential Research Reagents and Materials
| Reagent/Material | Function/Description | Experimental Role |
|---|---|---|
| AIENAP Fluorophore | Synthesized red-emissive AIE molecule with o-phenylenediamine group. | Core sensing element that specifically reacts with NO to generate fluorescence signal [42]. |
| β-Cyclodextrin (β-CD) | Macrocyclic oligosaccharide host molecule. | Improves solubility, biocompatibility, and optical properties of AIENAP; enables cell wall penetration [42] [44]. |
| NO Donors (e.g., SNAP) | Compounds that spontaneously release NO under physiological conditions [43]. | Used as positive controls to validate sensor response and for calibration experiments. |
| NO Scavengers (e.g., Carboxy-PTIO) | Compounds that stoichiometrically react with and remove NO [43]. | Used as negative controls to confirm the specificity of the observed fluorescence signal. |
| Appropriate Plant Model | e.g., Nicotiana benthamiana or Arabidopsis thaliana. | Provides the biological context for in vivo imaging and stress application [42] [46]. |
Detailed Experimental Protocol
Sensor Preparation and Calibration
Procedure:
- Synthesis of AIENAP: Dissolve NAP (621 mg, 1.63 mM), triphenylboronic acid (518 mg, 1.79 mM), and Pd(PPh3)4 (50 mg) in a mixed solvent of tetrahydrofuran (20 mL) and N,N-dimethylformamide (5 mL). Stir the mixture under a nitrogen atmosphere for 10 minutes. Inject an aqueous solution of K2CO3 (5 mL, 8.1 mM) and react at 80 °C for 8 hours under nitrogen. After cooling, remove the solvents by rotary evaporation, add deionized water, and extract with dichloromethane. Purify the crude product by silica gel column chromatography to obtain the pure AIENAP compound [42].
- Preparation of β-CD/AIENAP Complex: Prepare a stock solution of β-CD in buffer (e.g., 10 mM PBS, pH 7.4). Dissolve the synthesized AIENAP in a suitable solvent like DMSO to create a stock solution. Add the AIENAP stock solution to the β-CD solution under vigorous stirring to achieve a specific molar ratio (e.g., 1:1 or as optimized). Stir the mixture for several hours at room temperature to allow the host-guest complex to form [42].
- In vitro Calibration:
- Prepare a series of solutions with known concentrations of an NO donor (e.g., SNAP) in a suitable buffer.
- Incubate a fixed concentration of the β-CD/AIENAP sensor with each standard solution.
- After a 2-minute incubation, measure the fluorescence intensity (Excitation/Emission: e.g., ~470/550 nm, depending on the specific probe).
- Plot the fluorescence intensity versus the calculated NO concentration to generate a calibration curve for semi-quantitative analysis [42] [47].
Plant Sample Preparation and Staining
Procedure:
- Plant Growth and Stress Induction: Grow plants (e.g., Arabidopsis or tobacco) under controlled conditions. To study NO bursts, subject a group of plants to abiotic stress, such as drought, salinity, or pathogen elicitors, while maintaining a control group [42].
- Sensor Infiltration:
- For leaf tissues, use a needleless syringe to infiltrate the prepared β-CD/AIENAP sensor solution from the abaxial (lower) side of the leaf. Apply gentle pressure to force the sensor solution into the intercellular spaces.
- For root imaging, carefully excavate and rinse the root system, then incubate the roots in the sensor solution for a predetermined duration [42] [46].
- Incubation and Washing: Incubate the infiltrated plant samples in the dark for a short period (e.g., 15-30 minutes) to allow the sensor to penetrate cells and react with any endogenous NO. Gently rinse the samples with fresh buffer to remove excess, unreacted sensor and reduce background signal [42] [48].
Image Acquisition and Data Analysis
Procedure:
- Microscope Setup: Utilize a confocal laser scanning microscope (LSCM) equipped with lasers and filters appropriate for the sensor's excitation and emission wavelengths. A spinning disk confocal system is recommended for faster imaging to capture dynamic processes [48].
- Image Acquisition:
- Place the stained plant sample (e.g., leaf disc, root) on a microscope slide.
- Set the microscope parameters: use a 20x or 40x objective lens, set the laser power and gain to levels that avoid saturation and minimize photobleaching, and adjust the pinhole for optimal optical sectioning.
- Acquire fluorescence images from both stress-treated and control plant tissues. To minimize autofluorescence interference from chlorophyll, use appropriate spectral unmixing or choose filter sets that best separate the sensor's signal from plant background [48].
- Data Processing and Quantification:
- Use image analysis software (e.g., ImageJ/Fiji) to quantify the mean fluorescence intensity in specific regions of interest (ROIs), such as individual cells or tissue areas.
- Normalize the fluorescence intensities against the control conditions or use ratiometric methods if available.
- Generate false-color images to visually represent the spatial distribution and relative levels of NO within the plant tissues [42] [48].
The overall experimental workflow, from sensor preparation to data analysis, is illustrated below.
Application in Plant Stress Research
This protocol was successfully applied to visualize the distribution of NO in plant tissues under different spatial and temporal conditions, particularly in response to abiotic stress [42]. The sensor enabled semi-quantitative analysis, revealing elevated NO levels in specific cell types during stress response. Furthermore, the technology proved valuable for visually tracking the effect of exogenous NO donors on plant stress responses, providing a tool to explore slow-release effects and early stress warning before the appearance of physical symptoms [42].
Troubleshooting and Technical Notes
- Low Signal-to-Noise Ratio: Ensure thorough washing after incubation to remove unbound probe. Optimize sensor concentration and incubation time to maximize specific binding while minimizing background. Use spectral unmixing to separate sensor fluorescence from plant autofluorescence [48].
- Sensor Toxicity or Artifacts: The incorporation of β-CD significantly enhances biocompatibility. Nevertheless, control experiments with scavengers (e.g., Carboxy-PTIO) are essential to confirm that the observed fluorescence is specifically due to NO and not a result of sensor-induced stress or interaction with other reactive species [42] [43].
- Variable Penetration: Plant cell walls are significant barriers. The small size of the β-CD/AIENAP complex is a key advantage. For some tissues or species, slight vacuum infiltration or the use of surfactants (e.g., 0.01% Tween-20) may improve uniformity, but these should be tested for phytotoxicity [42] [46].
Understanding the real-time dynamics of key metabolites and ions is fundamental to advancing plant science. The in vivo implantation of nanosensors represents a transformative approach for monitoring physiological processes directly within living plant tissues, offering unprecedented spatial and temporal resolution. This protocol details methodologies for tracking three critical targets: glucose, ATP, and calcium ions (Ca²⁺), which play pivotal roles in plant energy metabolism, signaling, and stress responses [6] [23]. Traditional methods for analyzing these molecules often require tissue destruction, preventing dynamic measurements and leading to the loss of crucial information about rapid fluctuations and spatial gradients [49]. In vivo biosensors overcome these limitations by enabling continuous, non-destructive monitoring within the native plant environment, thereby providing a more accurate picture of plant physiology [33] [50].
These advanced sensing tools are particularly valuable for research framed within the context of a broader thesis on in vivo implantation technologies. The integration of nanotechnology with plant biology has facilitated the development of highly sensitive and specific sensors that can be deployed directly into plant tissues with minimal disruption to normal physiological functions [6] [23]. For instance, the "bioristor," a textile-based organic electrochemical transistor (OECT) integrated into plant stems, has demonstrated the feasibility of long-term (up to six weeks) real-time monitoring of sap electrolyte content, revealing circadian patterns in solute concentration [33]. Similarly, genetically encoded sensors using fluorescent proteins and FRET (Förster Resonance Energy Transfer) technology have enabled the visualization of metabolite gradients and ion fluxes at cellular and subcellular levels [51] [52]. This document provides a comprehensive framework for implementing these cutting-edge techniques, complete with detailed protocols, reagent specifications, and visualization tools to support researchers in the rigorous application of these methods.
Sensor Technologies and Working Principles
In vivo plant sensing employs diverse technological platforms, each with distinct mechanisms and applications. The table below summarizes the primary biosensor types used for tracking metabolites and ions in plants.
Table 1: Biosensor Platforms for In Vivo Plant Sensing
| Sensor Type | Transduction Mechanism | Key Analytes | Spatial Resolution | Implementation Method |
|---|---|---|---|---|
| FRET-based Optical Nanosensors | Energy transfer between donor and acceptor fluorophores upon analyte binding [51] [23] | ATP, Ca²⁺, glucose, phytohormones [23] [52] | Cellular to subcellular [23] | Genetically encoded or exogenously applied [23] |
| Electrochemical Sensors | Measurement of electrical current/voltage changes from redox reactions [6] [50] | Glucose, sucrose, pesticides, toxins [6] | Tissue to organ level [33] | Implanted electrodes or bioristors [33] |
| Plasmonic Nanoprobes | Surface-enhanced Raman scattering (SERS) and photoluminescence [53] | microRNA, nucleic acids [53] | ~200 μm [53] | Infiltrated nanoparticles [53] |
| Textile-Based OECTs (Bioristor) | Conductivity modulation of polymer by ionic content in sap [33] | Sap electrolyte concentration, abiotic stress markers [33] | Organ level (stem) [33] | Direct insertion into stem [33] |
Mechanisms of Action Visualization
The following diagrams illustrate the fundamental working principles of the primary biosensor technologies used for in vivo plant metabolite and ion sensing.
Diagram 1: Biosensor working principles for plant metabolite detection.
Research Reagent Solutions
Successful implementation of in vivo sensing protocols requires specific reagents and materials. The following table catalogues essential research reagent solutions for tracking metabolites and phytohormones in plants.
Table 2: Essential Research Reagents for In Vivo Plant Sensing
| Reagent/Material | Function/Application | Examples & Key Characteristics |
|---|---|---|
| Genetically Encoded FRET Sensors | Ratiometric detection of specific analytes in live cells [51] [23] | ATeam1.03-nD/nA: ATP sensing [52]Cameleons: Ca²⁺ detection [23]FLIP Sensors: Glucose/sucrose monitoring [23] |
| Conductive Polymers | Transducer element in electrochemical sensors [6] [33] | PEDOT:PSS: Used in bioristor for sap monitoring [33]Polypyrrole: Membrane material for selectivity [50] |
| Nanoparticles | Signal enhancement, targeted sensing [6] [53] | Gold Nanostars: SERS-based miRNA detection [53]Quantum Dots: Fluorescent tags in FRET sensors [23] |
| Functionalized Textile Fibers | Scaffold for implantable sensors [33] | Cotton Threads: Biocompatible substrate for bioristor integration [33] |
| Permeable Membranes | Selectivity enhancement, fouling prevention [50] | Nafion: Cation selectivity in electrodes [50]PLGA/PVA Composites: Biocompatible coating with drug elution [50] |
Experimental Protocols
Protocol 1: Monitoring Cytosolic ATP Dynamics with FRET-Based Sensors
Principle: The ATeam1.03-nD/nA biosensor utilizes FRET between mseCFP (donor) and cp173-mVenus (acceptor) fluorophores linked by the ε-subunit of Bacillus ATP synthase. ATP binding induces a conformational change that alters FRET efficiency, providing a ratiometric readout of MgATP²⁻ concentration [52].
Materials:
- Arabidopsis lines expressing ATeam1.03-nD/nA in cytosol
- Confocal or fluorescence microscope with 440 nm and 515 nm filters
- Image analysis software (e.g., ImageJ with FRET analysis plugins)
- Controlled environment growth chambers
Procedure:
- Plant Material Preparation: Utilize homozygous Arabidopsis lines expressing cytosolic-targeted ATeam1.03-nD/nA under the CaMV 35S promoter. Grow plants under standard conditions (22°C, 16/8h light/dark) for 5-7 days [52].
- Microscopy Setup: Configure microscope for ratiometric imaging using 440 nm excitation and simultaneous collection of 475 nm (mseCFP) and 530 nm (cp173-mVenus) emissions [52].
- Image Acquisition: Capture baseline images of seedlings. For time-series experiments, acquire images at 1-5 minute intervals depending on experimental treatment.
- Hypoxia Treatment: To observe ATP dynamics, expose seedlings to progressive hypoxia by replacing atmospheric oxygen with nitrogen in an imaging chamber [52].
- Data Processing: Calculate Venus/CFP emission ratios for each time point. Convert ratios to MgATP²⁻ concentrations using the in vitro calibration curve (Kd ~3.5 mM at pH 7.5, 22°C) [52].
- Validation: Confirm sensor functionality by applying mitochondrial inhibitors (e.g., cyanide) to deplete ATP, or uncouplers (e.g., FCCP) to increase ATP demand [52].
Expected Outcomes: Cytosolic ATP concentrations typically range from 0.5-1.5 mM in aerobic conditions with distinct tissue gradients (e.g., higher in root tips than mature zones). Hypoxia induces rapid ATP depletion, with kinetics varying by tissue type and severity of oxygen deprivation [52].
Protocol 2: Real-Time Sap Solute Monitoring with Implantable Bioristor
Principle: The bioristor is a textile-based organic electrochemical transistor (OECT) functionalized with conductive polymer (PEDOT:PSS). Ionic solute fluctuations in the xylem sap modulate the polymer's conductivity, enabling real-time monitoring of sap electrolyte dynamics [33].
Materials:
- Textile fiber (cotton) functionalized with PEDOT:PSS
- Silver gate electrode
- Source-meter unit for electrical measurements
- Data acquisition system
- Tomato plants (3-4 weeks old)
Procedure:
- Sensor Fabrication: Functionalize natural textile fibers by repeated immersion in PEDOT:PSS solution. Air-dry between immersions to build conductive polymer coating [33].
- Plant Preparation: Select healthy tomato plants at 3-4 week growth stage. Identify stem region between first and second leaf for implantation.
- Sensor Implantation: Insert functionalized textile fiber 2-3 cm into stem parenchyma tissue using sterile micro-syringe guide. Position silver gate electrode in adjacent soil [33].
- Electrical Measurements: Apply fixed drain-source voltage (Vds = -0.4 V) and gate voltage steps (Vg = 0-1 V). Monitor drain-source current (Ids) continuously [33].
- Data Processing: Calculate sensor response (R) as R = (I₀ - I)/I₀ × 100, where I₀ is initial Ids and I is steady-state Ids after Vg application [33].
- Circadian Rhythm Analysis: Collect continuous measurements over 24-48 hours. Apply Fourier transformation to identify periodic components in R values [33].
Expected Outcomes: Sensor response (R) displays clear circadian oscillation, increasing during dark periods and decreasing during light periods, reflecting solute concentration changes in xylem sap. Periodicity analysis should reveal ~24h cycles [33].
Protocol 3: Calcium Ion Imaging with Genetically Encoded Yellow Cameleons
Principle: Yellow Cameleons are FRET-based Ca²⁺ sensors consisting of calmodulin (CaM) and M13 peptide flanked by CFP and YFP. Ca²⁺ binding induces conformational change that increases FRET efficiency [23].
Materials:
- Arabidopsis or Lotus japonicus expressing Yellow Cameleon
- Confocal microscope with CFP/YFP filter sets
- Perfusion system for stimulus application
- Image analysis software
Procedure:
- Plant Preparation: Use transgenic plants expressing Yellow Cameleon (e.g., YC3.6) in cell types of interest. For root studies, grow plants on vertical plates [23].
- Microscopy Configuration: Set up time-lapse imaging with 440 nm excitation and sequential collection of CFP (475 nm) and FRET (530 nm) channels [23].
- Stimulus Application: Apply defined stimuli (e.g., mechanical touch, osmotic stress, or microbial elicitors) via perfusion system during image acquisition.
- Ratiometric Analysis: Calculate FRET/CFP ratio images after background subtraction. Generate ratio values over time for regions of interest [23].
- Calibration: Perform in vivo calibration using Ca²⁺ ionophores (ionomycin) in Ca²⁺-free and high-Ca²⁺ buffers to establish dynamic range [23].
Expected Outcomes: Ca²⁺ signatures exhibit stimulus-specific spatiotemporal patterns, including oscillations, waves, and gradients. Response amplitudes and kinetics vary with stimulus type and intensity [23].
Data Analysis and Interpretation
Quantitative Sensor Characteristics
Understanding the performance specifications of different biosensors is crucial for experimental design and data interpretation. The following table summarizes key quantitative parameters for the featured sensing platforms.
Table 3: Performance Metrics of Featured Plant Biosensors
| Sensor & Target | Dynamic Range / Detection Limit | Temporal Resolution | Spatial Resolution | Key Interferences |
|---|---|---|---|---|
| ATeam1.03-nD/nA (ATP) | Kd = 3.5 mM (at pH 7.5, 22°C) [52] | 30 seconds to 5 minutes [52] | Subcellular compartmentalization [52] | Minimal pH sensitivity in physiological range [52] |
| Bioristor (Sap Solutes) | Linear response to electrolyte concentration [33] | 24 minutes per measurement cycle [33] | Whole stem level [33] | Composite signal from all ionic solutes [33] |
| Yellow Cameleon (Ca²⁺) | Kd = 100-600 nM (depending on variant) [23] | Sub-second to seconds [23] | Cellular to subcellular [23] | pH fluctuations below pH 7.0 [23] |
| FLIPglu (Glucose) | Kd = 600 μM for glucose [23] | 1-5 minutes [23] | Cellular resolution [23] | Specific for glucose over other sugars [23] |
Experimental Workflow Visualization
The following diagram outlines the comprehensive workflow for planning and executing in vivo sensing experiments in plants, from sensor selection to data interpretation.
Diagram 2: Comprehensive workflow for in vivo plant sensing experiments.
Troubleshooting and Technical Considerations
Sensor Biocompatibility and Perturbation: A critical consideration in in vivo sensing is minimizing disruption to normal plant physiology. While cytosolic and plastid-expressed ATeam1.03-nD/nA sensors show no phenotypic alterations, mitochondrial-targeted expression can cause dwarfism and organelle abnormalities [52]. Similarly, bioristor implantation requires careful insertion to avoid vascular damage [33]. Always include appropriate controls to distinguish physiological responses from sensor-induced artifacts.
Environmental Control: Maintain consistent environmental conditions during experiments, as metabolite and ion dynamics are influenced by light, temperature, and humidity. For circadian studies, ensure precise control of photoperiod conditions before and during monitoring [33].
Signal Calibration and Normalization: Ratiometric sensors like FRET-based probes provide internal calibration, but in vitro characterization under plant physiological conditions (pH, temperature) is essential for quantitative interpretation [52]. Electrochemical sensors may require periodic recalibration against known standards.
Multiplexing Capabilities: While this protocol focuses on single-analyte detection, emerging technologies enable parallel monitoring of multiple targets. For example, recent advances allow separate imaging of two molecules simultaneously, opening possibilities for studying metabolite interactions and signaling cascades [51].
The in vivo implantation of nanosensors in plant tissues represents a transformative frontier in plant science, enabling the direct, real-time monitoring of physiological processes. The full potential of this technology is unlocked through its integration with two key enabling technologies: wireless readout systems and machine learning (ML) data analysis. Wireless readout eliminates the need for physical connections that can damage delicate plant tissues and compromise experimental integrity, allowing for continuous, non-destructive data acquisition from living plants. Concurrently, machine learning provides the computational framework necessary to decipher complex, multi-dimensional datasets generated by these sensors, extracting meaningful biological signals from noise and identifying subtle patterns indicative of plant health, stress, or developmental status. This document details the application notes and experimental protocols for implementing these technologies within a research program focused on the in vivo implantation of plant nanosensors.
Wireless Readout Technologies for Implanted Nanosensors
A primary challenge in live-plant monitoring is obtaining data without inducing damage through wired connections. Wireless data and power transfer systems offer a viable solution.
Resonant Inductive Coupling for Power and Data Transfer
One established method for wireless operation is resonant inductive coupling. This approach functions by using a matched pair of radio-frequency coils as a transmitter and receiver [54]. The receiver circuit, which includes the implanted nanosensor, is integrated into a structure designed for minimal plant impact. The transmitter coil can be positioned externally, for instance, adjacent to a plant stem or leaf where the sensor is implanted. This setup enables remote impedance measurements of the sensor without a direct electrical connection.
Application Note: This system has been successfully validated in biomedical models for tracking inflammatory biomarkers like IL-6, showing a strong correlation (R² > 0.9) with standard ELISA results [54]. For plant science, this technology can be adapted for sensors detecting specific ions or signaling molecules, enabling real-time monitoring of plant stress responses.
Optical Readout of Near-Infrared (NIR) Fluorescent Nanosensors
An alternative wireless readout strategy utilizes optical sensing with near-infrared (NIR) fluorescent nanosensors. These sensors are implanted in plant tissues and respond to target analytes through changes in their fluorescence intensity in the NII range (1000–1700 nm) [10] [36]. A key advantage of NIR light is its ability to penetrate plant tissues more effectively than visible light and avoid interference from chlorophyll autofluorescence.
Application Note: This method is entirely passive and does not require power to be delivered to the sensor. The readout is performed by external NIR imaging systems or microscopes, making it a truly non-invasive wireless monitoring technique. This approach has been used to monitor hydrogen peroxide (H₂O₂) signaling during stress and the primary auxin hormone indole-3-acetic acid (IAA) [10] [36].
Table 1: Comparison of Wireless Readout Technologies for Implanted Nanosensors
| Technology | Principle | Key Advantages | Limitations | Example Plant Analytics |
|---|---|---|---|---|
| Resonant Inductive Coupling [54] | Resonant inductive coupling for power transfer and remote impedance measurement. | Provides power wirelessly; enables continuous monitoring; suitable for electronic biosensors. | Requires precise coil alignment; performance dependent on proximity and orientation. | Impedance-based detection of ions, proteins, or other biomarkers. |
| NIR Fluorescence Imaging [10] [36] | Measurement of fluorescence intensity changes in response to analyte binding. | Non-invasive; avoids chlorophyll interference; high spatial and temporal resolution. | Limited by light penetration depth in thicker tissues; requires specialized NIR cameras. | H₂O₂ [10], IAA (auxin) [36], Fe(II)/Fe(III) ions [55]. |
Machine Learning Data Analysis for Nanosensor Output
The signals from implanted nanosensors can be weak, complex, and confounded by noise. Machine learning techniques are increasingly critical for processing this data to achieve accurate, actionable insights [56].
ML for Signal Classification and Stress Identification
Machine learning models, particularly classifiers, can be trained to automatically identify specific plant states based on sensor data. For example, a dataset of fluorescence signals from a H₂O₂-responsive NIR-II nanosensor can be used to train a model that classifies the type of stress a plant is experiencing.
Application Note: In one implementation, a machine learning model trained on NIR-II fluorescence data achieved an accuracy exceeding 96.67% in differentiating between four distinct types of plant stress [10]. This demonstrates the power of ML to translate raw optical sensor data into highly reliable diagnostic information.
ML for Enhancing Sensor Specificity and Functionality
ML algorithms are also employed to improve the quality of the sensor data itself. They can help in discriminating between different analytes or in deconvoluting signals from complex environments. For instance, electrochemical nanosensors often produce multi-factorial data that can be processed with ML to enhance their specificity and sensitivity against confounding signals [56].
Experimental Protocols
Protocol 1: Implantation and Wireless Monitoring of a NIR Fluorescent Nanosensor
This protocol details the procedure for implanting a NIR fluorescent nanosensor for real-time monitoring of target analytes like H₂O₂ or IAA, based on published methodologies [10] [36].
Workflow Overview:
Materials:
- NIR fluorescent nanosensor (e.g., single-walled carbon nanotubes wrapped with a specific polymer for target recognition) [36] [55].
- Target plant specimen (e.g., Arabidopsis thaliana, spinach, tobacco).
- NIR fluorescence imaging system (microscope or whole-plant imager with capabilities for 1000-1700 nm detection).
- Micro-syringe or microneedle for infiltration.
- Buffer solution for sensor suspension.
Procedure:
- Nanosensor Preparation: Suspend the nanosensor in an appropriate buffer solution (e.g., sterile deionized water or mild buffer) to create a stable dispersion. Centrifuge if necessary to remove aggregates.
- Plant Preparation: Grow plants under controlled conditions until the desired developmental stage. Acclimatize plants to the experimental environment for at least 24 hours.
- Sensor Implantation:
- Using a micro-syringe or microneedle, carefully infiltrate a small volume (e.g., 1-10 µL) of the nanosensor suspension into the plant tissue of interest (e.g., leaf mesophyll, stem cortex).
- Avoid causing significant physical damage. The goal is to introduce the sensors into the apoplastic space or specific cell layers.
- Allow the plant to recover and the sensor signal to stabilize for a predetermined period (e.g., 1-2 hours).
- Wireless NIR Readout:
- Position the plant under the NIR imaging system.
- Focus on the area of sensor implantation.
- Acquire a baseline time-series of NIR fluorescence images.
- Apply the experimental stimulus (e.g., light stress, pathogen elicitor, nutrient solution).
- Continue acquiring time-series images to monitor fluorescence changes in response to the stimulus.
- Data Processing & ML Analysis:
- Use image analysis software to quantify the fluorescence intensity from the region of interest over time.
- Export the time-series data for further analysis.
- Input the processed fluorescence data into a pre-trained machine learning model (e.g., a classifier) to identify the plant's stress state or physiological status [10].
Protocol 2: Validation of Sensor Performance and Specificity
Workflow Overview:
Procedure:
- In Vitro Titration:
- Prepare a series of standard solutions with known concentrations of the target analyte across the expected physiological range (e.g., from 500 pM to 5 μM for a hormone) [54].
- Measure the sensor's response (e.g., impedance change, fluorescence shift) to each concentration in triplicate.
- Generate a standard titration curve by fitting the data with a regression model (e.g., a rational function). The model should yield a high coefficient of determination (e.g., R² > 0.98) and a low root mean square error (RMSE) [54].
- In Vivo Application:
- Implant the sensor into live plants as described in Protocol 1.
- Apply the relevant treatments and record the sensor's output in real-time.
- Reference Method Validation:
- Following sensor measurement, destructively harvest plant tissue samples from the same location or a comparable one.
- Analyze the analyte concentration in these samples using a established, independent method such as ELISA, Liquid Chromatography-Mass Spectrometry (LC-MS), or High-Performance Liquid Chromatography (HPLC) [54] [36].
- Perform a statistical correlation analysis (e.g., linear regression) between the sensor-derived data and the data from the traditional method to validate the sensor's accuracy and reliability in a complex biological environment [54].
Table 2: Key Performance Metrics from Exemplary Nanosensor Studies
| Sensor Target | Sensor Type | Linear Range / Detection Limit | Key Performance Metric | Validation Method | Reference |
|---|---|---|---|---|---|
| IL-6 Protein | Wireless Impedance (Electronic) | Titration from 500 pM to 5 μM | Strong correlation with ELISA (R² > 0.9) | ELISA on collected wound fluid | [54] |
| H₂O₂ Signaling | NIR-II Fluorescent (Optical) | Sensitivity: 0.43 μM | Stress classification accuracy: > 96.67% | Machine learning model validation | [10] |
| Auxin (IAA) | NIR Fluorescent (Optical) | Real-time measurement in planta | Species-agnostic; direct measurement | Correlation with physiological phenotypes | [36] |
| Fe(II) and Fe(III) | NIR Fluorescent (Optical) | Simultaneous detection in planta | High spatial and temporal resolution | Demonstration across multiple plant species | [55] |
The Scientist's Toolkit: Essential Research Reagents & Materials
Table 3: Key Research Reagent Solutions for In Vivo Plant Nanosensor Research
| Item Name | Function/Description | Example Application |
|---|---|---|
| Single-Walled Carbon Nanotubes (SWNTs) | Serve as a highly sensitive and photostable platform for NIR fluorescent sensors. Can be functionalized with various polymers for specific analyte detection. | Base material for NIR sensors detecting IAA [36], H₂O₂ [10], and Iron [55]. |
| Corona Phase Molecular Recognition (CoPhMoRe) | A technique to wrap SWNTs with a library of polymers, creating a selective corona phase that binds specific target molecules, altering SWNT fluorescence. | Enables the development of highly specific nanosensors without the need for genetic plant modification [36] [55]. |
| NIR-II Fluorescence Imaging System | A microscope or macroscope equipped with lasers and detectors for the NIR-II range (1000-1700 nm). Allows deep tissue penetration and minimizes autofluorescence. | Essential for wireless, optical readout of implanted SWNT-based nanosensors [10]. |
| Machine Learning Classifier (e.g., SVM, CNN) | A computational algorithm trained to categorize complex sensor output data into predefined classes (e.g., type of stress, nutrient status). | Classifying H₂O₂ fluorescence signatures to identify plant stress types with high accuracy [10]. |
| RFID Coils & Lock-in Amplifier | Components of a resonant inductive coupling system for wireless power and data transfer to implanted electronic (impedance-based) nanosensors. | Enables wireless operation of implantable biosensors for continuous monitoring [54]. |
Navigating Technical Challenges and Enhancing Sensor Performance
Ensuring Biocompatibility and Minimizing Phytotoxicity of Nanomaterials
The in vivo implantation of nanosensors in plant tissues represents a frontier in plant science, enabling real-time monitoring of signaling molecules, metabolites, and pathogens [23]. However, the success of this technology hinges on overcoming two principal challenges: ensuring the biocompatibility of the nanomaterial (NM) with plant tissues and minimizing its potential phytotoxic effects. Uncontrolled nano-stress can induce a cascade of adverse physiological responses, including oxidative stress, biomolecular damage, and genotoxicity, which can compromise both the plant's health and the sensor's function [57] [58]. This Application Note provides a detailed protocol for the pre-implantation evaluation of nanomaterials, focusing on characterization, in vivo phytotoxicity assessment, and the application of mitigation strategies to ensure reliable and sustainable plant-nanosensor integration.
Comprehensive Characterization of Nanomaterials
Thorough physico-chemical characterization is the critical first step in evaluating NM safety, as the properties of NMs dictate their biological interactions [59]. The following parameters must be established prior to any in vivo experimentation.
Table 1: Essential Characterization Parameters for Nanomaterials Intended for Plant Implantation
| Parameter | Description | Relevant Standard/Guidance |
|---|---|---|
| Chemical Composition & Purity | Elemental makeup and presence of impurities. | ISO/TS 10993-19 [59] |
| Particle Size & Size Distribution | Hydrodynamic diameter, polydispersity index. | ISO/TR 13014 [59] |
| Agglomeration/Aggregation State | Tendency of particles to cluster in solution. | ISO/TR 13014 [59] |
| Shape/Morphology | Physical form (e.g., spherical, rod, tubular). | ISO/TS 10993-19 [59] |
| Surface Area | Specific surface area, which influences reactivity. | ISO/TR 13014 [59] |
| Surface Charge (Zeta Potential) | Indicator of colloidal stability and interaction with biological membranes. | ISO/TR 13014 [59] |
| Solubility/Dispersibility | Behavior in relevant biological and extraction media. | ISO/TR 10993-22 [59] |
Experimental Protocol: Basic Characterization Workflow
Objective: To determine the key physico-chemical properties of a newly synthesized NM. Materials:
- Nanomaterial powder or suspension.
- Relevant solvents (e.g., deionized water, physiological buffers).
- Sonicator (e.g., QSONICA Sonicators).
Procedure:
- Sample Preparation: Prepare a stable suspension of the NM in an appropriate solvent (e.g., deionized water) at a standardized concentration (e.g., 100 µg/mL). Sonicate the suspension for 30 minutes to minimize aggregation prior to analysis [60].
- Dynamic Light Scattering (DLS): Use a instrument such as a Malvern Zetasizer Nano-ZS to measure the hydrodynamic diameter, polydispersity index (PDI), and zeta potential of the NM suspension. Perform measurements in triplicate.
- Electron Microscopy: Analyze the NM using Transmission Electron Microscopy (TEM) or Field-Emission Scanning Electron Microscopy (FESEM) to confirm primary particle size, size distribution, and shape. This provides a direct visualization complementary to DLS [60].
- Crystallographic and Chemical Analysis: Employ X-ray Diffraction (XRD) to determine the crystallographic structure and X-ray Photoelectron Spectroscopy (XPS) for surface chemistry analysis [60].
In Vivo Phytotoxicity and Biocompatibility Assessment
Following characterization, NMs must be evaluated in living plant systems to assess their biological impact. The following protocol outlines a multi-parametric approach.
Experimental Protocol: In Vivo Implantation and Phytotoxicity Screening
Objective: To evaluate the physiological, biochemical, and histological responses of plant tissues to implanted nanomaterials. Materials:
- Sterilized plant seeds (e.g., Arabidopsis thaliana, Oryza sativa).
- Nanomaterial suspensions at various concentrations.
- Equipment for biochemical analysis (spectrophotometer, centrifuge).
- Histological staining kits.
Procedure:
- Experimental Setup: Implant the NM into the target plant tissue (e.g., via micro-injection into stems or leaves) at a range of concentrations. Include a control group implanted with an inert buffer.
- Morphological and Growth Analysis: After a predetermined period (e.g., 2-4 weeks), assess:
- Oxidative Stress and Antioxidant Response Analysis:
- Homogenize plant tissues and centrifuge to collect supernatant.
- Quantify Reactive Oxygen Species (ROS) using fluorescent probes like H₂DCFDA.
- Measure lipid peroxidation by quantifying Malondialdehyde (MDA) content via the thiobarbituric acid reactive substances (TBARS) assay.
- Assess antioxidant enzyme activity by measuring the levels of superoxide dismutase (SOD), catalase (CAT), and glutathione peroxidase (GPx) [61] [58].
- Genotoxicity Assessment:
- Isplant DNA from control and treated tissues.
- Perform a comet assay (single-cell gel electrophoresis) to detect DNA strand breaks, a key indicator of genotoxicity [58].
- Histopathological Examination:
- Section the implanted tissue and adjacent areas.
- Stain with appropriate dyes (e.g., Toluidine Blue) and examine under a microscope for cellular damage, tissue necrosis, and inflammatory-like responses [61].
Table 2: Key Phytotoxicity Endpoints and Their Interpretations
| Endpoint | Measurement Technique | Significance of Adverse Finding |
|---|---|---|
| Biomass Reduction | Fresh/Dry weight measurement | General growth inhibition and metabolic disruption. |
| ROS Production | Fluorescence assay (H₂DCFDA) | Induction of oxidative stress, leading to cellular damage. |
| Lipid Peroxidation | TBARS Assay (MDA content) | Loss of membrane integrity and function. |
| Antioxidant Enzyme Activity | Spectrophotometric assays (SOD, CAT, GPx) | Activation of plant defence systems against nano-stress. |
| Genotoxicity | Comet Assay | DNA damage, potential for mutagenesis. |
| Nutrient Imbalance | ICP-MS on plant tissues | Disruption of ion homeostasis and metabolic pathways. |
Mitigation Strategies for Nanophytotoxicity
If significant phytotoxicity is observed, the following mitigation strategies can be employed to enhance biocompatibility.
Strategy 1: Application of Anti-stress Compounds
- Nitric Oxide (NO): Co-apply or pre-treat plants with an NO donor like sodium nitroprusside. NO has been shown to ameliorate phytotoxicity induced by ZnO NPs in wheat seedlings by enhancing the antioxidant defence system [58].
- Melatonin (ME): Exogenous application of melatonin can help scavenge excess ROS and modulate stress-responsive gene expression, reducing oxidative damage [58].
- Phytohormones: Application of certain phytohormones (e.g., gibberellic acid) can help counteract growth inhibition caused by NM stress [57].
Strategy 2: "Safer-by-Design" Approaches
- Surface Functionalization: Coat the NM with biocompatible polymers like polyethylene glycol (PEG) or use natural stabilizers from plant extracts. For instance, silver nanoparticles synthesized using turmeric extract demonstrated superior biocompatibility and minimal toxicity compared to those synthesized chemically [60].
- Size and Concentration Optimization: Utilize concentrations below the established toxicity threshold. Since toxicity often increases with decreasing size, optimizing the NM size to balance functionality and safety is crucial [62] [57].
Signaling Pathways and Experimental Workflow
The plant's response to NM stress is mediated by specific signaling cascades. The diagram below illustrates the key pathway and the overall experimental workflow.
NM Stress Response Pathway
Biocompatibility Assessment Workflow
The Scientist's Toolkit: Research Reagent Solutions
Table 3: Essential Reagents and Materials for Nanomaterial Biocompatibility Research
| Reagent/Material | Function/Application | Example Use-Case |
|---|---|---|
| Sodium Nitroprusside | Nitric Oxide (NO) donor for mitigating oxidative stress. | Amelioration of ZnO NP toxicity in wheat seedlings [58]. |
| Turmeric Extract | Natural reducing and capping agent for "green" synthesis of metal NMs. | Production of highly biocompatible silver nanoparticles (AgNPs) [60]. |
| Polyvinyl Pyrrolidone (PVP) | Synthetic polymer stabilizer to control NM agglomeration. | Used in chemical synthesis of AgNPs to improve colloidal stability [60]. |
| Malondialdehyde (MDA) Assay Kit | Quantification of lipid peroxidation as a marker of oxidative damage. | Standard assay for evaluating membrane integrity under NM stress [58]. |
| Comet Assay Kit | Detection of DNA strand breaks for genotoxicity assessment. | Critical for evaluating the safety of NMs at the genetic level [58]. |
| H₂DCFDA Fluorescent Probe | Cell-permeable indicator for detecting intracellular ROS. | Real-time measurement of oxidative stress in plant tissues [58]. |
The in vivo implantation of nanosensors in plant tissues represents a frontier in plant science, enabling real-time, non-destructive monitoring of signalling pathways, metabolism, and phytodynamics [23]. However, the reliability of data obtained from these nanosensors is critically dependent on signal stability. Key challenges such as photobleaching, sensor drift, and environmental interference can compromise data integrity, leading to inaccurate biological interpretations [23] [63]. Photobleaching, the irreversible loss of fluorescence due to photon-induced chemical damage, diminishes signal intensity over time. Sensor drift refers to the gradual and unpredictable change in sensor response, often caused by the physical aging of sensor materials or chemical poisoning [64] [65]. Environmental interference encompasses external factors like fluctuating electromagnetic fields or temperature variations that can disrupt sensor function [66] [67]. This Application Note details standardized protocols and solutions to mitigate these stability issues, ensuring robust and reproducible data for plant science research and drug development.
The table below summarizes the core stability challenges, their impact on nanosensor function, and the corresponding mitigation strategies explored in this note.
Table 1: Summary of Signal Stability Challenges and Compensatory Strategies
| Challenge | Primary Cause | Impact on Nanosensor | Mitigation Strategy |
|---|---|---|---|
| Photobleaching | Photon-induced chemical damage and dye decomposition [63]. | Irreversible decay of fluorescence signal intensity, leading to inaccurate quantitative measurements [63]. | Use of ratiometric nanosensors with highly photostable fluorophores (e.g., rhodol, rhodamine derivatives) [63]. |
| Sensor Drift | Aging of sensor materials, poisoning, contamination, and environmental changes over time [64] [65]. | Gradual, unpredictable change in sensor response (e.g., steady-state feature and transient feature values), causing misclassification and inaccurate tracking of analyte concentrations [64]. | Domain adaptation algorithms (e.g., Knowledge Distillation, DRCA) that compensate for feature drift in data space [65]. |
| Environmental Interference (EMI) | External electromagnetic fields from everyday electronics or medical equipment [66] [67] [68]. | False signal readings, device inhibition, or permanent damage. Leads can act as antennas, amplifying interference [67] [68]. | Physical shielding (EMI shields), passive filtering (feedthrough capacitors), and programmatic filtering [68]. |
Experimental Protocols
Protocol 1: Fabrication and Application of Photostable Ratiometric pH Nanosensors
This protocol describes the synthesis of highly photostable, ratiometric pH nanosensors based on mesoporous silica nanoparticles (mSiNPs), suitable for long-term pH monitoring in plant tissues [63].
Research Reagent Solutions
Table 2: Key Reagents for Ratiometric pH Nanosensors
| Reagent | Function | Note |
|---|---|---|
| Tetradecyl orthosilicate (TEOS) | Silica precursor for constructing the nanoparticle matrix. | Forms the core structure of the mesoporous silica nanoparticle [63]. |
| Aminopropyltriethoxysilane (APTES) | Silane coupling agent for covalent dye attachment. | Enables functionalization of the silica surface for dye immobilization [63]. |
| Rhodol-based dye (pHD) | pH-sensitive fluorophore. | Covalently labeled onto the outer shell of the mSiNP; fluorescence increases with pH [63]. |
| Rhodamine derivative dye (pHI) | pH-sensitive fluorophore with opposite response. | Doped into the core of the mSiNP; fluorescence decreases with pH [63]. |
| CTAB surfactant | Pore-forming template agent. | Creates the mesoporous structure during nanoparticle synthesis [63]. |
| Britton-Robinson (BR) buffer | Calibration buffer system. | Used for characterizing the pH response across a wide range (pH 3.0-9.0) [63]. |
Step-by-Step Procedure
Synthesis of Dye-Silane Conjugates:
- pHI-Silane: Dissolve N,N'-dicyclohexylcarbodiimide (DCC, 0.95 mg, 4.5 μmol), N-hydroxysuccinimide (NHS, 0.53 mg, 4.5 μmol), and the pHI dye (0.73 mg, 1.5 μmol) in 270 μL anhydrous dimethylsulfoxide (DMSO). Stir the mixture for 12 hours under an inert argon atmosphere at 30°C. Subsequently, add APTES (1.8 μL, 7.5 μmol) and react for another 12 hours [63].
- pHD-Silane: Prepare a stock solution of pHD in DMSO (10.0 mM). Add DCC (0.63 mg, 3 μmol) and NHS (0.71 mg, 6 μmol) to 320 μL DMSO. Add 30 μL of the pHD stock solution (0.3 μmol) and stir for 3 hours. Finally, add absolute ethanol (36 μL) containing 1.0% v/v APTES (1.5 μmol) and stir for 12 hours under argon at 30°C [63].
Fabrication of Core-Shell Mesoporous Silica Nanoparticles (mSiNPs):
- Dissolve CTAB (140 mg) in deionized water (3.7 mL) in a 25 mL flask and stir for 10 minutes.
- Add ethanol (525 μL) and stir for another 10 minutes.
- Add triethylamine (TEA, 206 μL) as a catalyst and place the flask in an oil bath pre-heated to 60°C.
- After 10 minutes of stirring, add TEOS (300 μL) and the pre-formed pHI-silane conjugate (272 μL) dropwise to form the dye-doped core. Allow the reaction to proceed with stirring.
- To form the outer shell, sequentially add more TEOS (150 μL) and the pre-formed pHD-silane conjugate (136 μL) dropwise.
- Continue the reaction for 2 hours to complete the growth of the core-shell structure [63].
Purification and Characterization:
- Centrifuge the resulting nanoparticle solution to collect the nanosensors. Wash repeatedly with ethanol and methanol to remove the CTAB template and unreacted precursors.
- Characterize the nanosensors using transmission electron microscopy (TEM) to confirm size and morphology. Use fluorescence spectroscopy to validate the dual-emission spectra [63].
Calibration and In Vivo Implantation:
- Resuspend the nanosensors in a series of BR buffer solutions spanning pH 3.0 to 9.0.
- Acquire fluorescence emission spectra at a single excitation wavelength (e.g., 488 nm). Plot the ratio of the two emission intensities (e.g., I₅₈₀ₙₘ / I₆₂₀ₙₘ) against the pH to create a calibration curve.
- For plant implantation, the nanosensors can be introduced into specific plant tissues (e.g., leaf mesophyll or root cortex) via microinjection or infiltration techniques. The fluorescence ratio can then be monitored in real-time using confocal or fluorescence microscopy [63].
Figure 1. Ratiometric pH Nanosensor Fabrication Workflow
Protocol 2: Compensating for Sensor Drift Using Knowledge Distillation
This protocol outlines a computational method to correct for sensor drift in electronic-nose-based gas recognition systems, a challenge analogous to long-term chemical sensing in plants. The method uses Knowledge Distillation (KD), a semi-supervised domain adaptation technique, to align data distributions from different time periods (batches) [65].
Research Reagent Solutions
Table 3: Key Components for Drift Compensation Analysis
| Component | Function | Note |
|---|---|---|
| Gas Sensor Array Drift Dataset | Benchmark dataset for developing and testing drift compensation algorithms. | Publicly available UCI dataset containing 6 gases measured over 36 months in 10 batches [65]. |
| Source Domain Data | Baseline data for initial model training. | Considered to have no drift (e.g., data from the first month or batch) [64] [65]. |
| Target Domain Data | Drifted data for model adaptation and testing. | Data collected in subsequent months/batches, exhibiting sensor drift [65]. |
| Teacher Model | Complex model trained on source domain data. | Provides soft labels (probability distributions) to guide the student model [65]. |
| Student Model | Simpler model trained on target domain data. | Learns from both the hard labels of the source data and the soft labels from the teacher, improving generalizability to the drifted target domain [65]. |
Step-by-Step Procedure
Dataset Preparation and Feature Extraction:
- Obtain a sensor dataset with temporal drift, such as the UCI Gas Sensor Array Drift Dataset.
- Define the source domain (e.g., Batch 1) and target domain (e.g., Batch 4, 14, etc.).
- Extract relevant features from the sensor response curves. Common features include steady-state features (e.g.,
Fs = Max(R) - Min(R)) and transient features capturing the dynamics of the response [64].
Model Training and Knowledge Distillation:
- Train Teacher Model: Train a complex model (e.g., a deep neural network) on the labeled source domain data. This model will learn the initial classification task for the gases.
- Generate Soft Labels: Use the trained teacher model to predict the unlabeled (or sparsely labeled) target domain data. The output will be "soft labels" – probability vectors over the gas classes, which contain richer information than hard class labels.
- Train Student Model: Train a simpler, more robust model on the target domain data. The training objective for the student is a weighted combination of:
- The standard cross-entropy loss with the true labels (if available in small quantities).
- A distillation loss (e.g., Kullback–Leibler divergence) that measures the difference between the student's predictions and the teacher's soft labels [65].
Evaluation:
- Evaluate the performance of the final student model on the held-out test set from the target domain.
- Use metrics such as accuracy, precision, recall, and F1-score, and compare against baseline methods like Domain Regularized Component Analysis (DRCA) [65].
Figure 2. Knowledge Distillation for Sensor Drift Compensation
Protocol 3: Shielding and Filtering for Electromagnetic Interference (EMI) Mitigation
This protocol describes hardware and design strategies to protect sensitive implantable sensor electronics from electromagnetic interference, which is critical for ensuring signal fidelity in laboratory environments with various electronic equipment.
Research Reagent Solutions
Table 4: Key Components for EMI Mitigation in Implantable Sensors
| Component | Function | Note |
|---|---|---|
| EMI Shield | Conductive case (e.g., titanium) that acts as a Faraday cage. | Prevents radiated EMI from reaching the internal circuitry. Requires careful design for openings needed for leads or communication [68]. |
| Feedthrough Capacitor | A passive filter mounted on the shield wall. | Allows signal leads to pass through the shield while shunting high-frequency EMI noise to the ground. Features low equivalent series resistance (ESR) [68]. |
| Bipolar Configuration | A design strategy for sensor leads or electrosurgery. | Minimizes the EMI field by localizing current flow between two closely spaced electrodes, unlike a monopolar configuration [67]. |
Step-by-Step Procedure
Risk Assessment:
Shielding Implementation:
- Enclose the sensor's core electronics in a continuous, conductive EMI shield. The shield should be connected to the system ground.
- For sensors requiring external leads, ensure the leads are properly insulated. The shield's integrity is paramount, as any gap can act as a slot antenna [68].
Filtering Implementation:
- Selecting Feedthrough Capacitors: Choose capacitors with a capacitance value that provides low impedance at the noise frequencies of concern. Ensure they are rated for the sensor's operating voltage and can be hermetically sealed if necessary.
- Integration: Install the feedthrough capacitors at the point where each signal lead enters the EMI shield. This ensures that external noise is filtered before it can enter the device's internal circuitry [68].
Design and Configuration Optimization:
- Where feasible, use a bipolar design for any external sensing or actuation leads to minimize the antenna effect and confine electromagnetic fields [67].
- Maximize the physical distance between the implanted sensor and known sources of EMI whenever possible [67].
- For additional protection, implement programmatic filtering in the sensor's software to digitally remove any residual noise that passes through the hardware filters.
Figure 3. EMI Shielding and Filtering Pathway
Optimizing Sensor Specificity and Sensitivity in Complex Plant Matrices
The in vivo implantation of nanosensors in plant tissues represents a transformative approach for real-time monitoring of plant physiology, signaling molecules, and stress responses. However, the complex plant matrix presents significant challenges for sensor performance, including biofouling, signal interference, and unpredictable biomolecular interactions [69]. This application note details standardized protocols and optimization strategies to enhance nanosensor specificity and sensitivity for reliable in planta deployment, framed within a broader thesis research context on advancing plant nanosensor technology.
Nanosensor Performance Optimization Strategies
Chemical and Physical Modification Approaches
Table 1: Nanosensor Modification Strategies for Enhanced Performance in Plant Matrices
| Modification Strategy | Nanomaterial Platform | Target Analyte | Performance Enhancement | Reference |
|---|---|---|---|---|
| Chemical Functionalization | ||||
| DNA aptamer conjugation | Single-walled carbon nanotubes (SWCNTs) | Hydrogen peroxide (H₂O₂) | Limit of detection: 10 μM; Selective over other ROS | [69] |
| 4-Mercaptophenylboronic acid | Gold nanoparticles (Au NPs) | Plant glycoside toxins (α-solanine, α-chaconine) | Selective over minerals (K⁺, Ca²⁺) and vitamins; LOD <3.4 μM | [70] |
| Polyethylene glycol functionalization | Single-walled carbon nanotubes | Plant polyphenols | LOD in low μg mL⁻¹ range | [70] |
| Peptide-based functionalization | Gold nanospheres/nanorods | Phenylalanine and derivatives | Enhanced selectivity for aromatic compounds | [70] |
| Physical Encapsulation | ||||
| ZIF-8 encapsulation | Silver nanocubes | Cu²⁺ ions | LOD: 4 × 10⁻⁴ M | [70] |
| HKUST-1 MOF coating | Silver nanoparticles | CO₂ gas | 14-fold increase in signal response | [70] |
| Sensor Configuration | ||||
| FRET-based nanosensors | Genetically encoded fluorescent proteins | Ca²⁺, ATP, glucose, hormones | Ratiometric detection for self-calibration | [23] |
| Electrochemical nanosensors | Graphene oxide/Gold NPs | Metabolites, hormones, ions | High conductivity and sensitivity | [6] [23] |
Advanced Material Solutions for Matrix Challenges
The unique plant environment necessitates specialized material solutions to overcome barriers to effective sensing:
Conductive Polymers and Composite Materials: Integration of transition metal oxides coated with conductive polymers (e.g., polyaniline, polythiophene, polypyrrole) enhances electron transfer kinetics and sensor stability. These materials demonstrate reduced ionization potential and improved electrical conductivity due to delocalized π-electrons throughout the polymer backbone [6].
Two-Dimensional Materials: Graphene and similar two-dimensional materials with exceptional metallic conductivity and semiconducting characteristics enable well-organized biosensor architectures ideal for wearable electronics and in planta monitoring systems [6].
Biomimetic Recognition Elements: Incorporation of biomimetic receptors including enzymes (e.g., glucose oxidase), DNA strands, antibodies, or whole cells as biological recognition components significantly enhances analyte specificity through evolved molecular complementarity [6].
Experimental Protocols for In Planta Nanosensor Validation
Protocol: Functionalization of SWCNT-Based H₂O₂ Nanosensors
Principle: DNA aptamer functionalization of single-walled carbon nanotubes enables selective detection of hydrogen peroxide, a key reactive oxygen species signaling molecule in plant stress responses [69].
Materials:
- Single-walled carbon nanotubes (Sigma-Aldrich, #519308)
- HPLC-purified DNA aptamer sequence: 5'-GGG AGC TCA GAA TGA AAT GCT AGG GTT TTT GTT GTG GTT GGG TCG TGC CTC CC-3'
- Hemin (Sigma-Aldrich, #51280)
- N-(3-Dimethylaminopropyl)-N'-ethylcarbodiimide hydrochloride (EDC, Sigma #03450)
- N-Hydroxysuccinimide (NHS, Sigma #130672)
- 2-(N-morpholino)ethanesulfonic acid (MES) buffer, 0.1 M, pH 6.0
- Phosphate buffered saline (PBS), 0.1 M, pH 7.4
- Centrifugal filters, 100 kDa MWCO (Amicon #UFC510096)
Procedure:
- SWCNT Preparation: Disperse 1 mg of SWCNTs in 10 mL of 1% w/v sodium cholate solution. Sonicate using a probe sonicator (5 mm tip) at 40% amplitude for 30 min (1 s pulse on, 1 s pulse off) in an ice bath. Centrifuge at 20,000 × g for 30 min at 4°C. Collect the supernatant containing individually dispersed SWCNTs.
- Carboxylation: Add 10 mL of concentrated HNO₃ to the SWCNT dispersion and reflux at 120°C for 4 h. Cool to room temperature and dilute with 40 mL deionized water. Filter through a 0.22 μm PTFE membrane and wash with deionized water until neutral pH.
- Aptamer Conjugation: Resuspend carboxylated SWCNTs in 10 mL MES buffer. Add 2 mL of 10 mg/mL EDC and 2 mL of 10 mg/mL NHS. React for 30 min with gentle shaking. Purify using centrifugal filters (100 kDa MWCO) at 5,000 × g for 10 min. Resuspend in PBS buffer.
- Add 100 nmol of amino-modified DNA aptamer to the activated SWCNTs. React for 4 h at room temperature with gentle mixing.
- Hemin Incorporation: Add 50 μL of 1 mM hemin solution to the aptamer-SWCNT conjugate. Incubate for 1 h at 37°C.
- Purification: Remove unreacted components using centrifugal filtration (100 kDa MWCO) with PBS buffer. Concentrate to final volume of 1 mL. Store at 4°C until use.
Validation: Confirm functionalization success through Raman spectroscopy (increased D/G band ratio), UV-Vis spectroscopy (characteristic Soret band at 400 nm indicating hemin incorporation), and fluorescence quenching assays with standard H₂O₂ solutions.
Protocol: In Planta Implantation and Calibration of Nanosensors
Principle: Effective deployment of nanosensors into plant tissues requires careful consideration of delivery methods and in situ calibration to account for matrix effects [69] [71].
Materials:
- Functionalized nanosensors (from Protocol 3.1)
- Arabidopsis thaliana or Spinacia oleracea plants (4-6 weeks old)
- Aerosolization device (0.2-0.5 μm nozzle)
- Pressure-regulated injection system (for hydroponic delivery)
- Near-infrared fluorescence imaging system (for SWCNT-based sensors)
- Confocal microscopy system (for FRET-based sensors)
- Standard analyte solutions for calibration
Procedure:
- Plant Preparation: Grow plants under controlled conditions (16:8 h photoperiod, 22°C, 60% relative humidity). Acclimate for 24 h prior to experimentation.
- Nanosensor Delivery:
- Aerosol Application: Dilute nanosensors to working concentration (typically 10-100 μg/mL in isotonic buffer). Apply using aerosol sprayer with 0.3 μm nozzle at 10 psi pressure, maintaining distance of 15 cm from leaf surface. Apply until uniform coating forms (typically 2-3 sprays).
- Hydroponic Delivery: For root zone implantation, add nanosensors to hydroponic solution at final concentration of 5-20 μg/mL. Maintain plants in nanosensor solution for 2-4 h before transfer to fresh nutrient solution.
- Injection Delivery: For stem implantation, use microsyringe with 33-gauge needle to inject 5-10 μL of nanosensor suspension at multiple sites along stem.
- In Planta Calibration:
- After nanosensor implantation, apply standard solutions of target analyte to plant tissues.
- For H₂O₂ sensors, infiltrate leaves with 0, 10, 50, 100, 500 μM H₂O₂ solutions using needle-free syringe.
- Record sensor response at each concentration using appropriate detection modality (fluorescence, electrochemical, etc.).
- Generate calibration curve relating sensor signal to analyte concentration.
- Signal Acquisition:
- For optical sensors, use NIR fluorescence imaging with appropriate filters (e.g., 785 nm excitation, 900-1300 nm emission for SWCNTs).
- For electrochemical sensors, implant microelectrodes and connect to potentiostat for continuous monitoring.
- Acquire baseline signals for minimum 1 h before experimental treatments.
Validation: Perform control experiments with non-functionalized nanosensors to account for background signal and plant autofluorescence. Confirm sensor stability through continuous monitoring over 24-72 h period.
The Scientist's Toolkit: Research Reagent Solutions
Table 2: Essential Research Reagents for Plant Nanosensor Development
| Reagent/Material | Supplier Examples | Function in Nanosensor Development | Application Notes |
|---|---|---|---|
| Nanomaterials | |||
| Single-walled carbon nanotubes (SWCNTs) | Sigma-Aldrich (#759009), NanoIntegris | Fluorescent sensing platform | Near-infrared emission enables deep tissue penetration |
| Gold nanoparticles (spherical, rod) | Sigma-Aldrich (#741965), NanoComposix | Plasmonic sensing, electrochemical platforms | Tunable surface plasmon resonance; easily functionalized |
| Graphene oxide | Sigma-Aldrich (#777676), Graphenea | Electrochemical sensing | High surface area, excellent conductivity |
| Quantum dots (CdSe/ZnS) | Sigma-Aldrich (#900265), NN-Labs | Fluorescent tags | High quantum yield, photostability |
| Functionalization Reagents | |||
| EDC/NHS crosslinkers | Thermo Fisher (#PG82079) | Carboxyl group activation | Critical for biomolecule conjugation |
| Heterobifunctional PEG linkers | Creative PEGWorks | Spacer arms, reduced fouling | Enhances biocompatibility and stability |
| Thiol-modified DNA/RNA | Integrated DNA Technologies | Aptamer-based recognition | Custom sequences for specific targets |
| Plant-Specific Materials | |||
| Plant cell wall degrading enzymes (pectinase, cellulase) | Sigma-Aldrich (#P9932, #C1184) | Tissue permeability enhancement | Facilitate nanosensor penetration |
| Silwet L-77 surfactant | Lehle Seeds (#VIS-01) | Enhanced leaf surface wetting | Improves foliar application efficiency |
| Agarose injection matrix | Sigma-Aldrich (#A9539) | Nanosensor stabilization in apoplast | Maintains sensor position in tissue |
Visualization of Optimization Strategies and Workflows
Nanosensor Optimization Pathways
Experimental Workflow for In Planta Validation
Advanced Optimization Approaches
Machine Learning-Enhanced Data Analysis
Complex data generated by in planta nanosensors benefits significantly from machine learning approaches:
Signal Denoising: Implement clustering algorithms (k-means, DBSCAN) to distinguish true sensor signals from background noise in complex plant matrices [56].
Pattern Recognition: Apply classification algorithms (support vector machines, random forests) to identify specific stress signatures from multiplexed sensor arrays [56] [70].
Multivariate Calibration: Utilize regression models (partial least squares, neural networks) to compensate for matrix effects and improve quantification accuracy [70].
Hybrid Technique Integration
Multimodal Sensing: Combine complementary techniques such as SERS with electrochemistry to generate orthogonal data streams for improved metabolite identification and verification [70].
Sensor Arrays: Deploy multiple nanosensors with partial specificity to create distinctive response patterns ("fingerprints") for complex plant metabolites, enabling identification without requiring absolute specificity from individual elements [70].
Optimizing nanosensor specificity and sensitivity in complex plant matrices requires multifaceted approaches addressing material design, surface functionalization, delivery methods, and advanced data analysis. The protocols and strategies outlined herein provide a foundation for reliable in vivo implantation and monitoring, enabling unprecedented insights into plant signaling pathways and stress responses. Future developments will likely focus on self-calibrating sensors, wireless readout platforms, and increasingly sophisticated biomimetic recognition elements to further enhance performance in the challenging plant environment.
Achieving Long-Term Stability and Continuous Monitoring for Chronic Studies
The in vivo implantation of nanosensors in plant tissues represents a transformative frontier in plant science, enabling real-time monitoring of physiological processes and stress signaling. For chronic studies, achieving long-term sensor stability is paramount to generating reliable, temporally rich datasets. This document outlines application notes and protocols to guide researchers in developing and implementing stable nanobiosensor platforms for prolonged plant studies, directly supporting advanced research into plant-pathogen interactions, stress adaptation, and metabolic regulation.
Long-term performance of implanted nanosensors is evaluated using a suite of quantitative metrics. The following tables summarize key signal quality parameters and material properties critical for chronic studies.
Table 1: Key Signal Quality Metrics for Long-Term Stability Assessment
| Metric | Description | Interpretation for Long-Term Studies | Reported Stability Evidence |
|---|---|---|---|
| Root Mean Square (RMS) | Average power of the signal over time | A limited decrease indicates stable signal amplitude [72]. | 32-month follow-up in implantable neural recorders [72]. |
| Band Power (BP) | Signal power in specific frequency bands | Limited decrease suggests maintained spectral content of the signal [72]. | 14-month follow-up in human clinical trials [72]. |
| Signal-to-Noise Ratio (SNR) | Ratio of desired signal strength to background noise | A limited decrease is crucial for preserving detection sensitivity over time [72]. | High stability in epidural wireless recorders [72]. |
| Effective Bandwidth (EBW) | Range of frequencies the signal utilizes | Remarkable steadiness indicates consistent signal information content [72]. | Demonstrated in long-term ECoG recordings [72]. |
Table 2: Nanomaterial Properties and Their Impact on Sensor Stability
| Nanomaterial | Key Properties | Role in Biosensor Architecture | Relevance to Long-Term Implantation |
|---|---|---|---|
| Single-Walled Carbon Nanotubes (SWNTs) | Near-infrared (nIR) fluorescence, high photostability, avoids chlorophyll auto-fluorescence [73]. | Optical transducer for real-time monitoring of biomarkers (e.g., H2O2, SA) [73]. | Photo-stability enables repeated measurements over time without signal degradation [73]. |
| Gold Nanoparticles (AuNPs) | Reduce electron transfer resistance, unique optical properties [6]. | Facilitates electron transfer in electrochemical sensors; label in optical sensors. | Biocompatibility and chemical inertness minimize fouling and inflammatory responses in tissues. |
| Conductive Polymers (CPs) | Delocalized π-electrons, enhanced electrical conductivity, low ionization potential [6]. | Forms the sensing layer; e.g., used with Glucose Oxidase (GOx) [6]. | Polymer architecture selection is critical for constructing robust and reliable sensors [6]. |
Experimental Protocols
Protocol: Fabrication and Calibration of SWNT-Based Optical Nanosensors
This protocol details the creation of coronated SWNT nanosensors for detecting specific plant signaling molecules like salicylic acid (SA) and hydrogen peroxide (H2O2) [73].
1. Materials and Reagents
- HiPCO Single-Walled Carbon Nanotubes (SWNTs)
- DNA oligomers (e.g., (GT)15 for H2O2 sensing) or custom-synthesized cationic fluorene-based co-polymers (e.g., S3 for SA sensing) [73]
- Ultrapure Water
- Phosphate Buffered Saline (PBS), 1X, pH 7.4
- Target analytes (e.g., Salicylic Acid, H2O2) for calibration
- Probe sonicator (with microtip)
- Ultracentrifuge
- Photoluminescence Excitation (PLE) spectrometer or similar nIR fluorescence measurement system
2. Sensor Fabrication Steps 1. Suspension Preparation: Disperse 1 mg of raw SWNTs in 10 mL of a 1 mg/mL solution of the selected wrapping molecule (e.g., (GT)15 DNA or S3 polymer) in 1X PBS. 2. Probe Sonication: Sonicate the mixture on ice using a probe sonicator at a power of 5-10 W for 30-60 minutes. This step exfoliates and individually disperses the SWNTs, allowing the wrapping molecules to form a corona phase. 3. Ultracentrifugation: Centrifuge the resulting suspension at >100,000 x g for 1 hour at 4°C. 4. Supernatant Collection: Carefully collect the top 70-80% of the supernatant. This contains the individually dispersed, polymer-wrapped SWNTs. The pellet contains large bundles and impurities and should be discarded. 5. Storage: The finalized nanosensor suspension can be stored at 4°C in the dark for several weeks.
3. Selectivity Screening and Calibration 1. Baseline Measurement: Using a PLE spectrometer, measure the nIR fluorescence intensity of the nanosensor suspension. 2. Analyte Challenge: Add a known concentration (e.g., 100 µM) of the target analyte (SA) and other potential interferents (e.g., Jasmonic Acid, Abscisic Acid) to separate aliquots of the sensor suspension. 3. Response Measurement: Record the fluorescence intensity after analyte addition. A selective sensor will show a significant fluorescence quenching or enhancement specifically for its target. 4. Dose-Response Curve: For the target analyte, repeat steps 1-3 with a series of known concentrations. Plot the fluorescence response (% change) against the analyte concentration to generate a calibration curve.
Protocol: In Vivo Implantation and Multiplexed Sensing in Plant Leaves
This protocol describes the integration of nanosensors into living plants (creating "nanobionic" plants) for multiplexed monitoring [73].
1. Plant Material Preparation
- Grow Brassica rapa subsp. Chinensis (Pak choi) or other model plants under controlled conditions until they reach the desired developmental stage (e.g., 4-6 weeks).
- Acclimate plants to experimental conditions for at least 48 hours prior to sensor implantation.
2. Sensor Injection and Integration 1. Loading: Draw the purified nanosensor suspension into a glass microneedle or a fine-gauge syringe. 2. Infiltration: Gently press the needle against the abaxial (lower) side of a leaf, infiltrating a small volume (~10-50 µL) of the suspension into the mesophyll air spaces. A water-soaked patch will indicate successful infiltration. 3. Incubation: Allow the plant to rest for a minimum of 4-6 hours post-infiltration to let the sensors stabilize within the leaf apoplast.
3. Real-Time Monitoring and Stress Application 1. Baseline Recording: Place the sensor-infiltrated leaf under a nIR fluorescence imaging system. Record the baseline fluorescence signal from both the target nanosensor and a reference sensor for at least 15 minutes. 2. Stress Application: Apply a defined stress stimulus. Examples include: * Pathogen Stress: Inoculation with a bacterial pathogen (e.g., Pseudomonas syringae). * Heat Stress: Briefly exposing the leaf to elevated temperature (e.g., 38°C). * Light Stress: Application of high-intensity light. * Mechanical Wounding: Lightly crushing a small section of the leaf with forceps. 3. Continuous Data Acquisition: Immediately after stress application, continuously monitor and record the fluorescence signals from all sensors for several hours to capture the dynamic wave of signaling molecules.
Visualization of Experimental Workflow and Signaling Pathways
The following diagrams, generated with Graphviz DOT language, illustrate the core experimental workflow and the signaling dynamics uncovered by these methods.
Diagram 1: Workflow for nanosensor-based chronic plant studies.
Diagram 2: Stress signaling cascade revealed by multiplexed nanosensors.
The Scientist's Toolkit: Research Reagent Solutions
Table 3: Essential Materials for In Vivo Plant Nanosensor Research
| Item / Reagent | Function / Application | Specific Example / Note |
|---|---|---|
| Single-Walled Carbon Nanotubes (SWNTs) | Core transducer element for optical nanosensors; provides nIR fluorescence signal. | HiPCO SWNTs are commonly used. Their nIR fluorescence is photostable and avoids plant auto-fluorescence [73]. |
| DNA Wrappings (e.g., (GT)15) | Forms a corona phase around SWNTs, conferring specificity to target analytes via the CoPhMoRe technique. | (GT)15-SWNT is a well-characterized nanosensor for detecting hydrogen peroxide (H2O2) in plants [73]. |
| Cationic Fluorene-Based Co-polymers | Synthetic polymer wrappings for SWNTs; designed to interact with specific plant hormones. | Polymer S3 (with pyrazine) was identified to create a selective, quenching-response nanosensor for Salicylic Acid [73]. |
| Near-Infrared (nIR) Fluorescence Imager | Essential equipment for non-destructive, real-time readout of SWNT-based sensor signals in living plants. | Must be capable of exciting and capturing fluorescence in the 900-1300 nm range. |
| Glass Microneedles / Micro-syringes | For precise, minimally invasive infiltration of nanosensor suspensions into the leaf mesophyll layer. | Minimizes tissue damage during implantation, which is critical for long-term studies. |
| Photoluminescence Excitation (PLE) Spectrometer | For in-vitro characterization, selectivity screening, and calibration of SWNT nanosensors. | Used to measure changes in nIR fluorescence intensity upon analyte binding. |
The in vivo implantation of nanosensors in plant tissues represents a frontier in plant science, enabling real-time monitoring of physiological processes. A significant challenge in this domain is the simultaneous tracking of multiple signaling molecules and pathogens, which is crucial for understanding complex plant stress responses and health status. Multiplexing strategies, which allow for the concurrent detection of several analytes within a single experiment, are vital for increasing throughput, improving data accuracy, and providing a more comprehensive view of plant system dynamics. This Application Note details current strategies and protocols for multiplexed detection, framed within the context of advanced plant nanosensor research. These approaches are transforming our ability to decipher plant signaling networks by moving beyond single-analyte measurements to capture the intricate interplay of multiple biological molecules in living systems.
Multiplexing in analytical science refers to the ability to simultaneously detect and quantify multiple distinct analytes within a single assay or experimental run. In the context of in vivo plant nanosensing, this capability is paramount for several reasons: it conserves precious plant samples, reduces experimental time and cost, and most importantly, allows for the correlation of different signaling events that occur concurrently within the plant system. The primary strategies for multiplexing can be categorized into several technological approaches.
Optical Biosensing leverages various light-matter interactions to detect multiple targets. Key modalities include colorimetric sensors that produce visible color changes [74], fluorescence-based sensors that emit light at specific wavelengths upon target interaction [74] [10], and surface-enhanced Raman scattering (SERS) biosensors that provide unique molecular fingerprints [74]. These optical parameters can be used to differentiate between multiple analytes within a single sample.
Molecular Multiplexing utilizes specific molecular labels or tags to encode information about different targets. Isobaric tagging is a powerful mass spectrometry-based strategy where peptides from different samples are labeled with chemical tags that have the same overall mass but produce unique reporter ions upon fragmentation [75]. This approach, including Tandem Mass Tags (TMT) and Isobaric Tags for Relative and Absolute Quantification (iTRAQ), enables the multiplexing of up to 54 samples in a single run [75]. Metabolic labeling, such as Stable Isotope Labeling by Amino Acids in Cell Culture (SILAC), incorporates heavy isotopes into proteins during cell growth, allowing for the simultaneous analysis of multiple samples [75].
Nucleic Acid-Based Multiplexing employs multiple primer sets in a single reaction to amplify and detect various genetic targets. Multiplex PCR is a prominent example, where several pairs of primers specific to different DNA targets are combined in one tube, enabling the simultaneous detection of multiple pathogens or genetic markers [76]. This method is highly specific and sensitive, capable of detecting as few as 10³ copies/μL of viral DNA in plant tissues [76].
Table 1: Comparison of Major Multiplexing Strategies
| Strategy | Principle | Multiplexing Capacity | Key Advantages | Primary Applications in Plant Research |
|---|---|---|---|---|
| Isobaric Tagging (e.g., TMT, iTRAQ) | Chemical tags with identical mass but distinct reporter ions upon fragmentation [75]. | Up to 54 samples [75]. | High throughput; reduces instrument time; high quantitative accuracy. | Multiplexed proteomic analysis of plant stress responses. |
| Multiplex PCR | Multiple primer sets in a single reaction amplify distinct DNA targets [76]. | Limited by primer compatibility (e.g., 2-3 targets in one assay) [76]. | High specificity and sensitivity; cost-effective for many samples. | Simultaneous detection of multiple plant pathogens (e.g., TYLCV and ToLCNDV) [76]. |
| Colorimetric Biosensing | Nanoparticles or enzymes produce distinct color changes for different analytes [74]. | Varies with detection design (e.g., 3-5 pathogens) [74]. | Simplicity; rapid visual readout; no need for complex instruments. | On-site detection of multiple foodborne pathogens. |
| Fluorescent Biosensing (NIR-II) | "Turn-on" fluorescent nanosensors activated by specific analytes [10]. | Potential for multiple sensors with distinct emission profiles. | High contrast for in vivo imaging; avoids plant autofluorescence. | Real-time monitoring of stress signaling molecules (e.g., H₂O₂) in living plants [10]. |
Detailed Experimental Protocols
Protocol: Multiplex PCR for Simultaneous Plant Virus Detection
This protocol is adapted from established methods for detecting tomato yellow leaf curl virus (TYLCV) and tomato leaf curl New Delhi virus (ToLCNDV) [76], and can be modified for other plant DNA viruses.
1. Research Reagent Solutions
Table 2: Essential Reagents for Multiplex PCR
| Reagent/Material | Function/Description | Example/Specification |
|---|---|---|
| Primer Pairs | Specifically designed to anneal to conserved regions of target viral genomes (e.g., coat protein or movement protein genes) [76]. | ToLCNDV-DNA-A, TYLCV, ToLCNDV-DNA-B primers [76]. |
| DNA Polymerase | Enzyme for PCR amplification. A robust master mix is recommended for multiplex reactions. | 2× Rapid Taq Master Mix [76]. |
| Template DNA | Plant genomic DNA containing the target viral sequences. | Extracted from plant leaves using a commercial kit (e.g., FastPure Plant DNA Isolation Mini Kit) [76]. |
| Recombinant Plasmids | Positive controls containing cloned target sequences for sensitivity assessment and standardization [76]. | pCE3-ToLCNDV-CP, pCE3-TYLCV-CP, etc. |
2. Procedure
- Step 1: DNA Extraction. Extract total DNA from plant leaf tissue using a commercial plant DNA isolation kit. Assess the quality and concentration of the extracted DNA using a spectrophotometer (e.g., Nanodrop). Store DNA at -20°C.
- Step 2: Primer Design and Preparation. Design primer pairs based on alignments of conserved regions within the target genomes (e.g., CP or MP encoding regions) [76]. Ensure amplicon sizes are distinct enough for clear differentiation by gel electrophoresis (e.g., 651 bp, 442 bp, and 305 bp). Synthesize and resuspend primers in nuclease-free water.
- Step 3: Reaction Setup.
- Prepare the multiplex PCR reaction on ice. A sample 25 μL reaction is suggested:
- 12.5 μL of 2× Rapid Taq Master Mix
- 0.15 μM/0.15 μM of ToLCNDV-DNA-A-F/R primer pair
- 0.25 μM/0.25 μM of TYLCV-F/R primer pair
- 0.50 μM/0.50 μM of ToLCNDV-DNA-B-F/R primer pair
- 100 ng of template DNA
- Nuclease-free water to 25 μL
- Gently mix and briefly centrifuge the tubes.
- Prepare the multiplex PCR reaction on ice. A sample 25 μL reaction is suggested:
- Step 4: Thermal Cycling.
- Perform PCR amplification using the following cycling conditions:
- Initial Denaturation: 95°C for 3 min
- 35 Cycles of:
- Denaturation: 95°C for 15 sec
- Annealing: 51–66°C (Optimize temperature, e.g., 55°C) for 15 sec
- Extension: 72°C for 1 min
- Final Extension: 72°C for 5 min
- Hold: 4°C
- Perform PCR amplification using the following cycling conditions:
- Step 5: Analysis.
- Analyze the PCR products by agarose gel electrophoresis (e.g., 1.5% gel).
- Visualize the DNA bands under UV light after staining. Successful multiplexing is confirmed by the presence of distinct, bright bands at the expected sizes for the targets.
3. Optimization Notes
- Annealing Temperature: A gradient PCR (51°C to 66°C) is crucial to determine the optimal annealing temperature for all primer pairs simultaneously [76].
- Primer Concentration: The concentration of each primer pair must be optimized to balance the amplification efficiency of all targets. The ratios provided are a starting point [76].
- Specificity: Always include negative controls (nuclease-free water) and positive controls (recombinant plasmids or known infected plant DNA) to validate the assay's specificity and rule out cross-amplification [76].
Protocol: Implantable Optical Nanosensors for In Vivo H₂O₂ Monitoring
This protocol outlines the methodology for using implantable, self-powered sensing systems and NIR-II fluorescent nanosensors to monitor hydrogen peroxide (H₂O₂) dynamics in living plants [24] [10].
1. Research Reagent Solutions
Table 3: Essential Reagents for Implantable H₂O₂ Nanosensors
| Reagent/Material | Function/Description |
|---|---|
| NIR-II Nanosensor (AIE1035NPs@Mo/Cu-POM) | The core sensing element. The Aggregation-Induced Emission (AIE) fluorophore acts as the NIR-II reporter, and the polymetallic oxomolybdates (POMs) act as the H₂O₂-responsive quencher [10]. |
| Poly(ethylene glycol) diacrylate (PEGDA) | A hydrogel polymer used to encapsulate and biocompatibly house the nanosensors for implantation [77]. |
| Photo-initiator | A compound that initiates PEGDA cross-linking under UV light to form the solid hydrogel matrix (e.g., 2-hydroxy-4'-(2-hydroxyethoxy)-2-methylpropiophenone) [77]. |
2. Procedure
- Step 1: Nanosensor Synthesis.
- NIR-II Fluorophore Preparation: Synthesize or source an AIE-active NIR-II fluorophore (e.g., AIE1035 with a donor-acceptor-donor structure). Encapsulate the dye into polystyrene (PS) nanospheres using an organic solvent swelling method to form AIE nanoparticles (AIENPs) [10].
- POM Quencher Synthesis: Synthesize the H₂O₂-responsive quencher (e.g., Mo/Cu-POM) which exhibits strong NIR absorption due to oxygen vacancies and a mixed valence state of Mo⁵⁺/Mo⁶⁺ [10].
- Co-assembly: Co-assemble the AIENPs and Mo/Cu-POM to form the final hybrid nanosensor (AIE1035NPs@Mo/Cu-POM). Characterize the successful assembly using TEM, XPS, and zeta potential measurements [10].
- Step 2: Hydrogel Encapsulation and Implantation.
- Hydrogel Formulation: Mix the nanosensors, PEGDA polymer (e.g., Mn = 8000 for lower crosslinking density), and photo-initiator in phosphate-buffered saline (PBS) [77].
- Cross-linking: Place the mixture in a mold, hold under a nitrogen atmosphere, and cross-link under 365 nm UV light for 60 minutes to form a solid hydrogel [77].
- Post-processing: Wash the solid hydrogel in PBS for several days to remove unencapsulated materials and unreacted reagents [77].
- Implantation: Sterilize the hydrogel. Under controlled conditions, make a small incision and implant the nanosensor-loaded hydrogel subcutaneously into the plant stem or target tissue [24] [77].
- Step 3: Data Acquisition and Machine Learning Analysis.
- Signal Recording: For self-powered systems, a photovoltaic module can be integrated to power the sensor continuously [24]. For fluorescent systems, use an NIR-II microscopy or macroscopic whole-plant imaging system to capture the "turn-on" fluorescence signal upon H₂O₂ presence [10].
- Stress Application: Expose the plant to various abiotic (e.g., drought, salinity) or biotic (e.g., pathogen) stresses and record the spatiotemporal H₂O₂ fluorescence patterns.
- Data Classification: Employ a machine learning model (e.g., a classifier) trained on the fluorescence response datasets to accurately differentiate between types of stress with high accuracy (>96.67%) [10].
Workflow and Signaling Pathway Diagrams
Diagram 1: General workflow for multiplexed detection in plant research, highlighting key stages and major technological options at the assay stage.
Diagram 2: H₂O₂ signaling pathway and detection mechanism using activatable NIR-II nanosensors, culminating in machine learning-based stress classification. POM: Polymetallic Oxomolybdate.
Assessing Efficacy, Reliability, and Advantages Over Conventional Methods
In modern plant science and agricultural biotechnology, the accurate measurement of physiological processes is fundamental to understanding growth, development, and stress responses. Traditional analytical methods, including enzyme-linked immunosorbent assay (ELISA), polymerase chain reaction (PCR), and various destructive assays, have long served as the gold standards for detecting proteins, nucleic acids, and metabolites [78] [79]. While these methods provide valuable data, they are inherently limited by their destructive nature, requiring tissue sampling that prevents longitudinal studies on the same organism, and they often lack the temporal resolution to capture rapid, dynamic changes in living systems [36] [28].
The emerging field of plant nanobionics offers a transformative approach through the in vivo implantation of nanosensors. These sensors enable real-time, non-destructive monitoring of biological molecules directly within living plant tissues [6] [36]. This application note provides a structured comparison between these established gold standards and nascent nanosensing technologies. We present standardized protocols for traditional methods and contextualize the performance benchmarks against which novel nanosensors must be evaluated to demonstrate efficacy, reliability, and advantage for in vivo plant research.
Comparative Analysis of Diagnostic Methodologies
The selection of an appropriate analytical method depends on the research question, target analyte, and required sensitivity. The table below summarizes the core characteristics of ELISA, PCR, and emerging nanosensor technologies.
Table 1: Benchmarking ELISA, PCR, and Nanosensors for Plant Science Applications
| Method | Primary Application | Key Advantage | Key Limitation | Sensitivity | Temporal Resolution |
|---|---|---|---|---|---|
| ELISA | Detecting proteins, antibodies, hormones (e.g., IAA) [78] | High specificity; suitable for high-throughput screening [78] [80] | End-point measurement; requires tissue destruction [36] | Detects pork at 10.0% in meat mixtures [80] | Low (hours to days) |
| PCR/Real-time PCR | Detecting DNA/RNA sequences (e.g., pathogen detection) [81] [79] | Extremely high sensitivity and specificity for nucleic acids [81] [80] | Requires tissue destruction and DNA/RNA extraction [81] | Detects pork at 0.1% in meat mixtures [80] | Low (hours) |
| Nanosensors | Real-time monitoring of metabolites & signaling molecules (e.g., H₂O₂, IAA, SA) [36] [28] | Non-destructive, real-time, in vivo monitoring [36] [28] | Emerging technology; requires validation against gold standards [6] | Nanomolar range for H₂O₂ and SA [28] | High (seconds to minutes) |
A comparative study on meat species detection highlights the typical performance gap between PCR and ELISA, with real-time PCR demonstrating a hundred-fold greater sensitivity (0.1% for pork detection) compared to ELISA (10% for pork detection) [80]. Similarly, in plant pathology, an indirect ELISA for Rice tungro disease showed 96.6% specificity compared to PCR, while a dot-blot assay developed in the same study was noted for its simplicity and suitability for field use without specialized equipment [81]. For Helicobacter pylori detection, PCR showed the highest specificity (94.44%), while RUT (Rapid Urease Test) showed the highest sensitivity (92.16%); ELISA, while rapid and non-invasive, showed a lower specificity of 61.11% [79]. These benchmarks are crucial for validating new sensing technologies.
Established Experimental Protocols
Protocol for Indirect ELISA
The following protocol is adapted from serological detection methods for plant viruses and is a common technique for detecting antibodies or antigens [81] [78].
Key Reagents:
- Coating Buffer: Carbonate-bicarbonate buffer (pH 9.6)
- Blocking Buffer: 1% Casein in PBS (CPBS)
- Wash Buffer: 1x PBS with 0.05% Tween 20 (PBST)
- Primary Antibody (e.g., rabbit antiserum against target antigen)
- Enzyme-Conjugated Secondary Antibody (e.g., anti-rabbit IgG conjugated to Horseradish Peroxidase - HRP)
- Substrate: Tetramethylbenzidine (TMB)
- Stop Solution: 1M HCl or H₂SO₄
Procedure:
- Coating: Coat 96-well maxisorp immunoplates with 100 µl/well of a 1:40 dilution of test leaf sap in carbonate-bicarbonate coating buffer. Incubate overnight at 4°C [81].
- Washing: Wash the plate once with 300 µl/well of PBST wash buffer [81].
- Blocking: Block plates with 200 µl/well of 1% CPBS blocking buffer for 2 hours at room temperature [81].
- Primary Antibody Incubation: Add the primary antibody diluted in blocking buffer. Incubate for 2 hours at room temperature.
- Washing: Wash plates three times with PBST to remove unbound antibody.
- Secondary Antibody Incubation: Add the enzyme-conjugated secondary antibody diluted in blocking buffer. Incubate for 1-2 hours at room temperature [78].
- Washing: Wash plates three times with PBST to remove unbound conjugate.
- Signal Detection: Add enzyme substrate (TMB). Incubate in the dark for 15-30 minutes until color develops [78].
- Stop Reaction: Add an equal volume of stop solution to each well. The color will change from blue to yellow if TMB/H₂SO₄ is used.
- Reading: Measure the optical density (OD) at 450 nm using an ELISA plate reader [78].
Protocol for PCR-Based Pathogen Detection
This protocol is commonly used for detecting viral or bacterial pathogens in plants, such as Rice tungro disease or Helicobacter pylori [81] [79].
Key Reagents:
- Lysis Buffer (e.g., CTAB/NaCl for DNA extraction)
- Taq DNA Polymerase
- dNTPs (dATP, dCTP, dTTP, dGTP)
- Primer pairs specific to target gene (e.g., Urea C, 16S rRNA, CSTP for H. pylori) [79]
- MgCl₂
Procedure:
- DNA Extraction:
- Homogenize plant or biopsy tissue.
- Resuspend in TE buffer with SDS and proteinase K. Incubate overnight at 40°C [79].
- Extract DNA using CTAB/NaCl solution.
- Remove debris and proteins with phenol/chloroform/isoamyl alcohol extraction.
- Precipitate DNA with isopropanol, wash with ethanol, and resuspend in TE buffer [79].
- PCR Reaction Setup:
- Prepare a 25 µl reaction mixture containing [79]:
- 2 mM MgCl₂
- 0.2 mM of each dNTP
- 0.4 µL of each forward and reverse primer
- 2.5 U of Taq DNA polymerase
- 1 µL of extracted DNA template
- Prepare a 25 µl reaction mixture containing [79]:
- Thermal Cycling:
- Initial Denaturation: 94°C for 5 minutes.
- Amplification (35 cycles):
- Denaturation: 94°C for 30 seconds.
- Annealing: Primer-specific Tm for 30 seconds.
- Extension: 72°C for 30 seconds.
- Final Extension: 72°C for 7 minutes [79].
- Analysis: Visualize PCR products on a 1% agarose gel stained with ethidium bromide under UV light [79].
Workflow Comparison: Traditional Methods vs. Nanosensor Implantation
The following diagram illustrates the key procedural steps and fundamental differences between destructive gold-standard methods and the non-destructive approach of nanosensor implantation.
The Scientist's Toolkit: Key Research Reagent Solutions
Successful experimentation in this field relies on a suite of critical reagents and materials. The following table details essential items for the protocols and technologies discussed.
Table 2: Essential Research Reagents and Materials
| Item | Function/Application | Specific Examples & Notes |
|---|---|---|
| Polyclonal/Monoclonal Antibodies | Core recognition element in ELISA for specific antigen binding [78]. | Rabbit antiserum against purified tungro viruses; anti-human IgG for serology [81] [79]. |
| PCR Primers | Specifically amplify target DNA sequences for pathogen detection or gene expression analysis [81] [79]. | Primers for Urea C, 16S rRNA, and CSTP genes for H. pylori; pathogen-specific primers for Rice tungro virus [81] [79]. |
| Single-Walled Carbon Nanotubes (SWNTs) | The core optical transducer in near-infrared (nIR) fluorescent nanosensors [36] [28]. | Serves as a highly photostable nIR fluorophore; structure is non-covalently functionalized with specific polymer wrappings [28]. |
| Corona Phase Molecular Recognition (CoPhMoRe) Polymers | Imparts molecular specificity to SWNT-based nanosensors [36] [28]. | Cationic fluorene-based copolymers (e.g., S3 polymer) for salicylic acid; (GT)₁₅ DNA oligos for H₂O₂ [28]. |
| Near-Infrared (NIR) Fluorescence Imager | Essential equipment for reading signals from SWNT-based nanosensors in plant tissues [36]. | Allows detection in the nIR range (e.g., ~1000 nm) to avoid interference from plant chlorophyll autofluorescence [36] [28]. |
| Microtiter Plates | Solid phase for ELISA assays [78]. | 96-well maxisorp immunoplates (e.g., Nunc) for optimal protein binding [81]. |
| Enzyme Conjugates & Substrates | Generate measurable signal (color, light) in ELISA [78]. | Horseradish Peroxidase (HRP) conjugated to secondary antibody with TMB substrate [78]. |
Nanosensor Multiplexing: A Case Study in Advanced Phenotyping
The true power of in vivo nanosensors is revealed in multiplexed sensing configurations, where multiple distinct sensors are deployed simultaneously within the same plant to decode complex signaling networks.
A seminal study demonstrated this by multiplexing a novel salicylic acid (SA) nanosensor with a previously developed H₂O₂ nanosensor in Pak choi plants [28]. The SA nanosensor was created by screening a library of cationic polymer-wrapped SWNTs, identifying a specific polymer (S3) that induced a 35% quenching of nIR fluorescence upon binding 100 µM SA with high selectivity over other plant hormones [28]. When applied to plants subjected to different stresses (pathogen, heat, light, mechanical wounding), the multiplexed sensors revealed distinct temporal wave characteristics of H₂O₂ and SA generation for each stress type within hours of treatment [28]. This capability to map the dynamics of multiple signaling molecules in real-time provides unprecedented insight into plant stress physiology that is inaccessible through destructive, single-time-point assays.
Logic of Multiplexed Sensing for Stress Pathway Decoding
The following diagram conceptualizes the information flow and experimental logic of a multiplexed nanosensor experiment designed to dissect early plant stress signaling.
The gold-standard methods of ELISA and PCR provide the essential foundation of specificity, sensitivity, and validation for plant diagnostics and biochemical analysis. However, the future of plant phenotyping and physiological research lies in the integration of these validated approaches with the non-destructive, real-time capabilities of implanted nanosensors. The benchmarking data and protocols provided here serve as a critical reference point for developing and validating new nanosensing technologies. By meeting or exceeding the performance benchmarks of traditional assays while providing unprecedented temporal and spatial resolution, nanosensor multiplexing represents a paradigm shift, moving from single-point snapshots to a dynamic, continuous understanding of plant health and signaling.
The in vivo implantation of nanosensors in plant tissues represents a frontier in plant science, enabling real-time, non-destructive monitoring of physiological processes [23]. For researchers and drug development professionals, quantifying the performance of these nanosensors through standardized metrics is critical for experimental validation and technology adoption. This document outlines the core performance metrics—limits of detection, response time, and accuracy—for prominent in vivo plant nanosensors, provides detailed protocols for their experimental determination, and visualizes the underlying signaling pathways and workflows.
Performance Metrics of In Vivo Plant Nanosensors
The following table summarizes the key performance metrics for recently developed nanosensors designed for in vivo plant applications.
Table 1: Performance Metrics of Select In Vivo Plant Nanosensors
| Nanosensor Type / Target Analyte | Limit of Detection (LOD) | Response Time | Reported Accuracy / Specificity | Key Nanomaterials Used |
|---|---|---|---|---|
| NIR-II Fluorescent Nanosensor for H₂O₂ [10] | 0.43 µM | 1 minute | >96.67% (for stress classification via ML) | AIE Fluorophore (AIE1035), Polymetallic Oxomolybdates (POMs, e.g., Mo/Cu-POM) |
| Near-Infrared Fluorescent Nanosensor for Indole-3-Acetic Acid (IAA) [36] | Not explicitly quantified in results | Enables real-time tracking | Species-agnostic detection; bypasses chlorophyll interference | Single-walled carbon nanotubes (SWCNTs), specially designed polymer |
| FRET-based QD Nanosensor for Ganoderma boninense DNA [9] | 3.55 × 10⁻⁹ M | Results within 30 minutes (similar assays) | High specificity for target DNA sequence | Cadmium Telluride Quantum Dots (CdTe QDs), Gold Nanoparticles |
Experimental Protocols for Performance Quantification
Protocol: Determining LOD and Response Time of a NIR-II H₂O₂ Nanosensor
This protocol is adapted from studies on H₂O₂-activatable NIR-II nanosensors [10].
1. Principle The nanosensor is in a fluorescence-"off" state until it encounters the target analyte (H₂O₂). The redox reaction between H₂O₂ and the polymetallic oxomolybdates (POM) quencher restores the NIR-II fluorescence of the AIE fluorophore. The LOD is the lowest H₂O₂ concentration that produces a statistically significant signal over the background. Response time is the duration required for the fluorescence signal to stabilize upon analyte exposure.
2. Research Reagent Solutions Table 2: Key Reagents for NIR-II H₂O₂ Nanosensor Assay
| Reagent/Material | Function in the Experiment |
|---|---|
| AIE1035NPs@Mo/Cu-POM Nanosensor | The core "turn-on" sensory element for H₂O₂ detection. |
| Hydrogen Peroxide (H₂O₂) Standard Solutions | The target analyte; used for calibration and sensitivity testing. |
| Phosphate Buffered Saline (PBS), various pH | Provides a stable, physiologically relevant chemical environment. |
| NIR-II Spectrofluorometer | Instrument to measure fluorescence intensity in the 1000-1700 nm range. |
| Living Plant Specimens (e.g., Arabidopsis, lettuce) | The in vivo system for sensor validation and stress response monitoring. |
3. Procedure 1. Nanosensor Preparation: Synthesize and characterize the AIE1035NPs@Mo/Cu-POM nanosensor as described in the literature [10]. Confirm particle size (approx. 230 nm) and dispersion (PDI ~0.078) using dynamic light scattering (DLS) and transmission electron microscopy (TEM). 2. In Vitro Calibration: * Prepare a dilution series of H₂O₂ in PBS (e.g., 0.1 µM to 100 µM). * Add a fixed concentration of the nanosensor to each H₂O₂ solution. * Immediately place the mixture in a quartz cuvette and measure the NIR-II fluorescence intensity (e.g., at 1035 nm emission) over time. * Plot the fluorescence intensity against H₂O₂ concentration to generate a calibration curve. * Calculate the LOD using the formula: LOD = 3σ/S, where σ is the standard deviation of the blank (zero analyte) signal, and S is the slope of the calibration curve. 3. Response Time Measurement: From the kinetic fluorescence data obtained in step 2c, determine the time taken for the fluorescence signal to reach 95% of its maximum value for a given H₂O₂ concentration. This is the response time. 4. In Vivo Validation: * Introduce the nanosensor into living plant leaves via infiltration using a syringe without a needle. * Subject plants to various abiotic stresses (e.g., heat, light, drought) known to induce H₂O₂ production. * Use an NIR-II macroscopic whole-plant imaging system or an NIR-II microscope to capture real-time fluorescence signals. * Correlate the fluorescence turn-on with the onset of stress.
4. Data Analysis The calibration curve allows for the quantification of unknown H₂O₂ concentrations in plant tissues. The rapid response time enables the monitoring of dynamic changes in H₂O₂ levels during stress signaling.
Protocol: Assessing Accuracy via Machine Learning for Stress Classification
This protocol leverages machine learning (ML) to enhance the accuracy of stress diagnosis using nanosensor data [10].
1. Principle The spatial and temporal fluorescence patterns generated by the nanosensor in response to different stresses are distinct. An ML model can be trained to recognize these patterns and accurately classify the type of stress applied to the plant.
2. Procedure 1. Data Acquisition: Using the NIR-II H₂O₂ nanosensor, collect fluorescence imaging data from a large number of plants subjected to a minimum of four different stress conditions (e.g., heat, drought, high salinity, pathogen attack) and a control group. 2. Feature Extraction: From the fluorescence images and videos, extract features such as maximum fluorescence intensity, time-to-peak, spatial distribution of the signal, and signal persistence. 3. Model Training and Validation: * Label the dataset with the corresponding stress types. * Split the data into a training set (e.g., 80%) and a testing set (e.g., 20%). * Train a supervised ML classifier (e.g., Support Vector Machine, Random Forest) on the training set. * Use the testing set to validate the model's performance and calculate its classification accuracy.
3. Data Analysis The model's accuracy, defined as the percentage of correctly classified stress events in the test set, is a critical metric for the nanosensor system's diagnostic capability. The reported accuracy of >96.67% demonstrates the high precision achievable with this integrated approach [10].
Signaling Pathways and Experimental Workflows
H₂O₂-Mediated Stress Signaling Pathway
The following diagram illustrates the central role of H₂O₂ in plant stress signaling, which is the basis for the NIR-II nanosensor's function.
Diagram 1: H₂O₂ stress signaling and sensing.
Workflow for Nanosensor Performance Quantification
This diagram outlines the comprehensive experimental workflow from sensor preparation to final data analysis and validation.
Diagram 2: Performance quantification workflow.
The in vivo implantation of nanosensors in plant tissues represents a frontier in plant science, enabling real-time monitoring of signaling molecules, metabolites, and physiological processes. Nanosensors—selective transducers with a characteristic dimension on the nanometre scale—have emerged as crucial tools for non-destructive, minimally invasive analysis of plant systems [23] [8]. These sensors primarily fall into two categories: genetically encoded nanosensors, which are engineered into the plant's genome and produced by the plant's own cellular machinery, and exogenously applied nanosensors, which are synthesized externally and introduced into plant tissues through various delivery methods [23]. This comparative analysis examines the technical specifications, implementation protocols, and research applications of both approaches within the context of advanced plant science research, providing a framework for selecting appropriate sensing strategies for specific experimental needs.
Technical Specifications and Comparative Analysis
Fundamental Operating Principles
Genetically encoded nanosensors are typically based on fluorescent proteins or biological receptors integrated into the plant's genetic code. The most common design utilizes Förster Resonance Energy Transfer (FRET), where two fluorescent proteins with spectral overlap serve as a donor-acceptor pair [23] [82]. When the target analyte binds to the sensing domain, it induces conformational changes that alter the distance or orientation between the fluorophores, modifying FRET efficiency [83]. Common FRET pairs include cyan fluorescent protein (CFP) and yellow fluorescent protein (YFP) [23]. Recent advances include fluorescence lifetime imaging microscopy (FLIM) implementations, where the fluorescence lifetime of the donor fluorophore is measured, providing quantification independent of sensor concentration or excitation power [83].
Exogenously applied nanosensors employ synthetic nanomaterials with tunable optical or electrochemical properties. These include single-walled carbon nanotubes (SWCNTs) wrapped in specially designed polymers [36], quantum dots [23], plasmonic nanosensors [23], and electrochemical nanosensors [23] [6]. Their sensing mechanisms rely on changes in fluorescence intensity, surface-enhanced Raman scattering (SERS), or electrical signals upon analyte binding [23] [36]. For instance, a recently developed near-infrared fluorescent nanosensor for auxin detection uses SWCNTs wrapped in a specially designed polymer that detects indole-3-acetic acid (IAA) through changes in near-infrared fluorescence intensity [36].
Comparative Performance Characteristics
Table 1: Performance Comparison of Nanosensor Platforms
| Performance Parameter | Genetically Encoded Nanosensors | Exogenously Applied Nanosensors |
|---|---|---|
| Sensitivity | Nanomolar to micromolar range for metabolites [84] | Varies by design; picomolar to nanomolar range demonstrated for hormones [36] |
| Spatial Resolution | Subcellular compartment targeting possible [23] | Tissue-level to cellular resolution [23] [36] |
| Temporal Resolution | Real-time monitoring (seconds to minutes) [82] | Real-time to near-real-time monitoring [36] |
| Long-term Stability | Days to weeks (dependent on protein turnover) [82] | Hours to days (may degrade or be metabolized) [23] |
| Multiplexing Capacity | Limited by spectral overlap [83] | Potentially higher with different nanomaterials [6] |
| Quantitative Accuracy | High with ratiometric FRET or FLIM readouts [83] | Requires calibration; subject to environmental interference [23] |
Table 2: Implementation Requirements Comparison
| Implementation Factor | Genetically Encoded Nanosensors | Exogenously Applied Nanosensors |
|---|---|---|
| Development Timeline | Months to years (requires genetic engineering) [84] | Weeks to months (nanomaterial synthesis and validation) [36] |
| Species Compatibility | Limited to transformable species [23] | Broad species applicability [36] |
| Regulatory Considerations | GMO regulations apply [23] | Fewer regulatory hurdles in some jurisdictions [6] |
| Technical Expertise Required | Molecular biology, plant transformation, microscopy [82] [84] | Nanomaterial synthesis, characterization, application [23] [36] |
| Cost Factors | High initial development, lower per-use cost [23] | Variable nanomaterial costs, potentially expensive raw materials [23] |
Experimental Protocols
Implementation Workflow for Genetically Encoded Nanosensors
Diagram: Genetically Encoded Sensor Workflow
Protocol 3.1.1: Sensor Design and Genetic Construct Assembly
- Step 1: Select appropriate sensing scaffold based on target analyte (e.g., auxin receptors for auxin sensing [84], phosphate-binding proteins for phosphate sensing [84]).
- Step 2: Engineer sensing domain fused to fluorescent protein pairs (e.g., CFP-YFP for FRET [23] or single FPs for FLIM [83]).
- Step 3: Clone genetic construct into plant expression vector with suitable promoters (constitutive, tissue-specific, or inducible [84]).
- Step 4: Verify construct sequence and protein expression in model systems (e.g., protoplasts or transient expression in Nicotiana benthamiana [23]).
Protocol 3.1.2: Plant Transformation and Screening
- Step 1: Transform Arabidopsis thaliana or target species via floral dip (Agrobacterium-mediated) [23] [84].
- Step 2: Select transformants on antibiotic-containing media.
- Step 3: Screen T1 and subsequent generations for sensor expression and functionality.
- Step 4: Counteract potential gene silencing by using mutant plants deficient in gene silencing pathways [23].
Protocol 3.1.3: Imaging and Data Acquisition
- Step 1: Mount plant tissues for microscopy imaging.
- Step 2: For FRET sensors: collect emissions at 480 nm (CFP) and 535 nm (YFP) with excitation at 433 nm [23].
- Step 3: For FLIM sensors: measure fluorescence lifetime decay of donor fluorophore (e.g., mTurquoise with ~4.0 ns lifetime) [83].
- Step 4: Implement controls for autofluorescence correction, particularly for chlorophyll (ex 410-460 nm, em 600-700 nm) and cell wall components [23].
Implementation Workflow for Exogenously Applied Nanosensors
Diagram: Exogenous Sensor Application Workflow
Protocol 3.2.1: Nanosensor Synthesis and Functionalization
- Step 1: Synthesize base nanomaterials (e.g., single-walled carbon nanotubes via CVD [36], quantum dots via colloidal synthesis [23]).
- Step 2: Functionalize with recognition elements (e.g., polymer wrapping for SWCNTs [36], antibodies [23], or molecular imprinting [6]).
- Step 3: Purify and characterize nanosensors (size distribution, surface charge, optical properties).
- Step 4: Confirm sensor stability and functionality in plant-relevant buffers.
Protocol 3.2.2: Plant Application and Integration
- Step 1: Apply nanosensors to plants via leaf infiltration (using syringe without needle [23]), root uptake [23], or dipping methods.
- Step 2: Optimize concentration to balance signal intensity with potential phytotoxicity (e.g., 1-100 μg/mL for SWCNT-based sensors [36]).
- Step 3: Allow appropriate incubation time for sensor distribution (typically 2-48 hours [23]).
- Step 4: For root applications, facilitate uptake through natural openings or rhizodermis lateral root junctions [23].
Protocol 3.2.3: Signal Detection and Processing
- Step 1: For near-infrared fluorescent sensors: image with NIR-capable systems (excitation at 785 nm, emission collection >1000 nm) to avoid chlorophyll interference [36].
- Step 2: For electrochemical sensors: measure current or voltage changes using integrated electrode systems [23] [6].
- Step 3: For SERS sensors: collect Raman spectra with appropriate laser excitation sources [23].
- Step 4: Process signals with background subtraction and normalization to reference signals where possible.
The Scientist's Toolkit: Essential Research Reagents and Materials
Table 3: Key Research Reagent Solutions for Nanosensor Implementation
| Reagent/Material | Function/Application | Examples/Specifications |
|---|---|---|
| Fluorescent Protein Pairs | FRET-based sensing elements | CFP-YFP pairs; mTurquoise-NowGFP for FLIM-FRET [83] |
| Plant Transformation Vectors | Delivery of genetic constructs into plants | Binary vectors with plant-specific promoters (35S, UBQ10) [84] |
| Single-Walled Carbon Nanotubes | Near-infrared fluorescence platform | Polymer-wrapped SWCNTs for hormone detection [36] |
| Quantum Dots | Photostable fluorescence emitters | CdTe QDs for viral pathogen detection [23] |
| Functionalization Polymers | Molecular recognition interfaces | Designed copolymers for specific analyte binding [36] |
| Gold Nanoparticles | Plasmonic sensing platforms | Shape-controlled AuNPs for SERS applications [6] |
| Microscopy Systems | Sensor signal detection | Confocal microscopes with FLIM capabilities [83] |
| Plant Growth Media | Maintain plant health during experiments | Standard MS media with appropriate supplements [23] |
Applications in Plant Science Research
Signaling Molecule and Hormone Detection
Genetically encoded sensors have revolutionized the study of plant hormones by enabling real-time tracking in specific cellular compartments. The abscisic acid (ABA) sensing platform based on engineered ABA receptors (PYR1) exemplifies this approach, where hormone binding induces conformational changes detectable via FRET [84]. Similarly, FRET-based gibberellin sensors have been deployed in Arabidopsis thaliana to monitor spatiotemporal dynamics of this crucial growth regulator [23]. These tools have revealed hormone gradient formation, transport mechanisms, and signaling dynamics in response to environmental stimuli.
Exogenously applied sensors provide complementary capabilities for hormone monitoring, particularly when genetic manipulation is impractical. The recently developed universal near-infrared fluorescent nanosensor for indole-3-acetic acid (IAA) detection demonstrates the power of this approach [36]. This sensor employs polymer-wrapped single-walled carbon nanotubes that detect IAA through changes in fluorescence intensity, bypassing chlorophyll interference and functioning across multiple plant species without genetic modification. Such sensors enable direct, real-time tracking of auxin fluctuations in leaves, roots, and cotyledons under various environmental conditions.
Metabolic Monitoring and Pathogen Detection
Genetically encoded sensors for metabolites include the FLIP (FRET-based sensors for sugar and metabolite detection) series, which have been used to monitor glucose levels in Arabidopsis thaliana and Oryza sativa [23]. The cpFLIPPi5.3 sensor enables phosphate monitoring in Arabidopsis and Brachypodium distachyon, featuring a phosphate-binding protein fused to two fluorescent proteins in a FRET configuration [84]. These tools allow researchers to track metabolic flux in response to environmental changes and genetic modifications.
Exogenously applied nanosensors offer versatile platforms for pathogen detection through various mechanisms. Antibody-functionalized quantum dots have been used to detect Citrus tristeza virus, while zinc oxide nanostructures can identify Grapevine virus A-type infections [23]. These sensors provide rapid diagnostic capabilities without requiring genetic modification of crop species, making them potentially valuable for agricultural monitoring and disease management applications.
The comparative analysis of genetically encoded and exogenously applied nanosensors reveals complementary strengths that can be strategically leveraged for different research scenarios. Genetically encoded sensors provide unparalleled spatial precision and long-term monitoring capabilities within genetically tractable systems, making them ideal for fundamental research into signaling pathways and metabolic regulation. Exogenously applied sensors offer species flexibility and rapid deployment for applications across diverse plant systems, showing particular promise for agricultural monitoring and species where genetic transformation is challenging.
Future developments will likely focus on multiplexing capabilities, enhanced signal-to-noise ratios, and integration with precision delivery systems such as microneedles for highly localized, tissue-specific sensing [36]. The convergence of these technologies with advances in imaging, data analytics, and sustainable nanomaterial synthesis will further expand their applications in both basic plant science and agricultural innovation, ultimately contributing to improved crop optimization and fundamental understanding of plant physiology.
Validating In Vivo Results with Orthogonal Analytical Techniques
The in vivo implantation of nanosensors into plant tissues represents a transformative advancement in plant science, enabling the real-time monitoring of signaling molecules, hormones, and metabolites within living systems [23] [28]. These sensors, including optical nanosensors based on Förster resonance energy transfer (FRET) and electrochemical nanosensors using carbon nanotubes, provide unprecedented spatial and temporal resolution for observing plant stress responses, metabolic flux, and phytohormone dynamics [23] [85]. However, the complexity of living plant systems and potential for sensor-plant interactions necessitate rigorous validation of in vivo readings using orthogonal analytical techniques—independent methods based on different physical or chemical principles. This protocol outlines comprehensive strategies for confirming nanosensor data through multiple analytical pathways, ensuring research integrity and reliability for critical applications in crop science, drug development from plant metabolites, and climate resilience research.
Orthogonal Technique Selection Framework
Matching Techniques to Analyte Classes
The selection of appropriate orthogonal methods depends primarily on the chemical nature of the target analyte and the specific nanosensor technology employed. The table below summarizes recommended pairings:
Table 1: Orthogonal Technique Selection Guide Based on Analyte Class
| Target Analyte Class | Primary Nanosensor Technology | Recommended Orthogonal Techniques | Key Considerations |
|---|---|---|---|
| Reactive Oxygen Species (e.g., H₂O₂) | Single-walled carbon nanotube (SWNT) optical sensors [28] | Amplex Red assay, Chemiluminescence probes, Spectrophotometry | Spatial localization, Rapid temporal dynamics |
| Plant Hormones (e.g., Salicylic Acid) | FRET-based genetically encoded sensors [23] | LC-MS/MS, GC-MS, SERS, Immunoassays | Low concentration, Complex matrix effects |
| Ionic Species (e.g., Ca²⁺) | FRET-based "cameleon" sensors [23] | Ion chromatography, AES, Fluorescent dyes | Compartmentalization, Signaling waves |
| Metabolic Intermediates | Electrochemical nanosensors [23] | HPLC, NMR, Enzymatic assays | Metabolic stability, Pathway context |
Experimental Design Considerations
When planning orthogonal validation, researchers must address several critical experimental factors:
- Temporal alignment: Synchronize measurement timelines between nanosensor readings and orthogonal sampling, accounting for differences in temporal resolution [28].
- Spatial resolution: Address disparities between localized nanosensor measurements (cellular/subcellular) and bulk tissue analyses through micro-sampling techniques [85].
- Minimizing plant disturbance: Implement sequential destructive sampling designs or use multiple genetically identical plants to reduce the impact of repeated measurements on living systems.
- Matrix effects: Account for interference from plant pigments, cell wall components, and secondary metabolites that may affect different analytical techniques variably [85].
Detailed Experimental Protocols
Protocol 1: Validating H₂O₂ Nanosensor Readings with Spectrophotometry
Principle
This protocol validates real-time hydrogen peroxide detection using SWNT-based nanosensors with the established Amplex Red spectrophotometric assay, which converts H₂O₂ into a fluorescent resorufin product in the presence of horseradish peroxidase [28].
Materials
- Plant material: Pak choi (Brassica rapa subsp. Chinensis) plants, 4-5 weeks old [28]
- Nanosensors: (GT)₁₅-DNA wrapped SWNTs for H₂O₂ detection [28]
- Reagents: Amplex Red reagent, Horseradish peroxidase (HRP), Potassium phosphate buffer, H₂O₂ standard solution
- Equipment: Near-infrared fluorescence imaging system, Microplate reader, Pestle and mortar, Microcentrifuge, Injection syringe
Procedure
Nanosensor implantation and stress application:
- Infiltrate abaxial leaf surface with 1 mL of (GT)₁₅-SWNT nanosensor solution using a needle-free syringe [28].
- Apply standardized stress treatments: light stress (1000 μmol m⁻² s⁻¹), heat stress (38°C), mechanical wounding, or pathogen infection.
- Monitor H₂O₂ flux in real-time using nIR fluorescence imaging at 1-minute intervals for 2 hours post-stress.
Tissue sampling for orthogonal analysis:
- At predetermined timepoints (e.g., 15, 30, 60, 120 minutes post-stress), harvest leaf discs (0.5 cm diameter) from equivalent positions on separate but genetically identical plants.
- Immediately flash-freeze samples in liquid nitrogen and store at -80°C until analysis.
Amplex Red assay execution:
- Grind 100 mg frozen tissue in 1 mL cold potassium phosphate buffer (50 mM, pH 7.4).
- Centrifuge at 12,000 × g for 15 minutes at 4°C.
- Transfer 50 μL supernatant to microplate wells in triplicate.
- Add 50 μL reaction mixture containing 50 μM Amplex Red and 0.1 U/mL HRP.
- Incubate 30 minutes at room temperature protected from light.
- Measure fluorescence at excitation/emission of 530/590 nm using microplate reader.
- Calculate H₂O₂ concentrations using a standard curve (0-10 μM).
Data Interpretation and Validation Criteria
Compare temporal patterns and relative magnitude of H₂O₂ changes between methods. Successful validation requires:
- Correlation coefficient (r) ≥ 0.85 between normalized response curves
- Consistent directionality of response across all stress treatments
- Similar time-to-peak response (± 10% variation acceptable)
Protocol 2: Validating Salicylic Acid Detection with LC-MS/MS
Principle
This protocol validates salicylic acid (SA) measurements from polymer-wrapped SWNT nanosensors using liquid chromatography tandem mass spectrometry (LC-MS/MS), providing superior sensitivity and specificity for hormone quantification [85] [28].
Materials
- Plant material: Arabidopsis thaliana or Pak choi plants
- Nanosensors: Cationic polymer (S3)-wrapped SWNTs selective for SA [28]
- Reagents: Deuterated SA internal standard, Methanol, Formic acid, Acetonitrile
- Equipment: UHPLC system coupled to triple quadrupole MS, Tissue lyser, Centrifugal evaporator, Solid-phase extraction columns
Procedure
SA nanosensor monitoring:
- Infiltrate S3-SWNT nanosensors into leaf mesophyll as described in Protocol 1.
- Apply stress treatments: pathogen infection (Pseudomonas syringae), UV exposure, or chemical inducers.
- Record SA-dependent fluorescence quenching at 1-minute intervals for 3 hours.
Sample preparation for LC-MS/MS:
- Harvest tissue samples (100 mg) at 0, 30, 90, and 180 minutes post-induction.
- Add deuterated SA internal standard immediately upon harvesting.
- Homogenize in 1 mL 80% methanol using a tissue lyser.
- Centrifuge at 15,000 × g for 20 minutes, collect supernatant.
- Dry under nitrogen gas and reconstitute in 100 μL 10% methanol.
LC-MS/MS analysis:
- Chromatography: Reverse-phase C18 column, gradient 10-90% methanol with 0.1% formic acid over 15 minutes.
- Mass spectrometry: ESI negative mode, MRM transitions 137→93 (SA) and 141→97 (internal standard).
- Quantify using internal standard calibration curve (0.1-100 ng/mL).
Validation Parameters
- Limit of detection: ≤ 0.1 ng/g fresh weight for LC-MS/MS
- Precision: CV < 15% for replicate analyses
- Accuracy: 85-115% recovery of spiked standards
- Correlation: Linear regression R² ≥ 0.90 between normalized nanosensor response and LC-MS/MS concentration
Research Reagent Solutions
Table 2: Essential Research Reagents for Orthogonal Validation
| Reagent/Category | Specific Examples | Function in Validation | Key Considerations |
|---|---|---|---|
| Nanosensor Platforms | (GT)₁₅-DNA SWNTs, Cationic polymer-wrapped SWNTs, FRET-based genetically encoded sensors [23] [28] | Primary in vivo detection of analytes | Selectivity, Photostability, Biocompatibility |
| Chromatography Systems | LC-MS/MS, GC-MS, HPLC with various detectors [85] | Separation and sensitive quantification | Matrix effects, Sensitivity, Recovery efficiency |
| Spectroscopy Reagents | Amplex Red, Fluorescent dyes, SERS substrates [85] | Signal generation for specific analytes | Interference, Stability, Penetration capability |
| Immunoassay Components | SA antibodies, Coated plates, Enzyme conjugates [85] | Molecular recognition-based detection | Cross-reactivity, Sample preparation needs |
| Sample Preparation Kits | Solid-phase extraction, Metabolite purification, Protein removal | Matrix simplification and analyte concentration | Analyte loss, Throughput, Compatibility |
Data Integration and Analysis Workflow
The validation of in vivo nanosensor data requires systematic comparison across multiple dimensions. The following workflow diagram illustrates the integrated validation process:
Quantitative Data Presentation Standards
All validation data should be presented in standardized tables to enable direct comparison between techniques. The example below demonstrates the appropriate format:
Table 3: Sample Validation Data for H₂O₂ Detection Under Multiple Stress Conditions
| Stress Condition | Time Post-Stress (min) | Nanosensor Response (ΔF/F₀) | Amplex Red (nmol/g FW) | Correlation Coefficient (r) | Validation Status |
|---|---|---|---|---|---|
| Mechanical Wounding | 15 | 0.25 ± 0.03 | 18.5 ± 2.1 | 0.92 | Validated |
| Mechanical Wounding | 30 | 0.41 ± 0.05 | 35.2 ± 3.8 | 0.89 | Validated |
| Pathogen Infection | 30 | 0.18 ± 0.02 | 14.3 ± 1.6 | 0.94 | Validated |
| Pathogen Infection | 60 | 0.38 ± 0.04 | 31.8 ± 2.9 | 0.91 | Validated |
| Heat Stress | 15 | 0.12 ± 0.02 | 9.8 ± 1.2 | 0.86 | Validated |
| High Light | 30 | 0.22 ± 0.03 | 19.1 ± 2.3 | 0.90 | Validated |
Advanced Applications and Multiplexed Validation
Multiplexed Sensor Validation
Recent advances enable simultaneous monitoring of multiple analytes, such as concurrent detection of H₂O₂ and salicylic acid using nanosensor multiplexing [28]. This approach requires expanded validation strategies:
Specialized Validation for Hormone Detection
Plant hormone detection presents unique challenges due to low concentrations and complex matrices. The research community has developed specialized approaches:
Table 4: Orthogonal Methods for Plant Hormone Validation
| Hormone Class | Nanosensor Approach | Recommended Orthogonal Methods | Detection Limits | Key Challenges |
|---|---|---|---|---|
| Salicylic Acid | Polymer-wrapped SWNTs [28] | LC-MS/MS, SERS with aptamers [85] | 0.1-1.0 nM | Differentiation from analogs |
| Auxins | FRET-based sensors [23] | GC-MS, Electrochemical sensors [85] | 0.5-2.0 nM | Spatial distribution patterns |
| Cytokinins | Genetically encoded sensors | Immunoassays, HPLC-ESI-MS | 0.2-1.0 nM | Complex conjugation metabolism |
| Abscisic Acid | Antibody-based nanosensors | UHPLC-MS/MS, ELISA | 0.3-1.5 nM | Rapid catabolism |
Troubleshooting and Quality Control
Common Validation Challenges
- Temporal misalignment: Address by implementing precise timing protocols and using internal reference standards.
- Spatial resolution mismatches: Mitigate through micro-sampling techniques and confocal validation imaging.
- Matrix interference effects: Implement robust sample cleanup and use standard addition methods.
- Sensor calibration drift: Include internal reference sensors and periodic recalibration checks.
Quality Control Metrics
- Accuracy: Mean recovery of 85-115% for spiked samples
- Precision: Coefficient of variation <15% for replicate analyses
- Sensitivity: Limit of detection sufficient to measure physiological concentrations
- Specificity: Demonstrate minimal interference from structurally similar compounds
Orthogonal validation remains essential for establishing the reliability of in vivo nanosensor data in plant systems. By implementing these comprehensive protocols and maintaining rigorous quality control standards, researchers can generate validated, high-confidence data that advances our understanding of plant signaling networks and stress responses, ultimately contributing to the development of climate-resilient crops and optimized plant-based pharmaceutical production.
Addressing Regulatory and Safety Considerations for Widespread Adoption
The implantation of nanosensors into living plant tissues represents a frontier in plant science and precision agriculture, offering unprecedented capabilities for real-time monitoring of physiology, stress, and disease [23] [10]. However, the transition of these technologies from laboratory research to widespread field application is contingent upon addressing complex regulatory and safety considerations. The unique physicochemical properties of nanomaterials that make them ideal for sensing—their high surface area-to-volume ratio, enhanced reactivity, and unique optical and electrical properties—also raise important questions about their interactions with biological systems [86] [69]. A proactive approach to safety assessment is not merely a regulatory hurdle but a fundamental component of responsible innovation, essential for building public trust and ensuring environmental protection. This document provides a structured framework for researchers to systematically evaluate and mitigate potential risks associated with in planta nanosensor implantation, with specific protocols for safety testing and regulatory preparation.
Mechanisms of Nanotoxicity and Risk Assessment
Understanding the fundamental mechanisms through which nanomaterials may interact with plant tissues is the cornerstone of effective risk assessment. Current research has identified several primary pathways by which nanoparticles can potentially cause adverse effects.
Key Toxicity Mechanisms
- Oxidative Stress: Nanoparticles (NPs) can trigger an imbalance between the production of reactive oxygen species (ROS) and antioxidant defenses [86]. This oxidative stress can damage cellular components, including lipids, proteins, and DNA. The assessment of oxidative stress can be performed by measuring the ratio of oxidized glutathione (GSSG) to reduced glutathione (GSH), where an increased GSSG-to-GSH ratio serves as a key indicator [86].
- Cell Death Pathways: Exposure to certain NPs can induce programmed cell death through apoptosis or unregulated cell death via necrosis [86]. The choice of assay is critical, as some NPs may interfere with colorimetric or fluorescent readouts.
- Genotoxicity: Some nanomaterials have the potential to cause DNA damage, which can be assessed through comet assays or γ-H2AX focus formation [86].
- Biocorona Formation: When nanoparticles enter plant tissues, biomolecules including proteins, metabolites, and carbohydrates spontaneously adsorb onto their surfaces, forming a "biocorona" [69]. This corona can alter the nanoparticle's surface properties, functionality, and biological interactions, potentially changing its intended sensing capability and toxicity profile.
Table 1: Primary Mechanisms of Nanomaterial Toxicity in Plant Systems
| Mechanism | Key Indicators | Recommended Assays |
|---|---|---|
| Oxidative Stress | Increased ROS; GSSG:GSH ratio; Lipid peroxidation | DCFH-DA assay; Glutathione assay; TBARS assay |
| Cytotoxicity | Loss of membrane integrity; Reduced metabolic activity | Trypan blue exclusion; MTT/WST-1 assay; LDH release |
| Genotoxicity | DNA strand breaks; Chromosomal aberrations | Comet assay; Micronucleus test |
| Biocorona Formation | Changes in hydrodynamic size; Altered surface charge | DLS; Zeta potential; Proteomics analysis |
Risk Assessment Workflow
A systematic approach to risk assessment ensures comprehensive evaluation of potential hazards. The following workflow outlines the key stages in assessing nanosensor safety.
Diagram 1: Risk Assessment Workflow
Physicochemical Characterization Protocols
Comprehensive characterization of nanomaterials is fundamental to understanding their behavior and potential toxicity. The properties of nanomaterials must be thoroughly documented before biological testing.
Essential Characterization Parameters
- Size and Morphology: Transmission Electron Microscopy (TEM) provides primary size and shape information. Dynamic Light Scattering (DLS) measures hydrodynamic diameter in suspension, which is crucial for understanding behavior in biological fluids [71].
- Surface Charge: Zeta potential measurement indicates colloidal stability and surface charge, which affects cellular interactions and aggregation behavior [71].
- Surface Chemistry: X-ray Photoelectron Spectroscopy (XPS) and Fourier-Transform Infrared Spectroscopy (FTIR) can characterize surface functional groups and elemental composition [10].
- Chemical Composition: Inductively Coupled Plasma Mass Spectrometry (ICP-MS) provides ultra-sensitive quantification of elemental composition and concentration, essential for dosimetry in exposure studies [71].
Table 2: Core Characterization Techniques for Nanosensors
| Parameter | Technique | Critical Data Points | Protocol Notes |
|---|---|---|---|
| Primary Size | TEM/SEM | Size distribution, Shape, Aggregation state | Analyze >100 particles for statistics; Report mean ± SD |
| Hydrodynamic Size | DLS | Intensity-based distribution, PDI | Measure in relevant biological media at 25°C; Triple measurements |
| Surface Charge | Zeta Potential | Zeta potential (mV) | Measure in relevant biological media; Triple measurements |
| Elemental Composition | ICP-MS | Concentration (μg/mL), Purity | Digest samples in aqua regia; Use internal standards |
| Surface Chemistry | XPS, FTIR | Functional groups, Elemental oxidation states | Prepare dry samples under inert atmosphere if air-sensitive |
Experimental Protocol: Basic Nanomaterial Characterization
Procedure:
- Prepare nanosensor suspension at appropriate concentration (e.g., 100 ppm) in deionized water and relevant biological media [71].
- For TEM analysis, deposit a drop of suspension on carbon-coated copper grid and air-dry. Image using appropriate magnification to resolve individual particles.
- For DLS and zeta potential, equilibrate samples for 2 minutes at 25°C before measurement. Perform minimum three replicates.
- For ICP-MS analysis, digest 100 μL of nanoparticle solution in 400 μL aqua regia (nitric acid:hydrochloric acid, 3:1). Dilute with 4.5 mL 1% nitric acid before analysis [71].
Quality Control: Include reference materials when available. Report all characterization data with standard deviations and polydispersity indices where applicable.
In Vitro and In Planta Safety Assessment
Before field deployment, nanosensors must undergo rigorous biological safety testing using both in vitro and in planta models.
In Vitro Cytotoxicity Testing
Protocol: Plant Cell Culture Viability Assessment
- Principle: Measure metabolic activity as an indicator of cell viability following nanosensor exposure.
- Materials: Plant cell suspension culture (e.g., tobacco BY-2), 96-well plates, MTT (3-(4,5-dimethylthiazol-2-yl)-2,5-diphenyltetrazolium bromide) or WST-1 reagent, microplate reader.
- Procedure:
- Culture plant cells in appropriate medium to logarithmic growth phase.
- Expose cells to nanosensor concentrations ranging from 1-100 μg/mL for 24-72 hours.
- Add MTT/WST-1 reagent and incubate according to manufacturer specifications.
- Measure absorbance at appropriate wavelength (typically 570 nm for MTT).
- Calculate cell viability relative to untreated controls.
- Interpretation: Dose-dependent reduction in viability indicates potential cytotoxicity. Note that some nanomaterials may interfere with assay reagents, requiring verification with multiple assay types.
In Planta Uptake and Translocation Studies
Understanding how nanosensors are taken up, transported, and accumulated in plants is essential for evaluating both functionality and potential environmental impacts.
Protocol: Quantitative Analysis of Nanoparticle Uptake via ICP-MS [71]
- Principle: Quantify metal-based nanosensor uptake and distribution in plant tissues with high sensitivity.
- Materials: Plant specimens (e.g., watermelon, tobacco, Arabidopsis), aerosolization or immersion system for application, nitric acid, hydrochloric acid, ICP-MS instrument.
- Procedure:
- Apply nanosensors to plants via foliar aerosol or root immersion at relevant concentrations (e.g., 100 ppm gold NPs) [71].
- After exposure period (e.g., 24 hours to 14 days), harvest plant tissues (leaves, stems, roots) and wash thoroughly to remove surface-adhered particles.
- Separately digest 100-500 mg of each tissue type in aqua regia at elevated temperature until clear.
- Dilute digested samples with 1% nitric acid and analyze by ICP-MS.
- Quantify element concentrations against standard curves and normalize to tissue weight.
- Data Analysis: Calculate bioconcentration factors and translocation factors between different plant compartments. Correlate distribution patterns with observed physiological effects.
Diagram 2: Uptake Quantification Workflow
Safe Laboratory Practices for Nanomaterial Handling
Researchers must implement appropriate safety controls when working with engineered nanomaterials to minimize occupational exposure and environmental release.
Exposure Controls and Personal Protective Equipment
- Engineering Controls: Handle nanoparticles within HEPA-filtered local exhaust ventilation systems (fume hoods, glove boxes) whenever possible [87]. Avoid procedures that may generate aerosols.
- Personal Protective Equipment (PPE): Wear double nitrile gloves, lab coats with extended sleeves, and safety goggles. For operations with potential for airborne nanoparticles, use respirators with NIOSH-approved N-, R-, or P-100 (HEPA) filters [87].
- Administrative Controls: Prohibit eating, drinking, chewing gum, applying cosmetics, or handling contact lenses in laboratories where nanomaterials are handled. Implement frequent hand washing protocols [87].
Spill Response and Waste Management
Spill Response Protocol:
- Alert personnel and evacuate immediate area.
- Don appropriate PPE including respiratory protection if airborne particles are suspected.
- For small spills, carefully cover with damp towels or spill pads to suppress dust.
- Wet-wipe contaminated surfaces; never brush or sweep dry nanoparticles.
- Use Tacki-Mat at the exit to prevent spread of nanoparticles [87].
- Dispose all cleanup materials as hazardous waste.
Waste Management: Treat all waste engineered nanoparticles as hazardous waste unless specifically demonstrated to be non-hazardous. Dispose of nanoparticle solutions according to hazardous waste procedures for the solvent carrier [87].
The Scientist's Toolkit: Essential Research Reagents and Materials
Table 3: Key Research Reagents for Safety Assessment
| Reagent/Material | Function in Safety Assessment | Example Application |
|---|---|---|
| Aqua Regia (HNO₃:HCl, 3:1) | Complete digestion of metallic nanosensors for elemental analysis | Sample preparation for ICP-MS quantification of gold NPs in plant tissues [71] |
| DCFH-DA Assay Kit | Detection of intracellular reactive oxygen species (ROS) | Measurement of oxidative stress in plant cell cultures exposed to nanosensors [86] |
| MTT/WST-1 Assay Kits | Assessment of cell metabolic activity/viability | In vitro cytotoxicity screening in plant cell cultures [86] |
| Glutathione Assay Kit | Quantification of GSH:GSSG ratio | Evaluation of oxidative stress status in plant tissues [86] |
| Artificial Sap Solution | Simulates ion composition of plant xylem/phloem | Testing nanosensor performance and stability in biologically relevant media [22] |
| HEPA-Filtered Enclosures | Engineering control for nanoparticle handling | Safe manipulation of nanosensor powders and suspensions [87] |
Regulatory Pathway Considerations
While specific regulatory frameworks for plant-embedded nanosensors are still evolving, researchers should prepare for eventual commercialization by adopting a proactive approach.
Data Requirements for Regulatory Submission
- Material Characterization: Comprehensive physicochemical data as outlined in Section 3.
- Environmental Fate and Transport: Data on persistence, bioaccumulation, and transformation in environmental media.
- Toxicity to Non-Target Organisms: Assessment of effects on beneficial soil microorganisms, pollinators, and other organisms in the agricultural ecosystem.
- Exposure Assessment: Evaluation of potential routes of exposure for agricultural workers and consumers.
Risk Management Strategies
- Safe-by-Design Approaches: Incorporate safety considerations during nanosensor development, such as using biodegradable materials or surface modifications that reduce toxicity.
- Containment Strategies: Develop approaches to limit nanosensor mobility within plants or into the environment when possible.
- Monitoring and Detection Methods: Establish sensitive methods for detecting and quantifying nanosensors in environmental and agricultural products.
The safe and responsible development of in planta nanosensors requires a multidisciplinary approach that integrates materials science, plant biology, and toxicology. By adopting these standardized protocols and safety practices, researchers can generate robust, comparable safety data that will accelerate the translation of these promising technologies from laboratory research to agricultural application while ensuring environmental protection and public health.
Conclusion
The in vivo implantation of nanosensors represents a paradigm shift in how researchers monitor plant physiology, offering unprecedented, real-time access to biochemical events within living tissues. This synthesis of knowledge confirms that these tools provide significant advantages over traditional destructive methods, including minimal invasiveness, high spatiotemporal resolution, and the ability to capture dynamic signaling processes. Key takeaways include the critical importance of nanomaterial biocompatibility, the transformative potential of wireless and machine-learning-integrated platforms, and the demonstrated success in monitoring crucial signaling molecules like H2O2 and NO. Future directions must focus on standardizing protocols, advancing multiplexed sensing capabilities, and navigating the regulatory landscape to transition these powerful technologies from laboratory proof-of-concept to robust, field-deployable tools. For biomedical and clinical research, the principles honed in plant models offer a valuable testbed for developing nanosensing strategies that could eventually be adapted for diagnostic and therapeutic monitoring applications in more complex systems.
References
- 1. Recent Developments in Nanosensors for Imaging ... [https://pmc.ncbi.nlm.nih.gov/articles/PMC6958676/]
- 2. SMART Researchers Unlock the Secrets to Plant Growth with ... [https://smart.mit.edu/post/smart-researchers-unlock-the-secrets-to-plant-growth-with-breakthrough-universal-nanosensor]
- 3. Microneedle Sensors for Ion Monitoring in Plants. One Step ... [https://pmc.ncbi.nlm.nih.gov/articles/PMC12305641/]
- 4. Emerging nanosensor platforms and machine learning ... [https://pmc.ncbi.nlm.nih.gov/articles/PMC9516957/]
- 5. Advancements in nanomaterials for nanosensors [https://pubs.rsc.org/en/content/articlehtml/2024/na/d4na00214h]
- 6. Nano-enabled biosensors in early detection of plant diseases [https://www.frontiersin.org/journals/nanotechnology/articles/10.3389/fnano.2025.1545792/full]
- 7. Nanosensors in healthcare: transforming real-time monitoring ... [https://pubs.rsc.org/en/content/articlehtml/2025/pm/d5pm00125k]
- 8. Nanosensor Applications in Plant Science [https://www.mdpi.com/2079-6374/12/9/675]
- 9. Nanomaterial-based biosensors: a new frontier in plant ... - PMC [https://pmc.ncbi.nlm.nih.gov/articles/PMC12055542/]
- 10. Machine learning-powered activatable NIR-II fluorescent ... [https://www.nature.com/articles/s41467-025-60182-w]
- 11. Electrochemical Nanosensors Applied to the Assay of ... [https://www.mdpi.com/2227-9040/13/8/272]
- 12. “On-plant” wearable electrochemical sensor for ... [https://www.sciencedirect.com/science/article/pii/S0039914025001407]
- 13. FRET Based Biosensor: Principle Applications Recent ... [https://www.mdpi.com/2075-4418/13/8/1375]
- 14. Genetically Encoded FRET-Based Nanosensor for Insect ... [https://pmc.ncbi.nlm.nih.gov/articles/PMC12612880/]
- 15. Carbon Nanotube-Mediated Plasmid DNA Delivery in Rice ... [https://pmc.ncbi.nlm.nih.gov/articles/PMC9028948/]
- 16. Polymer-coated carbon nanotube hybrids with functional ... [https://www.nature.com/articles/s41467-022-30185-y]
- 17. A multidimensional review of the applications and ... [https://link.springer.com/article/10.1007/s43939-025-00403-7]
- 18. Quantum dots – a versatile tool in plant science? - PMC [https://pmc.ncbi.nlm.nih.gov/articles/PMC1524975/]
- 19. An overview of a possible solution for modern agriculture [https://www.sciencedirect.com/science/article/abs/pii/S1387181125001234]
- 20. Metal–organic frameworks as versatile platforms for ... [https://pubs.rsc.org/en/content/articlehtml/2025/en/d5en00042d?page=search]
- 21. Metal Organic Frameworks for Smart Storage and Delivery ... [https://www.mdpi.com/2076-3417/15/10/5479]
- 22. Implantable Ion‐Selective Organic Electrochemical ... [https://pmc.ncbi.nlm.nih.gov/articles/PMC12591102/]
- 23. Nanosensor Applications in Plant Science - PMC [https://pmc.ncbi.nlm.nih.gov/articles/PMC9496508/]
- 24. An Implantable and Self-Powered Sensing System for the ... [https://www.sciencedirect.com/science/article/pii/S2095809924000626]
- 25. Plants as Environmental Biosensors - PMC - PubMed Central [https://pmc.ncbi.nlm.nih.gov/articles/PMC2635006/]
- 26. Flagellin sensing, signaling, and immune responses in plants [https://pmc.ncbi.nlm.nih.gov/articles/PMC12281300/]
- 27. Plant metabolites and signaling pathways in response to ... [https://www.sciencedirect.com/science/article/pii/S2667064X24001088]
- 28. Decoding early stress signaling waves in living plants ... [https://www.nature.com/articles/s41467-024-47082-1]
- 29. Unlocking plant regeneration capacity: small signaling ... [https://www.frontiersin.org/journals/plant-science/articles/10.3389/fpls.2025.1679487/full]
- 30. Amelioration in nanobiosensors for the control of plant ... [https://www.frontiersin.org/journals/nanotechnology/articles/10.3389/fnano.2024.1310165/full]
- 31. From plasmodesma geometry to effective symplasmic ... [https://elifesciences.org/articles/49000]
- 32. Dynamic regulation of plasmodesmatal permeability and its ... [https://pmc.ncbi.nlm.nih.gov/articles/PMC6441653/]
- 33. An in vivo biosensing, biomimetic electrochemical ... [https://www.nature.com/articles/s41598-017-16217-4]
- 34. Potential impacts of nanoparticles integration on ... [https://www.frontiersin.org/journals/plant-science/articles/10.3389/fpls.2025.1629548/full]
- 35. Nanoparticles as tools for enhancing plant resistance to ... [https://pmc.ncbi.nlm.nih.gov/articles/PMC12003758/]
- 36. Universal nanosensor unlocks the secrets to plant growth [https://news.mit.edu/2025/universal-nanosensor-unlocks-plant-growth-secrets-0609]
- 37. Hydrogen peroxide-induced stress acclimation in plants - PMC [https://pmc.ncbi.nlm.nih.gov/articles/PMC11073338/]
- 38. Hydrogen Peroxide Signaling in Plant Development and ... [https://www.frontiersin.org/journals/plant-science/articles/10.3389/fpls.2016.00230/full]
- 39. A Novel Fluorescent Probe for the Detection of Hydrogen ... [https://pmc.ncbi.nlm.nih.gov/articles/PMC10296328/]
- 40. Recent Advances in Second Near-Infrared Region (NIR-II ... [https://pmc.ncbi.nlm.nih.gov/articles/PMC8558517/]
- 41. Second near-infrared window fluorescence nanoprobes for ... [https://www.sciencedirect.com/science/article/abs/pii/S0169409X23000121]
- 42. Construction of a biocompatible supramolecular sensor for ... [https://www.sciencedirect.com/science/article/abs/pii/S0956566325010826]
- 43. Probes for Nitric Oxide Research—Section 18.3 [https://www.thermofisher.com/us/en/home/references/molecular-probes-the-handbook/probes-for-reactive-oxygen-species-including-nitric-oxide/probes-for-nitric-oxide-research.html]
- 44. Advances in applied supramolecular technologies 2021–2025 [https://pmc.ncbi.nlm.nih.gov/articles/PMC12409610/]
- 45. Supramolecular chemistry for optical detection and delivery ... [https://pubs.rsc.org/en/content/articlehtml/2025/cs/d4cs00500g]
- 46. Imaging tools for plant nanobiotechnology [https://www.frontiersin.org/journals/genome-editing/articles/10.3389/fgeed.2022.1029944/full]
- 47. Characterization of a Fluorescent Probe for Imaging Nitric Oxide [https://pmc.ncbi.nlm.nih.gov/articles/PMC3927988/]
- 48. Best practices in plant fluorescence imaging and reporting [https://pmc.ncbi.nlm.nih.gov/articles/PMC12284399/]
- 49. Plants Metabolome Study: Emerging Tools and Techniques [https://www.mdpi.com/2223-7747/10/11/2409]
- 50. Novel Molecular and Nanosensors for In Vivo Sensing [https://www.thno.org/v03p0583.htm]
- 51. Imaging approach for monitoring cellular metabolites and ions ... [https://pmc.ncbi.nlm.nih.gov/articles/PMC2843770/]
- 52. ATP sensing in living plant cells reveals tissue gradients and ... [https://pmc.ncbi.nlm.nih.gov/articles/PMC5515573/]
- 53. Plasmonic Nanoprobes for in Vivo Multimodal Sensing and Bioimaging of MicroRNA within Plants - PubMed [https://pubmed.ncbi.nlm.nih.gov/30694650/]
- 54. Wireless Power-Up and Readout of Label-Free ... [https://pmc.ncbi.nlm.nih.gov/articles/PMC12461922/]
- 55. SMART Researchers Pioneer First-of-its-Kind Nanosensor for ... [https://smart.mit.edu/post/smart-researchers-pioneer-first-of-its-kind-nanosensor-for-real-time-iron-detection-in-plants]
- 56. Machine Learning Techniques for Improving Nanosensors ... [https://www.mdpi.com/2073-4395/14/2/341]
- 57. Plant-nano interactions: A new insight of nano-phytotoxicity [https://www.sciencedirect.com/science/article/abs/pii/S0981942824003140]
- 58. Plant-nano interactions: A new insight of nano-phytotoxicity [https://pubmed.ncbi.nlm.nih.gov/38657549/]
- 59. Nanomaterials in Medical Devices [https://namsa.com/resources/blog/nanomaterials-medical-devices-biocompatibility-considerations/]
- 60. An In Vitro and In Vivo Study of the Efficacy and Toxicity ... [https://pmc.ncbi.nlm.nih.gov/articles/PMC9149986/]
- 61. In Vivo Biocompatibility Study on Functional Nanostructures ... [https://pmc.ncbi.nlm.nih.gov/articles/PMC11050673/]
- 62. Biocompatibility of nanomaterials and their immunological ... [https://pmc.ncbi.nlm.nih.gov/articles/PMC8357854/]
- 63. Highly Photostable and pH−Sensitive Nanosensors [https://www.mdpi.com/2227-9040/10/9/354]
- 64. A method of gas sensor drift compensation based on ... [https://www.nature.com/articles/s41598-023-39246-8]
- 65. Sensor Drift Compensation in Electronic-Nose-Based Gas ... [https://arxiv.org/html/2507.17071v1]
- 66. Implantable devices in the electromagnetic environment [https://www.sciencedirect.com/science/article/pii/S188042761300104X]
- 67. Electromagnetic Interference and Implanted Cardiac Devices [https://pmc.ncbi.nlm.nih.gov/articles/PMC6652500/]
- 68. Protecting Implantable Medical Devices From EMI ... [https://passive-components.eu/protecting-implantable-medical-devices-from-electromagnetic-interference/]
- 69. In Planta Nanosensors: Understanding Biocorona Formation ... [https://pmc.ncbi.nlm.nih.gov/articles/PMC10461777/]
- 70. Emerging nanosensor platforms and machine learning ... [https://pubs.rsc.org/en/content/articlehtml/2022/sc/d2sc02981b]
- 71. Quantitative Understanding of Nanoparticle Uptake in ... [https://www.frontiersin.org/journals/plant-science/articles/10.3389/fpls.2016.01288/full]
- 72. Long-term stability of the chronic epidural wireless recorder ... [https://pubmed.ncbi.nlm.nih.gov/34425566/]
- 73. Decoding early stress signaling waves in living plants ... [https://pmc.ncbi.nlm.nih.gov/articles/PMC10997764/]
- 74. Research Progress on Multiplexed Pathogen Detection ... [https://www.mdpi.com/2079-6374/15/6/378]
- 75. Sample Multiplexing Strategies in Quantitative Proteomics [https://pmc.ncbi.nlm.nih.gov/articles/PMC6951796/]
- 76. Development and Application of a Multiplex PCR Assay ... - PMC [https://pmc.ncbi.nlm.nih.gov/articles/PMC11945608/]
- 77. In-Vivo fluorescent nanosensor implants based on hydrogel ... [https://pmc.ncbi.nlm.nih.gov/articles/PMC10123989/]
- 78. An overview of ELISA: a review and update on best laboratory ... [https://pmc.ncbi.nlm.nih.gov/articles/PMC11808753/]
- 79. Comparative Evaluation of RUT, PCR and ELISA Tests for ... [https://pmc.ncbi.nlm.nih.gov/articles/PMC4961986/]
- 80. " Comparison of Real-Time PCR and ELISA -Based Methods for the..." [https://digitalcommons.chapman.edu/food_science_articles/19/]
- 81. Development of an Indirect ELISA and Dot-Blot Assay for Serological... [https://pmc.ncbi.nlm.nih.gov/articles/PMC5671674/]
- 82. Genetically Encoded Fluorescent Biosensors for Biomedical ... [https://pmc.ncbi.nlm.nih.gov/articles/PMC8615007/]
- 83. Quantitative Imaging of Genetically Encoded Fluorescence ... [https://www.mdpi.com/2079-6374/13/10/939]
- 84. Engineering plant biosensors: recent advances in design ... [https://www.sciencedirect.com/science/article/abs/pii/S0958166924001769]
- 85. Advanced strategies of the in-vivo plant hormone detection [https://www.sciencedirect.com/science/article/abs/pii/S016599362300273X]
- 86. Safety Evaluation of Nanotechnology Products - PMC [https://pmc.ncbi.nlm.nih.gov/articles/PMC8539492/]
- 87. Nanotechnology: Guidelines for Safe Research Practices [https://blink.ucsd.edu/safety/research-lab/nanotechnology.html]